BEST KIDDIE FARE

Diposting oleh good reading on Selasa, 31 Juli 2007

We eat out quite a bit. Even now that we have Bib, we still go out at least once a week and often three or more times a week; usually all on the weekend.Eating with Bib is a challenge because she's still too young to sit up on her own and ram little bits of finger food into her face at the dining table. Oh no, that doesn't deter us from going out. We take turns holding her or give her some "Mum Mums" while she sits in her car seat. If we're lucky, she's napping during the meal in her car seat.Here's where we've had success:


  • Chinese food: dim sum, congee noodle places, shanghai food, hong kong cafes, take out (more on these later!)

FOOD REVIEW: Chinese take out!


RESTAURANT: Kwong Chow Congee & Noodle House


ADDRESS: 3163 Main Street, Vancouver


PHONE: (604) 876-8520


PARKING: street/meter parking


COUPONS: No


FOOD: 9/12


AMBIENCE: 2/6 (that’s why I take out!)


SERVICE: 3/6


TOTAL POINTS: 14/24


PRICE: $$


NOTES: Chinese take out is generally a good bet on a Friday night when I’m too pooped to cook.Our old standby is the Kwong Chow restaurant on Main Street...yes that's the place where someone got murdered...I suppose this is because it tends to serve patrons into the wee hours in the morning (open until 2a.m.) It's a "hole-'n-the-wall" in my books, but the food's good and it's cheap so we order out and Stomach picks up the order on the way home from work and we enjoy the food more so because Bib's in her Exersaucer and Bebe can take her old sweet time with her food. This can take up to an hour or more if she's particularly chatty.

  • Japanese food

FOOD REVIEW


RESTAURANT: Kamakura (Kamei Royale)


ADDRESS: 601 W. Broadway #12, Vancouver


PHONE: (604) 876-3388


PARKING: street/meter parking; parkade underground


COUPONS: No, but various discount gift certificates are given if you spend a lot


FOOD: 10/12


AMBIENCE: 4.5/6


SERVICE: 6/6


TOTAL POINTS: 20.5/24


PRICE: $$$


NOTES: Kamakura on W. Broadway is a Japanese restaurant that has little private rooms. Sometimes they can get too cramped what with the car seat and toys and crap I bring along. As well, it tends to get really hot inside those little cabanas. Their menu is extensive and interesting and the food is very good to excellent and very consistent in quality. What I like about Kamakura is the friendly service; our favourite server is Suki, who chats up a storm with Bebe and always remembers her (with a mini ice-cream cone)! The kitchen even does substitution requests for Bebe (even if it's really weird!) like "Yaki-Udon with fish cake instead of chicken". The special maki rolls are very good and the cooked food is particularly well-prepared. I like their Oyster Motoyaki, the tempura yam sticks and their chopped scallop sushi. Stomach finds the sushi to be above average but not necessarily the most flavourful in his opinion.


  • Casual restaurants

FOOD REVIEW


RESTAURANT: Moxie's Classic Grill (West Broadway)


ADDRESS: 1759 West Broadway, Vancouver


PHONE: (604) 678-9973

http://www.moxies.ca/index2.htm

PARKING: street/meter parking; underground parkade


COUPONS: no


FOOD: 9/12


AMBIENCE: 5/6


SERVICE: 5/6


TOTAL POINTS: 19/24


PRICE: $$$


NOTES: I really like going to Moxie's because I like that they have a kids’ menu. I also like their adult menu and Bebe likes the Penne in red sauce. The last time we went the tomato sauce wasn't that good and the penne a bit on the hard side. The Moxie's in Richmond is way more consistent with their penne and other dishes. Moxie's also gives out crayons to keep Bebe busy so I have time to read the menu in peace.


*MOXIE’S CLASSIC GRILL (Richmond)
3233 St Edwards Dr, Richmond
Tel: (604) 303-1111

More aboutBEST KIDDIE FARE

At last something that makes sense...

Diposting oleh good reading

I'd like to Thank James Kovacs for pointing out that Hotfixes no longer require a call to MS support.

Why they ever did, I'm not sure. You would have thought people experiencing problems that required a "hotfix" should get it as quickly as possible...
More aboutAt last something that makes sense...

BREAD STUFFING WITH BACON & CARAMELIZED ONIONS

Diposting oleh good reading on Senin, 30 Juli 2007

(MAKES ABOUT 12 CUPS)
For the best flavour, make sure to cook the onions until they are a deep golden-brown colour.
1 pound bacon, cut crosswise into ½-inch strips
6 medium onions, chopped (about 7 cups)
4 stalks celery, chopped
1 teaspoon salt
½ teaspoon ground black pepper
½ cup fresh parsley leaves, chopped fine
12 cups dried French or other white bread cubes (dried—see note*)
1 cup chicken stock or low-sodium canned broth
3 large eggs, lightly beaten


*Note: to dry bread cubes: leave slices of bread out overnight to dry on cookie sheets. The next day, cut the slices into half-inch cubes and allow them to dry in a single layer for an additional night. QUICKIE METHOD: place cubed bread in a 225 degree oven for 30 minutes or until dried but not browned. You will need a one-pound loaf of bread to obtain the 12 cups of bread cubes necessary for the recipe (that’s about a regular sized loaf of bread).

  1. Cook bacon in large skillet or Dutch overn over medium heat until crisp and browned, about 12 minutes. Remove bacon from pan and drain on paper towels. Discard all but 3 tablespoon of rendered bacon fat.
  2. Increase heat to medium-high and add onions and ¼ teaspoon of salt. Cook onions until golden in colour, making sure to stir occasionally and scrape sides and bottom of pan, about 20 minutes. Add chopped celery. Reduce heat to medium and continue to cook, stirring more often to prevent burning, until onions are deep golden brown, and celery is soft, another 5 minutes. Transfer contents of pan to large bowl.
  3. Add remaining ¾ teaspoon salt, pepper, and parsley to bowl and mix to combine. Add bread cubes. Add drained bacon.
  4. Whisk stock and eggs together in small bowl. Pour mixture over bread cubes. Gently toss to evenly distribute ingredients.
  5. Stuff turkey with stuffing. Or bake the whole thing in a baking dish.
    The stuffing can be covered and refrigerated for one day. Place any stuffing that won’t fit in the bird in a greased baking dish. Dot with pats of butter, and cover with piece of foil that has been smeared with butter or sprayed with non-stick spray. Bake in 400 degree oven for about 25 minutes
More aboutBREAD STUFFING WITH BACON & CARAMELIZED ONIONS

CHOCOLATE LAYER CAKE

Diposting oleh good reading

(FROM BAREFOOT CONTESSA)
1 ¾ cups all-purpose flour, plus more for the pans
2 cups sugar
¾ cup cocoa powder
2 teaspoons baking soda
1 teaspoon baking powder
1 teaspoon kosher salt
1 cup buttermilk, shaken
½ cup vegetable oil
2 large eggs, at room temperature
1 teaspoon pure vanilla extract
1 cup freshly brewed hot coffee

Preheat oven to 350 degrees. Butter 2 8-inch round cake pans. Line with parchment paper, then butter and flour the pans.

Sift the flour, sugar, cocoa, baking soda, baking powder, and salt into bowl of an electric mixer fitted with a paddle attachment and mix on low speed until combined. In another bowl, combine the buttermilk, oil, eggs and vanilla. With the mixer on low speed, slowly add the wet ingredients to the dry.

With the mixer still on low, add the coffee and stir just to combine, scraping the bottom of the bowl with a rubber spatula.

Pour batter into prepared pans and bake for 35 to 40 minutes, until a cake tester comes out clean. Cool in the pans for 30 minutes, then turn them out onto a cooling rack and cool completely.

Place one layer, flat side up, on a flat plate or cake pedestal. With a knife or offset spatula, spread the top with frosting. Place the second layer on top, rounded side up, and spread the frosting evenly on the top and sides of the cake.
More aboutCHOCOLATE LAYER CAKE

DECADENT BRAN MUFFINS

Diposting oleh good reading

MAKES 1 DOZEN
2 cups all-purpose flour
1 ½ cups wheat bran
1 ½ tsps baking powder
¾ tsp fine salt
¼ tsp baking soda
1 ½ cups packed dark-brown sugar
1 ¼ cups plus 2 tbsp. Buttermilk
11 tbsp. (1 3/8 sticks) unsalted butter, melted & cooled
(if you have a scale, that’s 164 grams butter)
2 large eggs
2 tsp. Pure vanilla extract
1 ½ cups fresh or frozen berries OR dried fruit
½ cup ground flaxseed (my additional ingredient; optional)


1. Preheat oven to 350˚F. Line 12 large cup muffin tin with paper liners; set aside. Place flour, bran, flaxseed, baking powder, salt and baking soda in large bowl. Stir in sugar; set aside.

2. Whisk together buttermilk, butter, eggs & vanilla in a bowl. Add flour mixture; stir until just combined. Stir in fruit.

3. Divide batter among lined muffin cups. Bake until cooked through and golden brown, about 30 minutes. Transfer to a wire rack to cool slightly. Turn out; serve warm or at room temperature.

After cooled, the muffins can be individually wrapped and frozen. Bebe can eat ½ a muffin as they’re quite large. I just cut it in half while it’s frozen, put the rest back in the freezer and nuke it for 30 seconds.
More aboutDECADENT BRAN MUFFINS

BREAKFAST STRATA

Diposting oleh good reading

(serves 4-6)
½ loaf supermarket French or Italian bread (8 oz), sliced ½ inch thick
4 Tablespoons (1/2 stick) unsalted butter, softened, plus extra for greasing dish
4 shallots, minced
1 (10 oz) package chopped frozen spinach, thawed and squeezed dry
Salt and pepper
½ cup dry white wine
6 oz Gruyere cheese, shredded (1 ½ cups)
6 large eggs
1 ¾ cups half-and-half

Adjust oven rack to middle position and heat to 225 degrees. Spread bread over a large baking sheet and bake until dry and crisp on both sides, about 20 min per side. (Alternatively, leave the slides out overnight to dry) Spread 2 tablespoons of the butter over one side of the dried bread slices.

Melt the remaining 2 tablespoons butter in a 10-inch non-stick skillet over medium heat. Add the shallots and cook until softened, about 3 minutes. Stir in the spinach, ½ teaspoon salt, and a pinch of pepper and cook until the spinach is heated through, about 2 minutes. Transfer the spinach to a medium bowl. Add the wine to the skillet and simmer over medium-high heat until it measures ¼ cup, about 3 minutes; set aside to cool.

Grease 8 inch square baking dish with butter. Arrange half of bread, buttered-side up, in single layer in the dish and sprinkle with half of the spinach mixture and ½ cup of the Gruyere. Repeat to form a second layer with the remaining bread, spinach, and another ½ cup of the gruyere. Whisk together the eggs, reduced, wine, half-and-half, 1 teaspoon salt, and ½ teaspoon pepper until smooth, then pour evenly over the top. Cover the surface with plastic wrap and weigh it down. (with cans or sugar etc) Refrigerate at least 1 hour or overnight.

Adjust oven to middle position and heat oven to 325 degrees. Meanwhile, allow strata to stand at room temperature for 20 minutes. Remove the weights, uncover the strata, and sprinkle with the remaining ½ cup gruyere. Bake until both the edges and the center are puffed and the edges have pulled away slightly from the sides of the dish, 50 to 55 minutes. Cool on a wire rack 5 minutes before serving.

VARIATION: BREAKFAST STRATA WITH SAUSAGE, MUSHROOMS, AND MONTERY JACK
Omit the spinach and substitute 1 ½ cups shredded Monterey Jack cheese for the Gruyere. Brown breakfast sausage, about 4 minutes. Stir in the shallots and cook until soft. Stir in 8 ounces white button mushrooms, sliced, and continue to cook until mushrooms no longer release any liquid, about 5 minutes. Transfer mixture to medium bowl and season with salt and pepper to taste. Return the skillet to medium heat, add the wine, and continue to simmer as directed in step 2. Substitute the sausage mixture for the spinach mixture when assembling the strata.
More aboutBREAKFAST STRATA

VANILLA BUTTER COOKIES

Diposting oleh good reading

vanilla butter cookies

1 cup (2 sticks) unsalted butter, softened
¾ cup granulated sugar
1 large egg plus 1 egg white, beaten
1 teaspoon pure vanilla extract (or 1 vanilla bean, ground up)
2 ½ cups sifted all-purpose flour
¾ teaspoon coarse salt
½ cup fine sanding sugar

1. Put butter and granulated sugar in the bowl of an electric mixer fitted with the paddle attachment; mix on medium speed until pale and fluffy, about 2 minutes. Mix in whole egg and vanilla. Reduce speed to low. Add flour and salt and mix until combined.

2. Halve dough; shape each half into a log. Place each log on a 12-by-16 inch sheet of parchment. Roll in parchment to 1 ½ inches in diameter, pressing a ruler along edge of parchment at each turn to narrow log. Transfer to paper towel tubes to hold shape, and freeze until firm, about 1 hour.

3. Preheat oven to 375ºF. Brush each log with egg white; roll in sanding sugar. Cut into ½-inch thick rounds. Space 1 inch apart on baking sheets lined with parchment. Bake until edges are golden, 18 to 20 minutes. (cakebrain note: ensure the cookies are golden brown and they'll taste much more flavour as well as a better crunch). Let cool on sheets on wire racks. Store in airtight containers at room temperature up to 3 days.
More aboutVANILLA BUTTER COOKIES

GREEN TEA SHORTBREAD TREES

Diposting oleh good reading

2 cups all-purpose flour, plus more for rolling
2 tablespoons Chinese green-tea powder
½ teaspoon table salt
½ pound (2 sticks) unsalted butter, room temperature
½ cup confectioners’ or granulated sugar

1. Sift flour, tea powder, and salt into a small bowl; set aside. Place butter in the bowl of an electric mixer fitted with the paddle attachment. Cream on medium speed until fluffy, 3 to 5 minutes. Add sugar; continue to beat until very light in colour and fluffy, occasionally scraping down sides of the bowl with a spatula, about 2 minutes more. Add flour mixture; combine on low, scraping sides of bowl with spatula if necessary, until flour is just incorporated and dough sticks together when squeezed with fingers.

2. Place a piece of parchment on a clean surface; dust with flour. Roll dough to ¼-inch thickness; chill in refrigerator or freezer until firm, about 30 minutes.

3. Preheat oven to 325ºF. Line two baking sheets with parchment. Cut chilled dough with 2-inch tree cutters. Using a wide spatula, transfer to baking sheets. Chill until firm. Gather scraps together, reroll, chill, and cut shapes. Bake until firm and barely starting to colour, 15 to 20 minutes, rotating halfway through. Cool completely on wire rack; store in an airtight container for 3 to 4 weeks.

MAKES 3 DOZEN
More aboutGREEN TEA SHORTBREAD TREES

FRUITCAKE COOKIES

Diposting oleh good reading

½ pound dried figs
¼ pound raisins
¼ pound candied cherries, coarsely chopped
1 tablespoon honey
2 tablespoons dry sherry
1 tablespoon freshly squeezed lemon juice
6 ounces chopped pecans
Kosher salt
½ pound (2 sticks) unsalted butter, room temperature
½ teaspoon ground cloves
½ cup superfine sugar
1/3 cup light brown sugar, firmly packed
1 extra-large egg
2 2/3 cups all-purpose flour

Snip off the hard stems of the figs with scissors or a small knife and coarsely chop the figs. In a medium bowl, combine the figs, raisins, cherries, honey, sherry, lemon juice, pecans, and a pinch of salt. Cover with plastic wrap and allow to sit overnight at room temperature.

In the bowl of an electric mixer fitted with a paddle attachment, cream the butter, cloves, superfine sugar, and brown sugar on medium speed until smooth, about 3 minutes. With the mixer on low speed, add the egg and mix until incorporated. With the mixer still on low, slowly add the flour and ¼ teaspoon salt and mix just until combined. Don’t overmix! Add the fruits and nuts, including any liquid in the bowl. Divide the dough in half and place each half on the long edge of a 12 x 18-inch piece of parchment or wax paper. Roll each half into a log, 1 ½ to 1 ¾ inches thick, making an 18-inch-long roll. Refrigerate the dough for several hours, or until firm.

Preheat the oven to 350 degrees.

With a small, sharp knife, cut the logs into ½-inch thick slices. Place the slices ½ inch apart on ungreased sheet pans and bake to 15 to 20 minutes, until lightly golden.

MAKES 5 DOZEN SMALL COOKIES
More aboutFRUITCAKE COOKIES

CHEWY CHOCOLATE GINGERBREAD

Diposting oleh good reading

1 ½ cups plus 1 tablespoon all-purpose flour
1 ¼ teaspoons ground ginger
1 teaspoon ground cinnamon
¼ teaspoon ground cloves
¼ teaspoon ground nutmeg
1 tablespoon cocoa powder
¼ pound (1 stick) unsalted butter, room temperature
1 tablespoon freshly grated peeled ginger
½ cup packed dark-brown sugar
½ cup unsulfured molasses
1 teaspoon baking soda
1 ½ teaspoons boiling water
7 ounces best-quality semisweet chocolate, in ¼ inch chunks
¼ cup granulated sugar
1. Line two baking sheets with parchment. In a medium bowl, sift together flour, ginger, cinnamon, cloves, nutmeg, and cocoa. In the bowl of an electric mixer fitted with the paddle attachment, beat butter and ginger on medium speed until lightened, about 4 minutes. Add brown sugar; beat until combined. Add molasses; beat until combined.
2. In a small bowl, dissolve baking soda in boiling water. Beat half of flour mixture into butter mixture. Beat in baking soda mixture, then remaining half of flour mixture. Mix in chocolate; turn onto plastic wrap. Pat out to a 1-inch thickness; seal with wrap. Refrigerate until firm, 2 hours or overnight.
3. Preheat oven to 325ºF. Roll dough into 1 ½-inch balls; place 2 inches apart on baking sheets. Chill 20 minutes. Roll in granulated sugar. Bake until surfaces just begin to crack, 10 to 12 minutes, rotating halfway through. Let cool 5 minutes. Transfer to a wire rack, and cool completely.
MAKES 2 DOZEN
More aboutCHEWY CHOCOLATE GINGERBREAD

BANANA CHIFFON

Diposting oleh good reading

I think this is it. After searching long and hard for the best chiffon recipe, I found the best from "America's Test Kitchen". I took the basic recipe and have been having fun experimenting with different versions. I have made a chocolate one, a green tea one, a black sesame one and a banana flaxseed one.

Call me crazy, but I get an idea in my head that if I put some healthy ingredient in a stereotypically non-healthy treat that I legitimize its inclusion in my diet. Thus, I have included ground flaxseed into my Banana Chiffon cake recipe. People who don't care for it can omit it from the recipe. The amount included is small enough that it is barely detectable. Finely chopped nuts of some sort would be an acceptable replacement.

Note: America's Test Kitchen uses the "dip and sweep" method of measuring cake flour. Do not presift before measuring the flour or you will end up with a very different cake.


BANANA-FLAXSEED CHIFFON

1 ½ cups sugar
1 1/3 cups plain cake flour (measure unsifted)
1 ¼ tsp baking powder
¼ tsp baking soda
½ tsp salt
7 large eggs, 2 left whole, 5 separated (at room temperature)
1/3 cup vegetable oil
1 tsp vanilla extract
½ tsp cream of tartar
2/3 cup water
1 cup very finely mashed ripe bananas (about 2 large or 3 medium) [make sure bananas are very ripe—with brown spots on the skin]
½ cup ground golden flaxseed

1. Adjust oven rack to lower-middle position and heat oven to 325°F. Whisk sugar, flour, flaxseed, baking powder and salt together in large bowl (at least 4-quart size). Whisk in two whole eggs, five egg yolks (reserve whites), water, oil and extract until batter is smooth. Stir in bananas.

2. Pour reserved egg whites into large bowl; beat at low speed with electric mixer until foamy, about 1 minute. Add cream of tartar, gradually increase speed to medium-high, then beat whites until very thick and stiff, just short of dry, 9 to 10 minutes with handheld mixer or 5 to 7 minutes in standing mixer. With large whisk, fold whites into batter, smearing any blobs of white that resist blending.

3. Pour batter into ungreased large tube pan ( 9 inch diameter, 16-cup capacity).

4. Bake cake on lower middle rack in oven until wire cake tester inserted in center comes out clean, 60-70 minutes. Immediately turn cake upside down to cool. If pan does not have prongs around rim for elevating cake, invert pan over bottle or funnel, inserted through tube. Let cake hang until completely cook, about 2 hours.

5. To unmold, turn pan upright. Run frosting spatula or thin knife around pan’s circumference between cake and pan wall, always pressing against the pan. Use cake tester to loosen cake from tube. For one-piece pan, bang it on counter several times, then invert over serving plate. For two-piece pan, grasp tube and lift cake out of pan. If glazing the cake, use a fork or a paring knife to gently scrap all the crust off the cake. Loosen cake from pan bottom with spatula or knife, then invert cake onto plate. (Can be wrapped in plastic and stored at room temperature 2 days or refrigerated 4 days.)
More aboutBANANA CHIFFON

Fun with Chocolates

Diposting oleh good reading on Minggu, 29 Juli 2007

Last night, just before bedtime, my elder boy requested that I bake him some brownies the next day. He has been craving for brownies for quite some time already. We checked through a few recipes and decided to try this walnuts and chocolate chip brownies from a book which I bought recently. The description and the texture of the brownies look really attractive to me: "These chunky chocolate brownies are moist, dark and deeply satisfying. They are delicious with a morning cup of coffee and will definitely boost morale on a dreary day."

As promised, the first thing I did this morning was to bake a batch of brownies. It is a rather simple and straight forward recipe. It took me less than half-an-hour to get the brownies into the oven. I omitted the walnuts from the recipe as both my boys reminded me that they didn't want any nuts in their brownies.


I am so glad that the brownies turn out beautifully! They are rather thick (in terms of height) unlike my previous attempts, the brownies were too dense and were usually very flat and thin. I like the slightly flaky and crisp crust, with a moist, cake-like layer on top and it gets fudgy nearer the bottom. This is by far my best brownies which I have made from scratch, and it uses sunflower oil instead of butter...so much 'healthier' than another recipe from the same book that requires almost an entire block of butter! My boys couldn't really wait for me to finish my photo-taking session, they kept asking when they could try a piece of the brownies...and guess what my younger one was "doing" while I was trying to get the best lighting for my photos?


What can I say, but to give them each a piece right away!

Each time if I use any melted chocolates for baking, I will let my younger boy to help "clean-up" the bowl...he will lick up every single trace of melted chocolate. This time, I used the left over chocolates and made this:

I learnt this from the Martha Stewart's show...simply use a brush (I used a chopstick), dip it with melted chocolate and paint funny faces on the inside of a clean glass. Chill the glass in the fridge to let the chocolate set before filling it with cold milk. The 3 of us had fun painting our own glasses. They certainly look ugly but adorable, aren't they?!


Nut and Chocolate Chip Brownies

Ingredients
(makes 16)

150g semisweet chocolate, chopped
120ml sunflower oil
215g light brown sugar (I cut down to 200g)**
2 eggs
5ml vanilla essence
65g self-raising flour
4 tablespoon cocoa powder (unsweetened)
4 tablespoon milk chocolate chips
75g chopped walnuts (I omitted this)

**latest update: I further reduced the sugar amount to 180g and the texture or taste was not affected.

Method:
  1. Preheat oven to 180 degC. Lightly grease a shallow 19cm/7.5 inch square pan.
  2. Melt chocolate in a heatproof bowl set over a pan of simmering water.
  3. With an electric mixer (a manual whisk works well too), beat together oil, sugar, eggs and vanilla essence in a mixing bowl.
  4. Stir in the melted chocolate then beat well until evenly mixed.
  5. Sift the flour and cocoa powder into the batter. With a spatula, fold thoroughly until all the flour mixture incorporates into the batter.
  6. Stir in walnuts and chocolate chips. Mix well.
  7. Pour the mixture into the prepared square tin. Spread the mixture evenly to the edges. (The mixture is rather sticky and gooey.)
  8. Bake for about 30 ~ 35 mins until the top is firm and crusty. Cool in the pan before cutting into squares.

Recipe Source: The Cookie and Biscuit Bible
More aboutFun with Chocolates

Vietnamese dinner and lullabies

Diposting oleh good reading on Sabtu, 28 Juli 2007

We just visited the Vietnamese restaurant on Cambie that is now located on Main street. We were the only Asian people there. I recall the owner used to greet everyone with a friendly "welcome my friend" but this time we didn't get that. He just grunted and pointed to a booth. Hm. Could be we had 2 kids this time...and one a potentially crying baby.

Maybe he had a sense we would use our Entertainment Coupon too. Well, we did. I don't care. Stomach and I both ordered the Combo D and ordered a small wonton soup for Bebe. The food's still very good, but Stomach pointed out that the placed was a bit more run down looking than the previous place. As well, there were flies all over the place in the dining area. That's always a huge turnoff. On the other hand, I also noticed a cute ladybug that landed in our booth and that allowed me to point it out to Bebe. She noticed but wasn't impressed.

Funny thing during dinner is that I noticed all the "white people" were getting effusive greetings and everytime he passed their tables, he would ask how things were going. We didn't get our teapot filled even though we gave the secret Chinese signal: we tipped the lid on its side.
Tomorrow I'm going to try making a Green Tea Chiffon Cake. We'll see if I get the time.

FOOD REVIEW

RESTAURANT: Vina Vietnamese Cuisine


COUPONS: Yes/Entertainment

ADDRESS: 4136 Main Street, Vancouver, B.C.

PHONE: (604) 872-3455

PARKING: pay parking/street

FOOD: 10 /12

AMBIENCE: 3.5/6

SERVICE: 3/6

TOTAL POINTS: 16.5/24

PRICE: $$
More aboutVietnamese dinner and lullabies

CHOCOLATE MOUSSE CAKE

Diposting oleh good reading on Jumat, 27 Juli 2007

7 squares semi-sweet chocolate, melted
3 eggs
2 T liqueur (optional)
3 T icing sugar
1 cup whipping cream, whipped stiff
1 square semi-sweet chocolate, grated
Oreo cookie crumb crust (make using crushed chocolate wafers and melted butter)
springform pan

  1. Combine 7 squares chocolate, 1 whole egg and 2 egg whites until foamy. Add icing sugar and beat until stiff, shiny peaks form.
  2. Fold whipped cream into egg whites. Carefully fold chocolate mixture into egg white mixture
  3. Pour onto prepared oreo cookie crumb crust in springform pan with a 4 cup capacity.
  4. Chill until set, at least 3 hours
  5. Remove ring by using warm towels to loosen sides. Unmould onto serving plate.
  6. Decorate with grated chocolate and icing sugar
More aboutCHOCOLATE MOUSSE CAKE

MANGO PUDDING

Diposting oleh good reading

750 ml mango pulp of puree (in East Indian section of stores)
1 1/2 cups sugar
6 cups water (3 of boiling water & 3 cups cold)
4 packages unflavoured gelatin
500 ml whipping cream (unwhipped)
  • Dissolve gelatin in 3 cups boiling water, then add the 3 cups of cold water
  • Add the rest of the ingredients. Mix together thoroughly and refrigerage overnight.
  • One recipe fills two tupperware jello containers (round ring) or you could use a 9" x 13" pan and make them into squares.
  • Serve with a little evaporated milk and canned fruit cocktail
More aboutMANGO PUDDING

OYSTER SAUCE CHICKEN

Diposting oleh good reading


This is the quickest one pot meal I know how to make. It takes about 25 minutes to make in total (including prep) and is a favourite with kids. I have even made it with frozen chicken (threw the whole chunk into the pot) and it works too! You just add about 5 minutes to the cooking time! You can vary the proportions of chicken to veggies any way you want and it still turns out. If you turn on the rice cooker while the chicken's cooking on the stove, it'll be ready when the chicken's done.

OYSTER SAUCE CHICKEN
12 chicken wings
3-4 carrots, sliced
1 large yellow onion, cut into eighths (huge chunks)
2 T Oyster Sauce (Lee Kum Kee Brand--with the picture of the little boy and his mom on a boat--no substitutions or this recipe won't taste right!)
1/2 t sesame oil
1 T shaoxing wine
1/4 cup water

Dump everything into a pot in any order you want. Cover with a lid. Bring to a boil; lower heat and simmer, covered, for 15-20 minutes.

If you want a thicker sauce, you can add a cornstarch slurry (1T cornstarch & 2T cold water, mixed well) to the pot near the end when the chicken is done and bring to a boil to thicken the sauce.
More aboutOYSTER SAUCE CHICKEN

MAH JONG JELLO (RAINBOW FINGER JELLO)

Diposting oleh good reading

If you make these layers properly, they'll look like little mah jong tiles. Make sure your refrigerator is level.

4 packages flavoured jello
6 packages unflavoured gelatin (Knox)
1 can sweetened condensed milk (Borden)
Boiling water

JELLO LAYERS

For each jello layer (repeat this 4 times)
1/4 cup cold water
1 package unflavoured gelatin
1 cup boiling water
1 package flavoured gelatin
  • soften gelatin for 5 minutes in cold water
  • add the boiling water
  • stir in flavoured gelatin until completely dissolved
  • important: let cool to room temperature

MILK LAYERS:
1/2 cup cold water
2 packages unflavoured gelatin
1 cup boiling water
1 package flavoured gelatin
1 can sweetened condensed milk

  • soften gelatin for 5 minutes in cold water
  • add boiling water and stir to dissolve
  • blend in condensed milk and cool to room temperature
  • use 2/3 cup mixture for each milk layer

ASSEMBLY:

  1. Pour flavoured gelatin into 9" x 13" glass pan. Place in refrigerator until set (15-20 minutes)
  2. Slowly and gently pour 2/3 cup milk mixture (cooled) over top; tilt pan around to spread smoothly. Place in refrigerator until set
  3. Repeat steps #1 and #2 ending with jello mixture
  4. Refrigerate assembled jello another 4 hours before cutting
More aboutMAH JONG JELLO (RAINBOW FINGER JELLO)

POH-POH'S STEAMED SMILING CUPCAKES "FAAT GOH"

Diposting oleh good reading

This recipe is from cakebrain's poh poh (maternal grandmother)

1 cup Five Roses all purpose flour
1 cup brown sugar
6 oz or 3/4 cup water
1 t vinegar
1 t baking powder


  • Measure dry ingredients in a bowl and get rid of any lumps by sifting or mixing with a spoon.

  • Measure wet ingredients together

  • Heat 7 clay custard cups in a steamer on high heat

  • Pour wet ingredients all at once into the bowl of dry ingredients. Mix only until moistened. Do Not Overmix.

  • Pour mixture into cups that have been heated.

  • Cover, steam on high heat for 30 minutes

  • Cupcakes should smile and "explode" in laughter.
More aboutPOH-POH'S STEAMED SMILING CUPCAKES "FAAT GOH"

EGG TARTS THE EASY WAY

Diposting oleh good reading

5 eggs
4 oz evaporated milk
6 oz sugar
10 oz water
2 T custard powder
frozen tart shells
  • Mix sugar and 8 oz water
  • Use 2 oz or Hot water to dissolve custard powder
  • Mix all ingredients well
  • Pour into frozen tart shells
  • Bake at 180C for 15 to 20 minutes
More aboutEGG TARTS THE EASY WAY

FRENCH CREPES

Diposting oleh good reading

2 eggs
1 cup milk
1/3 cup water
1 cup flour
2 T sugar
2 T butter, melted

  • Blend all ingredients in a blender
  • Let rest in refrigerator for 1/2 hour
  • Heat and grease crepe pan or nonstick pan. Swirl crepe batter thinly in pan; allow to lightly brown on first side; flip and let other side dry.

Serve with nutella!

More aboutFRENCH CREPES

BAAK TONG GOH (SWEET RICE CAKE)

Diposting oleh good reading

2 cup American long grain rice (Calrose/Texas Long Grain)
2 1/2 cup water
1 1/2 cup sugar
4-5 drops "Yuet Heung Yuen" Lye water (found in Asian supermarkets)
1/2 t. Fast Rising Instant Yeast
1 T vinegar

  • Dissolve yeast & 1 T of sugar in water
  • Blend rice & water for 18 minutes in a blender
  • Add yeast mixture to rice mixture with sugar
  • Add drops of lye to the mixture and stir
  • Add vinegar and stir
  • Let sit at room temperature, covered for 5 hours
  • Steam for 12 minutes in oiled, plastic-wrap lined pan on high heat
More aboutBAAK TONG GOH (SWEET RICE CAKE)

CINNAMON APPLE CAKE

Diposting oleh good reading

1/2 cup butter, room temperature
1 cup firmly packed brown sugar
1 egg
1 t vanilla extract
1 1/2 c all purpose flour
2 t baking powder
1/2 t baking soda
1 cup buttermilk

Streusal topping:
1/2 cup plus 2 T sugar
1 t ground cinnamon
2 apples, peeled and sliced

  • Preheat oven to 350F. Butter & flour 9 inch square pan. Using electric mixer, cream butter with brown sugar in large bowl until fluffy. Add egg and vanilla and beat until well blended.
  • Sift flour, baking powder and baking soda together; mix into butter alternately with buttermilk, beginning and ending with dry ingredients. Pour into prepared pan.
  • Mix 1/2 cup plus 2 T sugar and cinnamon in small bowl. Place sliced apples atop cake batter. Spoon sugar mixture into apple depressions. Sprinkle remaining sugar over cake.
  • Bake cake until toothpick comes out clean, about 45 minutes.
More aboutCINNAMON APPLE CAKE

CHOCOLATE GANACHE

Diposting oleh good reading

Chocolate Ganache
8 ounces (227 grams) semisweet or bittersweet chocolate, chopped finely
1 cup (250 ml) heavy whipping cream
  • Place the chocolate in a medium sized bowl. Set aside.
  • Heat the cream in a medium sized saucepan over medium heat. Bring just to a boil.
  • Immediately pour the boiling cream over the chocolate and allow to stand for 5 minutes.
  • Stir until all the chocolate has melted
More aboutCHOCOLATE GANACHE

CARCINOGENIC BUBBLE RECIPE

Diposting oleh good reading

Pearl Milk Tea
Black tapioca pearls

  1. Boil water (3:1) Add tapioca pearls
  2. Cover and boil 20-30 minutes (40 if you like bubbles soft) on medium heat.
  3. Turn off heat. Don't lift lid. Let sit 30 minutes.
  4. Drain and rinse in cold water. Do Not Refrigerate

Sugar syrup

1 cup rock sugar & 1/2 cup water

  • Melt in saucepan over heat.
  • Add pearls to syrup and soak for 5 hours.

Milk Tea

  • For every serving of milk tea, use 2 Red Rose tea bags & condensed milk to taste. Brew tea as usual, squeezing the tea bags. Add condensed milk to the tea and mix well. Use cocktail mixer with ice to cool the tea. Add the syrup-soaked tapioca and serve.
More aboutCARCINOGENIC BUBBLE RECIPE

GINGER & CILANTRO VINAIGRETTE

Diposting oleh good reading

2 serrano chilies, stems and seeds removed
2 cloves garlic
1 T grated fresh ginger
3/4 cup pickled ginger
1 t chili paste
2/3 cup cilantro leaves
3 T pickled ginger juice
1 t vinegar
3/4 cup vegetable oil

Process all ingredients in a blender until smooth
More aboutGINGER & CILANTRO VINAIGRETTE

ALMOND TARTS (PITHIVIERS TARTS)

Diposting oleh good reading

This is cakebrain's rendition of Ikea's almond tarts. They go so well with tea. After tasting them I knew I could duplicate them at home. After experimenting, I found this one to taste most like the one from Ikea.

12 frozen tart shells
4 oz butter, unsalted
1/3 cup (2 1/2 oz) powdered sugar
1 egg
5 oz ground almonds
2 t all purpose flour
1 t vanilla
1 t almond extract

Icing Glaze
1/2 cup confectioner's sugar & a few teaspoons skim milk mixed to form a glaze to top the tarts


  • Cream the sugar and the butter well.

  • Mix in the egg; beat well.

  • Add the rest of the ingredients to mix and spoon into tart shells

  • Smooth filling

  • Bake 325F for 15-20 minutes

  • Glaze the cooled tarts with the icing.
More aboutALMOND TARTS (PITHIVIERS TARTS)

SPAGHETTI PIE

Diposting oleh good reading

1 lb ground beef
1/4 t salt
1/4 t black pepper
2 (8 oz) cans tomato sauce
1 1/2 cups low-fat sour cream
1/2 cup chopped green onions
1/4 cup (2 oz) 1/3 less fat cream cheese, softened
4 cups hot cooked spaghetti (about 8 oz uncooked pasta)
1 1/3 cups (5 oz) shredded reduced extra-sharp cheddar cheese
cooking spray
  1. Preheat oven to 350F
  2. Cook meat in a large nonstick skillet over medium heat until browned, stirring to crumble. Drain well, and return meat to pan. Stir in salt, pepper, and tomato sauce. Bring to a boil; reduce heat, and simmer for 20 minutes.
  3. Combine sour cream, green onions, and cream cheese in a small bowl, and set aside
  4. Place the spaghetti noodles in a 2 quart casserole dish coated with cooking spray. Spread the sour cream mixture over spaghetti noodles. Top with meat mixture. Sprinkle with cheddar cheese.
  5. Cover and bake at 350F for 25 minutes.
  6. Uncover; bake an additional 5 minutes or until cheese is bubbly

Yield: 6 servings

Calories: 408/serving

More aboutSPAGHETTI PIE

SALTED DUCK EGG WITH GROUND PORK

Diposting oleh good reading

1 salted duck egg
1/2 lb ground pork
1 regular chicken egg
1/2 t cornstarch
1/2 t sesame oil
dash of white pepper
pinch of sugar
1 t soy sauce
1/2 t shaoxing wine

  • Mix regular chicken egg and preserved duck egg white with ground pork
  • Reserve the duck egg yolk, which is solid.
  • Add rest of the ingredients and mix well.
  • Form meat mixture into a patty in a rimmed steam-proof dish.
  • Top the meat with chopped duck egg yolk; or if you desire keep it whole and place it onthe middle of the patty
  • Steam on med-high heat for 20 minutes.
More aboutSALTED DUCK EGG WITH GROUND PORK

CURRIED PEANUT SHRIMP

Diposting oleh good reading

These are great for the barbecue. Skewer and grill or broil under the broiler

1/3 cup orange marmalade
1/4 cup orange juice
2 T reduced far creamy peanut butter (or regular)
1 T dijon mustard
1 1/2 t curry powder
1 t vegetable oil
1/2 t salt
1/4 t chili sauce with garlic
1/4 t crushed red pepper
32 large shrimp, peeled and deveined (1 lb)
cooking spray for grill
bamboo skewers, soaked; or metal skewers

  • combine all ingredients except cooking spray. Marinate the shrimp for 30 minutes
  • Skewer shrimp with optional veggies on bamboo skewers
  • Grill.
More aboutCURRIED PEANUT SHRIMP

SPICY FRESH SALSA

Diposting oleh good reading

6 large tomatoes
1 onion, chopped
1 cup chopped fresh cilantro
2 fresh Anaheim chilies, seeded and diced
4 serrano chilies, minced
2 T red wine vinegar
2 T olive oil
2 garlic cloves, minced
salt to taste
*4 jalapeno peppers may be used in place of the chilies
  • Blanch tomatoes 30 seconds. Plunge in cold water, peel deseed and chop.
  • Mix together tomatoes, onion, cilantro, chilies, vinegar, oil and garlic in a large non-reactive bowl. Season with salt to taste.
  • Refrigerate until cold and to allow the flavours to mingle, at least 1 hour and up to 4 hours before serving.
  • Serve with corn chips or use as an accompaniment for grilled fish.
More aboutSPICY FRESH SALSA

POH POH'S TOISAAN RICE CANDIES

Diposting oleh good reading

Staying at Poh Poh's house during the summers when I was young was great fun. She would make this simple dough that was much like playdough. Poh Poh would form little ducks and balls with the brown dough with me and then she would steam it so I could eat it!

1 cup glutinous rice flour
1 cup wheat starch
1 cup brown sugar
boiling water
vegetable oil

  • Boil water. Combine all dry ingredients
  • Add water slowly and mix until dough doesn't stick anymore. Knead in a little vegetable oil. Add additional rice flour if dough is too sticky
  • Roll into ball or other shapes
  • Steam for 20 minutes
More aboutPOH POH'S TOISAAN RICE CANDIES

RICE CUSTARD

Diposting oleh good reading

1 cup rice flour (3 Elephants brand)
1 cup sugar
2 cups water


  1. Dissolve sugar with a little water. Mix flour with water to form a paste.
  2. Combine sugar and flour mixture together .
  3. Pour into clay custard cups which have been preheated in a steamer.
  4. Steam on high heat, covered, for 35 minutes
  5. Run a sharp knife around cooled custards to release

FRESH RICE RECIPE FOR RICE CUSTARD
2 cups rice
2 1/2 cups water
2 cups sugar

  • Blend rice and water in a blender for 10 minutes.
  • Add 2 cups sugar and stir to dissolve
  • Add a little less than 1 1/4 cups more cold water
  • Steam in preheated custard cups for 30 minutes
  • Use knife to release custard


    More aboutRICE CUSTARD

    RICE KRISPIES SQUARES

    Diposting oleh good reading

    1/4 cup margarine

    4 cups marshmallows

    1/2 t vanilla extract

    6 cups rice krispies cereal


    1. Melt margarine in a saucepan over low heat. Add marshmallows; stir until melted and well blended. Remove from heat. Stir in vanilla

    2. Add cereal stirring until coated well

    3. Press into 3 L pan sprayed with non-stick spray. Cool; cut into squares
    More aboutRICE KRISPIES SQUARES

    MOM'S SALTED FISH WITH GROUND PORK

    Diposting oleh good reading

    1/2 lb ground pork
    2 one inch slices of salted fish
    2 fresh or frozen peeled water chestnuts
    2 slices ginger
    1/2 teaspoon cornstarch
    1/2 teaspoon sesame oil
    1/2 teaspoon shaoxing wine
    1/4 teaspoon white pepper
    1/2 teaspoon soy sauce
    pinch of sugar

    • clean and debone slices of salted fish
    • chop salted fish and water chestnuts
    • slice and shred ginger
    • mix water chestnuts and fish with ground pork with the rest of the ingredients and form into a patty in a rimmed steaming dish. sprinkle with slices of ginger
    • steam on med-high heat for 20 minutes.
    More aboutMOM'S SALTED FISH WITH GROUND PORK

    WILTON CAKE DECORATING COURSE AT THE COOKSHOP

    Diposting oleh good reading

    royal icing flowers, buttercream roses, fondant leaves

    cornelli lace technique, royal icing lilies & fondant leaves

    Prior to my due date and the impending birth of my next kid, I thought I had better do some things I knew I wouldn't be able to do with 2 little ones. This is a digital record of all the homework I had to do for the cake decorating course I took.

    first things first: practising how to make drop flowers & leaves

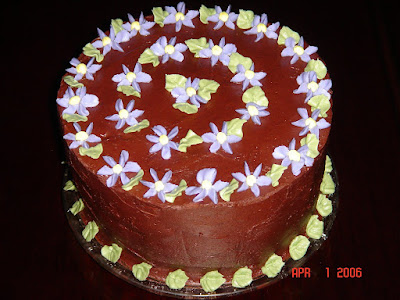
    I have always wanted to take a cake decorating course. The one that I enrolled in was located in City Square at 12th and Cambie at the cookware shop, The Cookshop. At the back of the store, there is a fully equipped kitchen and classroom where ordinary citizens, professionals in the food industry and foodies like me can take classes; usually these classes are taught by professionals in the industry. Often a chef from a local restaurant or bakery comes and has a demo and passes around tasty treats and a copy of the recipes.

    buttercream dots

    Every couple of months a calendar is published for the upcoming classes offered. A continuing course that is offered is the Wilton Cake Decorating Course. The entire course is about $300. Classes occur on the weekend, usually on Sundays and you can do all three courses or just one at a time, which is a flexible schedule for most people. You even get a certificate at the end of the course. I was able to get all three certificates for completing the entire three courses. Nothing like the "feel-good" factor of eating all those cakes and getting a certificate for it regardless of how good your cakes look! Everyone wins!

    practising the wilton rose
    I'd say the neatest thing I learned was how to make all those flowers. The "Wilton Rose" was the most challenging and I thought only got better with lots of practice. I think I'm pretty confident with the flower nail now and I'm not put off by trying to attempt a rose. The whole experience was quite rewarding because now I can use the skills I learned to make those yearly birthday cakes for the kids!
    basketweave technique (easier than it looks!); royal icing flowers; buttercream roses, fondant leaves


    rolled fondant, cornelli lace technique, royal icing lilies & fondant leaves

    For scheduling information, check out the calendar at the Cookshop for the classes they offer (click on the left sidebar on their homepage...it's the first link). The Wilton Cake decorating courses are always offered on Sunday afternoons. These cycle year round. I took the 3 course package. Occasionally, the Cookshop will also have guest chefs teaching their craft. I have taken a few where pastry chefs from local bakeries/patisseries come and share their recipes and decorating tips. Then you get to eat the stuff too. It's great. You have to keep an eye on the calendar to find chefs that appeal to you. The calendar only shows its offerings 2 to 3 months in advance.

    Other people have told me that Michaels Craft store offers the Wilton Cake decorating classes too. I can't say what they're like because I haven't taken them. However, I hear they can be cheaper with promotional stuff thrown in.

    RELATED LINKS:

    More aboutWILTON CAKE DECORATING COURSE AT THE COOKSHOP

    RECIPE INDEX

    Diposting oleh good reading on Kamis, 26 Juli 2007

    ANCIENT CHINESE SECRET RECIPES
    BARS AND SQUARES
    BEVERAGES
    BISCUITS & SCONES
    BREADS
    BREAKFAST/BRUNCH
    CAKE DECORATING
    CAKE RECIPES
    CANDIES
    CARNIVORE FOODS

    CASSEROLES
    CHEESECAKES
    COOKIES
    DRESSINGS/SAUCES

    JAPANESE FOOD
    KIDS' FOODS
    LOW-CARB DESSERTS
    ONE POT MEALS

    PARTY NOSHING/SNACKS
    PASTA
    PASTRIES
    PIES AND TARTS
    PUDDINGS AND CUSTARDS

    QUICKBREADS
    RICE RECIPES
    SAUCES
    SEAFOOD
    SIDE DISHES
    SMALL BATCH BAKING
    SNACKS
    SOUPS
    VEGGIES
    More aboutRECIPE INDEX

    FOOD REVIEW CRITERIA

    Diposting oleh good reading

    Evaluation Rubric: Criteria for Food Reviews

    FOOD: /12 (freshness, consistent quality, menu/creativity, plating)

    AMBIENCE: /6 (cleanliness, decor, washrooms, general atmosphere)

    SERVICE: /6 (efficient, friendly, personable, welcoming, professional)

    TOTAL POINTS: /24

    PRICE: /$$$$$$

    $=under $5 for a meal (e.g. hotdogs, hamburgers, fast food)[CHEAP EATS]
    $$=$10-20
    $$$=$20-30
    $$$$=$30-40
    $$$$$=$40-50
    $$$$$$=$50 AND UP
    More aboutFOOD REVIEW CRITERIA

    CAKEBRAIN'S FOOD REVIEWS

    Diposting oleh good reading

    AT THE MARKET


    ASIAN


    BAKERY/DESSERT/PATISSERIE

    BREAKFAST/BRUNCH

    CHINESE


    DIM SUM


    FRENCH

    JAPANESE

    INDIAN

    ITALIAN


    KIDDIE FARE


    NOSHING


    SEAFOOD

    WESTCOAST

    More aboutCAKEBRAIN'S FOOD REVIEWS

    Kiddy Bento Set

    Diposting oleh good reading on Senin, 23 Juli 2007


    Tried making bento sets for the kids' lunch yesterday.

    This is my first attempt to assemble one. I have not thought of making a bento for them until I came across a fellow flickr pal's beautiful bento sets she made for her husband.

    Was indeed very pleased that I could finally use those cute paper liners which I bought from Daiso many months ago.I don't have a proper lunch box at home (my boy seldom pack any food to school), but I managed to dig out some disposable food trays from my cupboard full of disposal containers;)


    I made the rice balls with the help of a rice mould which I use occasionally...the mould is a 3-in-1, that comes in 3 different shapes. The rice balls were filled in the middle with salmon flakes...by toasting some fresh salmons...seasoned with only a tiny pinch of salt & pepper in the oven. The rice balls were then sprinkled with different flavors of furukake (rice seasoning). I also toasted some fresh button mushrooms in the oven. The mushrooms didn't require any seasonings as they tasted very sweet just on their own. Filled up the other compartments with cherry tomatoes and some hard boiled quail eggs. A little tub of yogurt completed the set.

    My boys were so pleased to see their colourful set lunch when they came home from school. It's definitely a nice change from our usual porridge, noodle soups meals.
    More aboutKiddy Bento Set

    Harry Potter

    Diposting oleh good reading

    I finished the last Harry Potter yesterday. I'm sad to see the end of the series, but it was done really well. I'd love to say more, but I'm not going to spoil it for those less crazy than me :P
    More aboutHarry Potter

    Peach Tart

    Diposting oleh good reading on Kamis, 19 Juli 2007

    This is the first 'proper' tart I made yesterday afternoon. The very first tart I tried was using crushed digestive biscuits as base...a no-bake tart actually. I am not the tart or pie person. Believe it or not, I have not eaten a big tart like this before...I don't see them selling at the neighbourhood bakery shops either. I did tried those little fruit tartlets...but I don't really find them appealing. I don't quite like the hard and dry pastry base with this thick, glossy, gel-like glaze that's always very generously brushed on top of the fruits.

    So, why is it that I attempted to make this 18cm tart? Well, simply because I fell in love with the photo in a baking book. I would usually skip the part on tarts and pies whenever I browse thru baking books...but the picture of this beautiful pear tart really caught my eye and it doesn't have any glaze on top of the fruits! I couldn't wait any longer to try it out.

    It requires some time to make this tart though...as you need to chill the pastry for 20 mins before baking, bake it for another 12mins or so...then let it cool completely, before you can add in the fillings (otherwise the fillings will melt away)..then it's another 35mins of baking time.


    The step-by-step instructions and photos in the book are really useful. I was able to make the pastry base easily. I like reading these Japanese to Chinese translated cookbooks as they are always very detailed in their instructions. For this recipe, it's not necessary to use any baking weights or uncooked rice over the pastry when baking...hmmm, but I don't know the reason why?


    The filling was spread evenly all over the base before lining the peaches (we prefer peaches over pears). Off it went into the oven.


    Ok, here's my finished product...it's a far cry from the one in the cookbook right? I guess I should have pressed the peaches slightly further into the filling...the tart surface was rather flat...unlike the one illustrated in the cookbook...the filling is all beautifully puffed up, well above the pear slices. At first glance, I even thought it was made with a pastry covered on top.

    The tart tasted really very good...I'll certainly recommend my baking friend to try it. This tart is full of this buttery flavour...and except for the edges and the rim, the pastry was not hard at all. I could even taste the ground almonds, which was added to both the pastry base and filling. After eating one slice...I was so tempted to reach out for another one!

    I left the pie sitting on my kitchen table while I prepared dinner. When I was done cooking, I took a look at the pie and this was what I saw:

    The sun was setting then...and the light was shinning all over the tart. It looked so lovely! It took me only less than 5 mins to snap at least 30 shots! With the long afternoon rays...the lights casted shadows all over the tart...making the surface looked really 3 dimensional.


    This is my favourite shot! It makes the tart 'almost' comparable to the one shown in the cookbook :)

    Ingredients:
    (make one 18cm tart)

    pastry:
    80g cake flour (or plain flour)
    20g grounded almond powder
    30g caster sugar
    40g unsalted butter , soften at room temperature
    1 tablespoon (15g) lightly beaten egg

    filling:
    10g cake flour (or plain flour)
    80g grounded almond powder
    50g brown sugar
    60g unsalted butter, soften at room temperature
    1 egg, lightly beaten

    2 tablespoon Rum (I omitted this)
    some canned peach slices, well drained
    icing sugar for dusting

    Method:
    Pastry base:
    1. Lightly grease an 18cm tart pan, set aside.
    2. Toast almond powder at 100 degC for 10 mins. Stirring in between. Let cool.
    3. Sieve flour and almond meal. (The grounded almond powder I used are too huge to pass thru the sieve...so I simply threw them back into the sieved flour!)
    4. With a manual whisk, cream butter and sugar till light and fluffy.
    5. Add in the egg, very gradually, whisking the batter till well mixed each time the egg is added.
    6. Sieve over the flour/almond meal mixture in 2 to 3 additions into the batter. Fold the mixture gently with a spatula.
    7. Form and shape the pastry into a round ball. Roll out the pastry in between 2 sheets of cling wrap or baking paper (I used two sheets of cut-out plastic bags) to about 23cm in diameter.
    8. Remove one side of the cling wrap or baking paper. Place it over the prepared tart pan. Mould the pastry into the tart pan, smoothing the edges and the rim carefully...if the pastry is too soft to handle, chill it in the fridge for 10~15 mins. (I didn't have any problem with it.)
    9. Chill the pastry in the fridge for 20mins.
    10. Use a fork to poke holes on the pastry. Brush the top of the rim with egg wash. (I did this with my fingers.) Bake in pre-heated oven at 180 deg C for 10 ~12mins until the edges are slightly browned. Let cool completely.

      filling:
    11. With a whisk, cream butter and brown sugar till the mixture turns fluffy. Add in the egg gradually, mix well each time the egg is added.
    12. Add in grounded almond powder. Fold with a spatula till well incorporated. Sieve over the flour onto the mixture. Mix with a spatula. Add in rum and mix well.
    13. Spread the filling onto the cooled pastry base. Ensure that the edges are filled up. Line with peach (or pear) slices. Make sure the slices are well drained. Bake in pre-heated oven at 170 deg C for 30 ~ 35 mins, until the edges and filling turn golden brown. Let cool, and dust with some icing sugar.

    Recipe Source: Delicious!! Baked Cakes, Ikuko Omori
    More aboutPeach Tart