Oreo Muffins with Peanut Butter Chips

Diposting oleh good reading on Minggu, 30 Maret 2008

I bought a pack of buttermilk recently and used it on 3 separate occasions.

I first made a batch of buttermilk muffins following a recipe I copied from a magazine.


I replaced the chocolate chips with Reese's peanut butter chips...I finally chanced upon these at Cold Storage (Vivo city) a couple of months back...and I have been saving them just for this recipe! Knowing that the use of buttermilk will make bakes very tender, I had very high expectations for these muffins...plus the fact that the recipe was contributed by a local bakeshop and muffins are their speciality. So you would imagine how disappointed I was when the muffins didn't turn out as expected. They were slightly dry, even fresh out of the oven :(

Next, I tried making some buttermilk biscuits...hoping that I could yield a batch of nice, buttery biscuits just like those from Popeye's or Mcdonalds. It turned out to be a complete flop...they looked and tasted more like dinner rolls instead! I read that buttermilk biscuits are supposed to be very easy to make...but it proof to be a great challenge for me to cut out the sticky dough into rounds. I guess I have to read up more on these before my next attempt.

On the last day before the leftover buttermilk expires, I managed to squeeze in sometime to bake these Oreo muffins...


We actually came up with this recipe over a cup of Oreo Mcflurry! When we got home, I retrieved this very much trusted muffin recipe and adapted it according to my family members' wish list. I replaced the milk with buttermilk, and added in crushed oreo cookies and the peanut butter chips. I did noticed that the recipe calls for baking soda...which goes hand in hand with buttermilk. The original recipe calls for melted butter...since I was short of time to melt and let the butter cool off, I replaced it with sunflower oil.


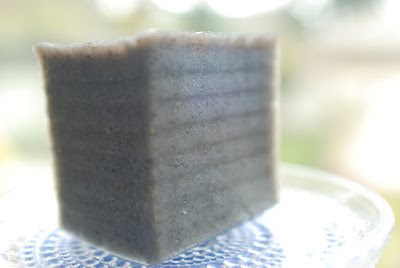
These muffins didn't look very pleasing due to the crushed oreos. Nevertheless, they tasted very delicious...moist and fluffy. Not only were they soft and tender, they were also packed with flavours...you can't go wrong with peanut butter chips and oreos?!


It was only while trying to compose this post that I learned from the joyofbaking site, that, besides buttermilk, using oil instead of butter will yield very tender muffins...as oil prevents the development of gluten in the flour.

If you were to ask me how I would rate these muffins...I would say these are the sort of muffins I can give away with confidence to my friends...of course, provided they like Both oreos and peanut butter ;)


Ingredients:
(makes 12 muffins)

250g plain flour
1 1/2 teaspoons baking powder
1/2 teaspoon baking soda
1/2 teaspoon salt
100g Reese's peanut butter chips
8 oreo sandwich cookies (remove fillings, coarsely chopped)
1 egg, lightly beaten
60ml vegetable oil
175ml buttermilk
125g granulated sugar

Method:
  1. Pre-heat oven to 180degC (350 degF).

  2. Sieve together flour, baking powder, baking soda and salt into a mixing bowl. Add peanut butter chips, crushed oreo biscuits and mix with a spatula. Make a well in the centre.

  3. Place egg, oil, buttermilk and sugar in another bowl. Mix (with a manual whisk) until thoroughly combined.

  4. Pour the liquid mixture into the dry ingredients. With the spatula, gently fold all the ingredients to form a wet batter. Just mix until the flour are incorporate into the batter. DO NOT Over mix. The batter will appear lumpy.

  5. Spoon batter into paper muffin cups. Bake for 20mins until muffins turn golden brown or a toothpick inserted into the centre comes out clean.

  6. Let cool on a wire rack.
Recipe source: adapted from Bread baking by hand or bread machine, by Eric Treuille & Ursula Ferrigno
More aboutOreo Muffins with Peanut Butter Chips

BLACK SESAME PUDDING CUBES

Diposting oleh good reading on Jumat, 28 Maret 2008

nine-layered black sesame pudding cubes

Have you ever had "Nien Goh"? It's the Chinese New Year's rice pudding cake that's steamed. This Black Sesame Pudding recipe is similar to the New Year's rice pudding cake in many ways. The base is rice flour and sugar and it's steamed. In fact, it's steamed in layers...9 layers in all. In the picture, you can see at least 8 layers. My ninth layer is kind of thin and doesn't show up very well. But it's there!

This recipe yielded a pudding that was not as chewy or tender as I would have liked. I wanted to replicate the Black Sesame puddings you get at Dim Sum. This one was more dense and very filling. After one cube, I was done and wanted to go to take a nap.


The black sesame flavour was pretty good, but perhaps this pudding is best eaten warm and fresh. After refrigeration, the pudding became harder and wasn't as pleasant to eat cold. I hadn't tried resteaming the pudding after it was refrigerated, but it's worth a try to bring back the texture. I don't think I'd make this one again. I couldn't eat more than one cube because it was so filling.

BLACK SESAME PUDDING

(from Distinctive Snacks of Hong Kong)
1 1/2 oz (40 g) black sesame
8 oz (225 g) castor sugar
3 1/2 cups water
7 oz (200 g) rice flour
2 oz (50 g) waterchestnut flour
1/2 T oil

  • Rinse, drain and air-dry the black sesame. Stir-fry in dry clean wok until golden brown. Grind in 6 oz(200 ml) water. Put through a sieve to form a fine solution.

  • Dissolve castor sugar in 6 oz (200 ml) water

  • Mix rice flour and waterchestnut flour with 2 cups (500 ml) water. Add oil and mix.

  • Add the above 3 items together, mix well. Pour a thin layer of mixture to about 1/2 cm thick in a square tin. Steam over high heat for 3 minutes until set.

  • Remove wok lid, pour in a second layer of mixture, steam for another 3 minutes. Repeat this process for 9 layers and then steam the whole pudding for 20 minutes.

  • Remove from heat. Cool, unmould, slice and serve.

  • Tip: mix sesame solution well before steaming.
More aboutBLACK SESAME PUDDING CUBES

Visceral Fat and Dementia

Diposting oleh good reading on Kamis, 27 Maret 2008

This study was released today, demonstrating in 6,583 patients that visceral fat mass in the 40s predicts the risk of dementia in old age. Patients in the highest quintile (20% with the most visceral fat mass) had an almost three-fold higher risk of dementia than patients in the lowest quintile. Overall fat mass was less strongly correlated with dementia. This study is so timely, they must have heard about my blog post.

They used a measure of visceral fat called the "sagittal abdominal diameter", basically the distance from the back to the belly button. In other words, the beer belly.

What we're looking at is another facet of the pervasive "disease of civilization" that rolls into town on the same truck as sugar and white flour. Weston Price described it in 14 different cultures throughout the world in Nutrition and Physical Degeneration. Diabetes, cardiovascular disease, obesity, cancer and dementia all seem to come hand-in-hand. It's hard to say exactly what the root cause is, but the chain of causality seems to pass through visceral fat in many people.

More aboutVisceral Fat and Dementia

Visceral Fat

Diposting oleh good reading on Rabu, 26 Maret 2008

This week, I stumbled upon a very interesting series of articles from the lab of Dr. Nir Barzilai.

The first article I came across showed that surgical removal of the visceral fat deposit of rats increased their lifespan. Visceral fat (VF) is the "beer belly", and consists of the perinephratic fat around the kidneys and the omental fat in front of the intestines. It doesn't include subcutaneous fat, the fat layer under the skin.

VF is tightly associated with the metabolic syndrome, the quintessential "disease of civilization" that affects 24% of Americans (NHANES III). It's defined by three or more of the following criteria: high blood pressure, large waist circumference, low HDL cholesterol, high triglycerides, and high fasting glucose. The metabolic syndrome is associated with a 3-4-fold increase in the risk of death from cardiovascular disease, and a 6-fold increase in the risk of developing type II diabetes. From a review on the metabolic syndrome (parentheses mine):


The most common alteration related to the impaired glucose metabolism with aging is the progressively increased fasting and postprandial [post-meal] plasma insulin levels, suggesting an insulin-resistant state.

This is all well and good, but who cares? What's to say VF plays any role other than as a simple marker for overweight?


The longevity paper led me to Dr. Barzilai's previous papers, which answered this question rather thoroughly. Rats raised on standard rat chow, which is a sad little compressed pellet made of grains and added nutrients, develop elevated insulin and insulin resistance with age, just like humans. Unless they don't have VF. Rats that had their VF surgically removed did not develop insulin resistance or elevated insulin with age, despite rebounding to their original total fat mass rather quickly (VF accounts for ~18% of total fat in these rats). These parameters are unaffected by removing an equal amount of subcutaneous fat, which has been shown in human liposuction patients as well.

Removing VF also improved diabetes-prone Zucker rats, which are profoundly insulin-resistant (leptin receptor loss-of-function). It kept wild-type rats just as insulin-sensitive as calorically restricted controls, which had a small amount of VF. This shows that VF isn't just a passive player; it's essential for the development of insulin resistance. It also shows, along with human studies, that insulin resistance is not an inevitable consequence of aging.

Adipose (fat) tissue is being increasingly recognized as an important endocrine (hormone-secreting) organ. It produces many different hormones that affect insulin sensitivity and appetite regulation, among other things. These hormones are collectively known as fat-derived peptides (FDPs). At least one of these FDPs, TNF-alpha, promotes insulin resistance.

Dr. Barzilai's group went on to explore the mechanism of VF contributing to insulin resistance. They increased the rate of glucose flux into the fat tissue of rats by infusing either glucose or insulin into the bloodstream. These treatments both cause increased glucose uptake by fat cells. What they saw when they dissected the rats was striking. The VF had ramped up its production of FDPs from 2- to 15-fold, while the subcutaneous fat had barely changed. Incidentally, insulin increased glucose uptake by VF twice as much as subcutaneous fat.

I'll say this again, because it's important. They forced glucose into VF cells, and those cells dramatically upregulated FDP production. And again, no visceral fat, no FDPs.

In earlier papers, he also showed that the removal of VF dramatically reduces the expression of TNF-alpha and leptin (two FDPs) in subcutaneous fat on a longer timescale, showing that VF and subcutaneous fat communicate to alter the metabolism. Again, TNF-alpha promotes insulin resistance, making it a possible link between the fat tissue and peripheral effects. VF removal had no effect on triglycerides, suggesting that they're only a marker of insulin dysfunction rather than a cause.

Now to take this research to its logical conclusion. Here's a plausible sequence of events leading up to the metabolic syndrome:
  • A meal high in quickly digested carbohydrate elevates blood glucose. OR, excessive fructose causes insulin resistance in the liver which leads to high fasting glucose.
  • Visceral fat responds by increasing production of FDPs.
  • FDPs, directly and/or indirectly, cause insulin resistance in the liver, muscle and other tissue. Liver insulin resistance causes alterations in lipoprotein ("cholesterol") profile (more on this in another post). Fat tissue remains insulin-sensitive.
  • The vicious cycle continues, with increased visceral fat size and glucose uptake increasing FDP production, which makes the liver more insulin resistant, which increases glucose production by the liver, etc.
More aboutVisceral Fat

SUPERSIZED SUSHI: GIGANTIC CALIFORNIA ROLLS

Diposting oleh good reading on Selasa, 25 Maret 2008


Have you ever had a craving for sushi?

I was at the local market handling a perfectly ripe avocado when the craving hit. I immediately added the avocado to my basket along with some of that fake crabmeat (surimi) made out of pollock. A fish with such an unappealing name surely needs to be processed into something else.

I had a 5-sheet package of "fancy" grade sushi seaweed in my cupboard at home, some Kokuho Rose brand sushi rice, a bottle of seasoned rice vinegar, and that weird Japanese mayonnaise in a squeeze bottle (Kewpie mayonnaise). Those are the makings for California Rolls!

Here's my recipe--actually I don't really use a recipe, I just kind of wing it, but this time I measured for your sake!


JUMBO CALIFORNIA ROLLS
these ingredients are the basics for a California Roll but you can kick it up a few notches by using the optional ingredients

3 cups cooked short-grain rice (white or brown) [I used Kokuho Rose brand]
1/4 cup seasoned rice vinegar [this comes prepared in a bottle]
2 cups surimi (fake crabmeat)
1 ripe avocado, sliced
1 package sushi seaweed [I used a fancy grade 5-sheet package--the more expensive the seaweed generally, the tastier it is]
optional: these ingredients will definitely make your rolls tastier!
julienned English cucumber, tobiko for garnish, toasted sesame seeds, real crab meat
This is surimi. I know it's fake, but it's delicious!
You can substitute real crab meat if you're made of money. But if I were you, I'd rather splurge on the seaweed.
  • In a large bowl, combine the seasoned rice vinegar with the hot cooked rice. Set aside to cool. Toss gently occasionally.
  • Using a bamboo sushi mat, lay the roasted sushi seaweed glossy side down. Usually there are little indentations on the seaweed--these should run vertically on the mat.
  • Spoon about 1 cup of the cooled seasoned sushi rice onto the seaweed. Spread the rice evenly over the seaweed. I often use a little paring knife to help me spread...I know, it's not orthodox but it keeps my hands from getting sticky! Real sushi chefs wet their hands in clean water continuously so the rice doesn't stick. They just use their hands to spread the rice.

  • Take whatever filling you desire and line it up along the bottom edge of the seaweed/rice mat. Of course if you use other fillings, you won't have a California roll. I've used canned salmon or tuna, cucumber, cooked egg (scrambled), red peppers, teriyaki shitake mushrooms and the list goes on and on. Pretty much anything goes. If you want, you don't have to use raw fish at all. At this point, you can also add the mayonnaise or other thick sauces as well.

  • Using the bamboo mat, roll the sushi away from you. Use the mat to help press close the roll.

  • Slice the sushi rolls with a sharp knife. It helps if you clean the knife sporadically. Often, with the larger rolls, I use a serrated bread knife to cut the rolls. It helps avoid crushing the rolls (I know! also unorthodox and not very Japanesey--I'm not Japanese!) It works. Take my word for it. You won't have smushed rolls.

  • Serve with a high grade soy sauce for sashimi/sushi. I like Yamasa. Kikkoman is good too. Pickled ginger and wasabi will only make it better.
More aboutSUPERSIZED SUSHI: GIGANTIC CALIFORNIA ROLLS

Okinawa and Lard

Diposting oleh good reading on Senin, 24 Maret 2008

The inhabitants of Okinawa, an island prefecture of Japan, are one of the longest-lived populations in the world. Their diet and lifestyle have been thoroughly studied for this reason. Papers typically focus on their consumption of vegetables, fish, soy, sweet potatoes, exercise, and the fact that some of them may have been mildly calorie restricted for part of their lives.

The thing that often gets swept under the rug is that they eat lard. Traditionally, it was their primary cooking fat. Of course, they also eat the pork the lard came from.

I'm not saying lard will make you live to 100, but a moderate amount certainly won't stop you...
More aboutOkinawa and Lard

Pizza Express

Diposting oleh good reading

During the recent one week term break, I grabbed the opportunity to play around with another pizza dough recipe. I have always wanted to try my hands on a homemade thin-crust pizza, and this recipe was the answer to my search.

The recipe requires only a few basic ingredients, and the amount is just right for our family. It only requires 250g of flour to make two 12 inches pizza doughs. After comparing the instructions for this recipe and the previous one that I have tried, I noticed that in order to get a thinner crust, the pizza will have to be baked right away after the topping has been added. Allowing the dough to proof for another 15mins or so before baking will create a slightly puff-up crust.


According to the instructions, I was supposed to be able to roll out the dough into two 12" rounds. Somehow, I didn't manage to reach that size...not even with the help of my younger boy...no matter how hard with pulled and tugged...the dough kept shrinking back. The furthest we could go was about 10 inches. It was easier for the 2nd portion though...probably it was left 'relaxing' on the table for almost 15mins while we were wrestling with the first one ;)

For the first pizza, I used the usual Hawaiian toppings which are my kids favourite.


For the second one, I made it into a vegetarian pizza. I added in my favourite fresh button mushrooms, green and yellow bell peppers and some tomatoes. I was totally clueless whether this one would be edible...as it was the first time I tried using these combination of ingredients.


Well, I was glad to hear that my elder boy gave very good ratings for this veggie version :) In fact, he told me he preferred this over the ham & pineapple toppings. I love the natural juices and sweetness from the fresh ingredients...and the these toppings were real simple to prepare as there is no cooking involved.


The crust was rather thin...although it was still a far-fetched from those biscuit-like thin pizza crusts. My elder boy told me he still prefers a deep pan pizza...and he declared that "the crust must be crispy on the outside and yet soft on the inside!" ;'(


Ingredients:
(make two 12" pizza dough)

250g bread flour
1 teaspoon fast-acting dry yeast
1 teaspoon salt
150ml lukewarm water
1 tablespoon extra-virgin olive oil

Method:
  1. Grease two 30cm (12in) round pizza trays. (I used a baking tray, lined with parchment paper).
  2. Sift flour and salt into a mixing bowl. Mix in the yeast. Make a well in the centre and add the water and olive oil. Using your hands, gradually work the ingredients together to form a soft dough. If the dough is too dry add a few drops of water.
  3. Turn dough out onto a lightly floured work surface and knead for 10 mins until the dough becomes smooth and elastic. Shape dough into a round ball and place in a lightly oiled mixing bowl. Cover with cling wrap and leave to rise for 1 hr or until double in size.
  4. Turn out the risen dough onto a lightly floured work surface and knock it down to release the air. Give it a few gently kneading. Divide dough into 2 portions. Shape into two balls, cover loosely with cling wrap and let it rest for about 10mins.
  5. Roll or press out each portion to a round, about 12" in size. Place dough on prepared tray.
  6. Spread pizza sauce over the dough to within 1 cm (0.5 inch) of the edge. Arrange a layer of grated cheese, followed by preferred toppings. Sprinkle the top all over with grated cheese.
  7. Bake in a preheat oven at 200 degC for 15~20mins or until the crust has turned golden and the cheese has melted. Serve warm.
Recipe source: adapted from Fresh Baked by Louise Pickford
More aboutPizza Express

Real Food IV: Lard

Diposting oleh good reading on Minggu, 23 Maret 2008

Your great-grandmother would have told you that natural, homemade lard is an excellent cooking fat. It has a mild, savory flavor and a high smoke point. It's well suited for sauteing and frying foods, and it makes the flakiest savory crust. It's also cheap to buy and easy to render. Rendering lard is the process by which fat tissue is turned into pure fat. I buy the best quality lard available for $2/lb at my farmer's market, making it far cheaper than butter and olive oil of equivalent quality.

The best place to buy lard is at a local farmer's market. Look for pigs that have been "field-raised" or "pasture-raised", and are preferably organic. This ensures that they receive sunlight and have been treated humanely. The "organic" label by itself simply means they have been fed organic feed; the pigs will often not have had access to the outdoors. I recommend avoiding conventional (non-organic) pork at all costs, because it's profoundly inhumane and highly polluting. This is where I buy my lard.

If you don't have access to good quality local lard, there are a couple of sources on the Local Harvest website. Look for "leaf lard", which is the fat surrounding the kidneys. It's lowest in polyunsaturated oil and thus has the highest smoke point and the lowest omega-6 content. It's also practically pure fat. You will recover 90% of the pre-rendering volume from leaf lard. On to the recipe.


Ingredients and Equipment:
  • Lard
  • Cheesecloth
  • Baking dish
  • Jars
1. Preheat the oven to 225 F.

2. Cut off any pieces of meat clinging to the fat.

3. Cut fat into small (~1-inch) cubes.

4. Place them into a non-reactive baking dish and then into the oven.

5. Over the next 2-3 hours, periodically mash the fat with a potato ricer or the back of a large spoon. The fat will gradually separate from the residual protein as a clear liquid.

6. When you are satisfied that you've separated out most of the fat, remove the baking dish from the oven and allow it to stand until it's cool enough to be safe, but warm enough to be liquid.

7. Pour through a cheesecloth into jars. Save the "cracklins", these can be eaten.

8. If you plan on using the lard for crusts, cool it as quickly as possible by placing the jars in cold water. If the lard solidifies slowly, it will have a slightly grainy texture that works less well for crusts, but is irrelevant for other purposes.

Finished lard has a long shelf life but I like to keep it in the fridge or freezer to extend it even further.

More aboutReal Food IV: Lard

TENDER ALMOND SCENTED MADELEINES

Diposting oleh good reading on Rabu, 19 Maret 2008

almond scented madeleines


After the resounding success of the Marshmallow Fluff-filled Bittersweet Chocolate Ganache-dipped Chocolate Madeleines with all my tasters, I thought it would be appropriate to go back to the basics and try a traditional madeleine recipe again.
In my Williams Sonoma: Essentials of Baking cookbook, I found a simple batter that yielded the most tender madeleine ever. I adapted the recipe to be lightly scented with almond and it tasted superb even 3 days later! I simply popped the madeleines in a toaster for a light warming and they tasted fresh again! These are the types of madeleines made for dunking a la Proust. I particularly enjoyed the tender crumb of these cakes and intend to make it again and again.


this madeleine recipe is my favourite so far because of its ethereal almond scent and tender crumb

Almond Scented Madeleines

(adapted from "Orange Madeleines", Williams Sonoma: Essentials of Baking)

2 large eggs
1/3 cup (3 oz/90 g) granulated sugar
1/4 t salt
1/2 t vanilla extract
1/4 t almond extract [I used 1/2 t almond extract]
1/2 cup ( 2 1/2 oz/75 g) all-purpose flour, sifted
1 t grated orange zest [I omitted this]
1/4 cup )2 oz/60 g) unsalted butter, melted and cooled

  • Position a rack in the middle of the oven, and preheat to 375degrees F (190degrees C). Using a pastry brush, heavily brush room-temp. butter over each of the 12 molds in a madeleine pan, carefully buttering every ridge. Dust the molds with flour, tilting the pan to coat the surfaces evenly. Turn the pan upside down, tap it gently, and discard the excess flour. [I used baker's spray and did away with all of these steps! ;p ]
  • In a large mixing bowl, combine the eggs, granulated sugar and salt. Beat on medium-high speed about 5 minutes. Beat in the vanilla and almond extracts. Sprinkle the sifted flour over the egg mixture and mix on low speed to incorporate.
  • Using a rubber spatula, gently fold in the orange zest [I omitted this] and half of the melted butter just until blended. Fold in the remaining melted butter.
  • Divide the batter among the 12 prepared molds, using a heaping tablespoon of batter for each mold. Bake the cookies until the top springs back when touched, 8-12 minutes [mine took 15-18 minutes].
  • Remove the pan from the oven and invert it over a wire rack, then rap it on a rack to release the madeleines. If any should stick use your fingers to loosen the edges, being careful not to touch the hot pan, and invert and rap again.
  • Let cool on the rack for 10 minutes. Using a fine-mesh sieve, dust the tops with confectioners' sugar and serve [I didn't need the confectioners' sugar...besides I couldn't wait to taste one]. Alternatively, cover with plastic wrap and store at room temperature for up to 3 days. Before serving, heat the cookies in a 250degreeF (120degree C) oven until warm, then dust with the confectioners' sugar.
More aboutTENDER ALMOND SCENTED MADELEINES

Thoughts on Obesity, Part I

Diposting oleh good reading

From the US Centers for Disease Control website:

Since the mid-seventies, the prevalence of overweight and obesity has increased sharply for both adults and children. Data from two NHANES surveys show that among adults aged 20–74 years the prevalence of obesity increased from 15.0% (in the 1976–1980 survey) to 32.9% (in the 2003–2004 survey).
In hunter-gatherer and some semi-agricultural societies, obesity is rare. In most, it's nonexistent. Wild animals typically do not accumulate enough fat to interfere with vigorous exercise, and when they do, it's because they're about to hibernate or migrate. Wild animals also tend to have similar amounts of body fat between individuals (at a given age and sex), unlike industrialized humans. This makes me think that obesity is an unnatural effect of our current lifestyle. Whatever the cause, it's getting progressively more common.

According to certain nutrition experts, we know exactly what causes overweight. It's a character flaw known as overeating. Calories in, calories out. And the cure is to eat less. The problem is, this treatment has a poor record of efficacy.

Restricting calories is also fraught with problems. Each person's metabolism has a preference for a specific body composition within the context of a particular lifestyle. If total calories are restricted without changing diet composition, the body reacts vigorously to maintain homeostasis. Energy expenditure is reduced; muscle and organ mass diminish. The psychological effects are particularly bad, as anyone can tell you who has been on a low-calorie diet. In 1944, Ancel Keys undertook a calorie restriction trial in conscientious objector "volunteers" in Minnesota. They remained on a 1,570-calorie diet that was low in fat and protein and high in carbohydrate, for 24 weeks. Hardly a draconian calorie count. Here's a quote from the study:

As starvation progressed, fewer and fewer things could stimulate the men to overt action. They described their increasing weakness, loss of ambition, narrowing of interests, depression, irritability, and loss of libido as a pattern characteristic of "growing old".
Some of the men ended up suffering from neurosis and borderline psychosis before the end of the study, one culminating in self-mutilation. This is what we're being prescribed for weight loss?

There are some diet trends that have associated with rising obesity in the US. Per capita calorie consumption has increased. This increase is due to a higher consumption of carbohydrate. Total protein and fat consumption have been almost identical for the past 30 years. This period also saw increases in the consumption of unsaturated vegetable oils, hydrogenated vegetable oils and high-fructose corn syrup. It's hard to say from this association which of these factors (if any) has caused us to gain weight in the last 30 years, but it certainly isn't total fat or protein. Fortunately, we have other clues.

More aboutThoughts on Obesity, Part I

MARCH MISSION ACCOMPLISHED: SPRING PETITS FOURS

Diposting oleh good reading on Selasa, 18 Maret 2008

Sugar rushhhhh!
spring petits fours

seedless raspberry jam sandwiched in the petits fours


a platter of these petits fours would be perfect for a dainty tea party. yup, i've munched two of the cakes in the foreground. i couldn't wait!


These darling Spring Petits Fours are so sweet I had to chase them down with a couple of glasses of water! They are enrobed in an icing made of confectioners' sugar. The recipe called for a kilogram of confectioners' sugar and I thought that a bit much for the quantity of cakes, so I halved the recipe for the icing. In the end, I still had plenty of icing left over. Mind you, I scraped the dripped icing from the sheet pan I had under the rack of petits fours and reused/repoured it over the remaining cakes. I didn't encounter any problems with my technique so I'm glad I saved myself some ingredients. I hate to waste.


For half of the petits fours, I sandwiched seedless raspberry jam. These little raspberry ones were even sweeter. whooeey! I think if you were to have ONE of the cakes with tea or coffee it would be fine. I'm not too fond of royal icing or this poured icing glaze. All I taste is sugar. It makes me want to brush my teeth right away.


As for the performance of the cool flower cake mold...it's a winner! I sprayed it with baker's spray beforehand and the little petits fours popped out no problem! I'd like to figure out a way of employing the spring flowers petits fours mold for making something else. Maybe brownies? Financiers? hmm. I just don't like the icing. Unfortunately it's the icing that makes it look so pretty! The little cake part was good by itself. Yet again, a dessert that looks pretty but doesn't rock my tastebuds. I think I would use this pan again, but perhaps I'd look for an alternative to this icing. Perhaps a thinner coating of icing or better yet, a coating of white chocolate tinted in pastel colours! yeah! That would be a winner, I'm sure! I'm trying that next.


Check out the recipe here.
More aboutMARCH MISSION ACCOMPLISHED: SPRING PETITS FOURS

Monkey's Favourite Cake

Diposting oleh good reading


Over the past two years, it has already became a family routine that we visit the library almost every weekend...and I must say, the library can be a dangerous place...at least for a cookbook lover like me!!

I simply couldn't resist the temptation to try out the various recipes whenever I leaf through pages and pages of beautiful illustrations and photographs of gorgeous desserts. Be it cakes, breads or muffins, they have never failed to entice me to make an attempt to replicate what I have seen. Some of them may not eventually appear on my breakfast table, but at least the recipes are safely kept in my folder...waiting to leap out anytime when the opportunity arise. As a result of my frequent visits to the library, it has become very apparently...no matter how hard I try not to notice...that my BMIndex has been 'bullish' ever since. I bet this index will remain bullish, judging at the rate that I am going ;(


I have been quite lucky lately...to be able to pick up very brand new cookbooks at the library, which means that there will be less chance of me looking at a book that comes with several missing pages!

I happened to pick up this newly published cookbook "Cooking for Kids" a couple of weeks ago. What caught my attention half-way browsing the book was the name of this cake....Monkey's Favourite Cake! After reading thru what are the ingredients that go into the making of this cake, I was immediately sold. This recipe was placed right on top of my ever growing to-do list!


You see, although this is simple banana cake, it comes with fillings! I thot it was really unusual and I like that the filling is made with not only mashed bananas but also some ground almonds. I was a little greedy and thought that I could use a large banana instead of a small one as stated in the recipe. It was a mistake. The filling was too 'runny'...I tried to salvage by adding more ground almonds to the mixture. Fortunately, by doing so, I was able to adjust the consistency to get a thicker paste.


It's a very simple and straight forward cake to make. The cake tasted delicious with the fillings. The only fault I could find was that the fillings turned to a darker shade when I left the cake overnight. Even though with lemon juice added, it didn't really preven the banana from turning black...maybe I should have added more lemon juice?


Ingredients:
(make one 18cm cake)

125g butter, room temperature
125g caster sugar
125g self-raising flour
2 eggs, bring to room temperature, lightly beaten
2 large bananas, mashed
icing sugar for dusting

Filling:
50g ground almonds (toast at 100 degC for 10mins)
50g icing sugar, sifted
1 small bananas, mashed
1/2 tsp lemon juice


Method:
  1. Grease and flour the sides of a 18cm pan. Line the base with parchment paper.
  2. Sieve self-rising flour, set aside.
  3. Toast ground almonds at 100 degC for 10mins, stir it halfway to ensure even toasting, set aside.
  4. With an electric mixer, cream butter and sugar together until pale and fluffy.
  5. Slowly dribble in the eggs gradually, mix well after each addition.
  6. With a spatula, fold in the sifted flour. Mix until flour is fully incorporated into the batter.
  7. Add in the mashed bananas and mix well.
  8. Pour batter into prepared pan and bake in pre-heated oven at 180 degC for about 30-35mins until the cake springs back when lightly pressed, or a skewer inserted into the centre comes out clean.
  9. Remove from oven, unmold and let cool.
  10. To make the filling, mix ground almonds with icing sugar (sifted), then add mashed banana and lemon juice. Mix to form a smooth paste.
  11. Slice the cake horizontally into 2 layers. Sandwich the layers with the filling. Dust with icing sugar.
More aboutMonkey's Favourite Cake

Say Hello to the Kuna

Diposting oleh good reading on Senin, 17 Maret 2008


For those of you who haven't been reading the comments, we've been having a spirited discussion about the diet and health of hunter-gatherers here. I brought up the Kuna indians in Panama, who are immune to hypertension, live a good long time, do not gain excess weight, and seem to have less cardiovascular disease and cancer than their city-dwelling cousins.

I was hungry for more information about the Kuna lifestyle, so over the last few days, I've dug up every paper I could find on them. The first paper describing their lack of hypertension was published in 1944 and I don't have access to the full text. In 1997, a series of studies began, headed by Dr. Norman Hollenberg at Harvard. He confirmed the blood pressure findings, and collected data on their diet, lifestyle and kidney function. Here's a summary:

The Kuna are half hunter-gatherers, half agricultural. They cultivate plantains, corn, cocoa, yucca, kidney beans, and several types of fruit. They trade for sugar, salt, some processed cocoa and miscellaneous other foods. They drink 40+ oz of hot cacao/cocoa per day, some locally produced and some imported. A little-known secret: the Kuna eat an average of 3 oz of donut a week. They also fish and hunt regularly.

In the first recent study, published in 1997, the Kuna diet is described as 29% lower in fat than the average US diet (56 g/day), 23% lower in protein (12.2 g), 60% higher in cholesterol, and higher in sodium and fiber. The study doesn't specifically mention this, but the reader is left to infer that 65% of their calories come from carbohydrate. This would be from plantains, corn, yucca, sugar and beans. The fat in their diet comes almost exclusively from coconut, cocoa and fish: mostly saturated and omega-3 fats.

In the next study, the picture is slightly different. Their staple stew, tule masi, is described as being 38% fat by calories (from coconut and fish), exceeding the American average. In the final study in 2006, Hollenberg's group used a more precise method of accounting for diet composition than was used in previous attempts. The paper doesn't report macronutrients as a percentage of calories however.

I was able to find some clues about their diet composition. First of all, they report the meat consumption of the Kuna at approximately 60 oz per week, mostly from fish. That's 8.6 oz per day, identical to the American average.

By putting together the pieces from the later studies, a new picture emerges: a diet high in fish and moderate in protein, moderate in unprocessed fat (especially saturated and omega-3), and moderately high in mostly unprocessed carbohydrate.

Here's my interpretation. The Kuna are healthier than their city-dwelling cousins for a number of reasons. They have a very favorable omega3:6 ratio due to seafood, wild game and relatively saturated vegetable fats. Their carbohydrate foods are mostly unprocessed and mostly from non-grain sources. They also live an outdoor life full of sunshine (vitamin D) and exercise. The chocolate may also contribute to their health, as it contains high levels of potentially protective polyphenols. They're healthier than industrialized people because they live more naturally.

Another lesson to be learned from the Kuna and other exceptionally healthy indigenous peoples is that the human body can tolerate a large amount of carbohydrate under the right conditions
More aboutSay Hello to the Kuna

Real Food III: Yogurt

Diposting oleh good reading on Minggu, 16 Maret 2008

Fermented milk is regarded by many cultures as a delicious health food. It has cropped up all over the world in different forms: kefir from Caucasia, laban from the Middle East, dahi from India, creme fraiche from Western Europe, piima from Finland, mursik from Kenya, and yogurt from your grandmother's house. But these same people would scarcely recognize the colored, sweetened gel that passes for yogurt in grocery stores today.

Most if not all dairy-eating cultures ferment their milk. Why is this? There are three main reasons. First of all, unpasteurized milk spontaneously ferments at room temperature, usually becoming delicious "clabbered milk"- whereas pasteurized milk becomes putrid under the same conditions. So fermented milk is difficult to avoid. The second, related reason, is that fermentation prolongs the life of milk in the absence of refrigeration. Fully fermented milk is stable for weeks at room temperature.

The third reason is that these cultures know cultured milk is delicious and nutritious. Fermentation with specially selected cultures of lactic acid-producing bacteria and sometimes yeast work to break milk down into a form that is more easily assimilated. They partly (or fully) digest the lactose, which can be a problem for some people, turning it into tangy lactic acid. They also partially digest casein, a protein in milk that is difficult for some to digest. And finally, the lower pH of fermented milk makes its minerals more bioavailable.

Traditionally, milk was fermented in its unpasteurized state, but raw milk is hard to find in many industrialized countries. Raw milk has its complement of enzymes intact, such as lactase and lipase, which aid in its digestion. It also contains lactose-digesting bacteria that make milk easier for some to digest, and contribute to intestinal health. These are all eliminated by pasteurization. Fortunately, fermentation restores some of the benefits of raw milk. It reintroduces lactic-acid bacteria, along with their digestive enzymes. With that in mind, here's a simple yogurt recipe:


Ingredients/equipment:

1/2 gallon whole, raw or pasteurized, cow or goat milk (add extra cream if you wish)
Starter culture (commercial starter or 2 tbsp of your favorite live-culture yogurt)
Thermometer
Glass jars with lids
Cooler or yogurt maker

Recipe:

1. Heat the milk to 110-115 F (43 C). If the temperature exceeds 115 F, let it cool.

2. Add the starter culture. If the starter is yogurt, whisk it into the milk.

3. Pour the milk into glass jars and keep it at about 110 F for 4-10 hours. 4 hours will yield a mild yogurt, 10 will be tangy. If you don't have a yogurt maker, this is the tricky part. You can use a cooler filled with 100 F water to maintain the temperature and spike it with hot water after a few hours, or you can ferment it in your oven with the pilot light on if the temperature is in the right range.


If you want a thicker yogurt, bring the milk to 180 F (82 C) and let it cool to 110 F before adding the starter. Add fruit, honey or other flavors before fermenting. Enjoy!

As a final note, I'll mention that milk simply does not agree with some people. If you've tried raw milk and homemade yogurt, and they cause intestinal discomfort or allergies, let them go.
More aboutReal Food III: Yogurt

A Sandy Flip

Diposting oleh good reading


Spunky's favorite movie is 'Grease'. She always wants her hair to look like Sandy's. So today we went with the flip from the beach scene from the movie.


Pull the hair into two ponytails in the front (optional).


Spray the ends of the hair with hairspray, let dry.


I used a flat iron. Run it down the hair and when you get to the bottom, curve the flat iron towards yourself.


Repeat on remaining hair.


Comb smooth so all of the hair is uniform.


Spray with hairspray.
More aboutA Sandy Flip

French Braid to Ponytail

Diposting oleh good reading


Excuse this picture. We were in a hurry to get her out the door. She really doesn't have scary eyes.


Divide a section in the front of the hair.


French braid it back and secure it with an elastic.


Pull the remaining hair up into a ponytail, on the last time through, only pull the ponytail halfway through.


Curl the ends and piece them out.
More aboutFrench Braid to Ponytail

Short French Braid

Diposting oleh good reading


Smooth and wet the hair.


Start out with your braid sections low, just above the ears.


French braid it down as far as you want to go.


Secure with an elastic.


Add a bow.
More aboutShort French Braid

Knot with Curls

Diposting oleh good reading


I pulled the top half of her hair smooth and then did a knot. I curled the ends with the flat iron.
More aboutKnot with Curls

Braids to Ponytail with a Center Part

Diposting oleh good reading

Sometimes my kids can pull off a center part. I started this one with the intention of French Braids, but I was told that no French Braids were allowed today, so we went with two braids to a ponytail. This one is pretty self-explanitory; I did secure each braid with an elastic before I pulled them back and I ended up leaving the elastics in, the flower covered them up. Plus I was lazy.


More aboutBraids to Ponytail with a Center Part

Side Braid to Ponytail

Diposting oleh good reading

*Hairstyle submitted by Laurie

This is Little Londynn. Londynn is going through a braid phase right now so her mom has to come up with all sorts of variations. Here is one in particular.


Section the front part of the hair from the part to the opposite side of the part.
Braid the hair back to where your ponytail will be. Secure with an elastic.
Comb hair smooth to the ponytail and pull the braid to the ponytail.
Secure with an elastic.
Place a bow or ribbon in the hair.


Thanks for your daughters picture Laurie! We miss her!
More aboutSide Braid to Ponytail

Improving Fuel Economy

Diposting oleh good reading on Sabtu, 15 Maret 2008

OK, you know driving isn't good for the environment, but you're going to do it anyway. Here's how to substantially increase your fuel economy without buying a new car:

1- Drive deliberately; accelerate gradually. A car uses a lot of fuel when it's accelerating rapidly.

2- Drive 55 mph on the highway. This makes a huge difference. It maximizes fuel efficiency by reducing wind resistance, which exponentially increases with speed. This reduces gas consumption by more than 20% relative to a speed of 75 mph. 60 mph is almost as good, if 55 is to slow.

3- Draft a truck. Large trucks with flat, square backs leave a massive low-pressure zone behind them, which you can exploit to save gas. At 20 feet behind a standard 18-wheeler, you will use about 27% less fuel. If that's too close, you still save 20% at 50 feet, and 11% at 100 feet. Be careful because trucks have a blind spot behind them, and some truckers do not appreciate drafting.

4- Keep your car well-maintained. Clogged filters, faulty oxygen sensors and flat tires all hurt fuel efficiency.

5- Lose the cargo. The more weight you have in your car, the more fuel is required to get it up a hill or accelerate it.

6- Turn off accessories. AC is the biggest power drain, but the fan used to circulate air also draws power.
More aboutImproving Fuel Economy

Convenience Store Survival Training

Diposting oleh good reading on Kamis, 13 Maret 2008

I was on the road yesterday driving to a county court to defend myself (unsuccessfully) against a speeding ticket. I reluctantly stopped into a convenience store on my way back, to see if there was anything I would eat for lunch.

I actually did find two things that were palatable and not too unhealthy: canned sardines and toasted cashews. The total was $2.50, affordable even for a grad student.

The sardines were canned in "tomato sauce", which I realized later contained soybean oil. Oops. Well I suppose when you get your food at a convenience store, you have to expect such things.

The main thing that bothered me was the trash. I posted a mugshot (above) of the can, fork and plastic bag that I either trashed or recycled as a result of the meal. The total volume of trash was probably almost as much as the total volume of food.

I think if you stick to nuts, canned fish and fresh fruit, it's possible to survive a convenience store stop. And Baby Ruths. Those are healthy, right?
More aboutConvenience Store Survival Training

Two Tons of Steel

Diposting oleh good reading


While I was waiting for the bus one morning, I decided I'd count cars to see how many were single-occupancy vs. two or more. I came up with a ratio of roughly 20 single-occupancy vehicles for every multiple-occupancy vehicle. The multiple-occupancy vehicles were most often work trucks, containing plumbers or construction workers going to a job.

People have to get to work. Maybe they don't have public transit where they are, or maybe they just don't feel like sitting next to smelly commuters, but for whatever reason, here in the U.S. they drive their cars.

The average American weighs about 180 lbs. Due to our love affair with SUVs, the average American car weighs over 2 tons and climbing. That means every time a person drives a single-occupancy vehicle to work, they aren't just expending the energy it takes to move 180 lbs 15 miles. They're also lugging around a hulking two-ton chunk of steel and plastic. The passenger of the average single-occupancy vehicle is only about 1/24 (4%) of the mass that's being moved to and from work. That's ridiculous!

Of course, we make up for the big weight of our cars with big engines so they can go vroom. That adds up to a lot of gasoline burned, for no clear benefit. In other words, most of us could easily be driving vehicles that perform the exact same function but burn 1/3 the gasoline. I'm not talking about space-age technology here; these vehicles are already on the market.

Why do we commute so inefficiently when better options surround us? I think there are several reasons. First of all, gasoline is dirt cheap. We have no incentive to be efficient beyond our own consciences. Even with the recent price jumps, gasoline doesn't cost much more than it ever has, if you adjust for inflation. In Europe, where high taxes mean gasoline can cost four times as much as in the US, vehicles are lighter and more efficient.

Secondly, we've always been a very car-centric society. Cars appeal to our desire for independence, power and control. A large, powerful car is a status symbol in the US. We've inherited these attitudes from previous generations and we're just beginning to question them. Are there healthier and less wasteful ways of getting to work?

There are, and many of them are very simple. The first and simplest is a carpool. If we put two average Americans in our two-ton car, all of a sudden the people are 1/12 the weight of the vehicle. With four people, the number jumps to 1/6. We've just made our vehicle almost four times as fuel efficient, per passenger! 1,000 lbs per person is still a lot of weight to be lugging around though, so let's look at some other options.

If you are on the market for a new car, fuel-efficient models abound. The new hybrid cars by Toyota and Honda are twice as efficient as their non-hybrid brethren, and not much more expensive. Some people truly need SUVs for their business, but I have good news for them too: there are now hybrid SUVs as well. That's right ladies and gentlemen, they're the most efficient gas guzzlers on the market.

Public transportation is another great option where it's available. Buses are big and heavy but they can accommodate many people.

Now let's get into the really efficient vehicles. Motorcycles and scooters weigh from 250-500 pounds, meaning that a passenger would be from 1/2 to 1/4 the total weight of the vehicle. Now we're beginning to make some sense. Certain scooters can go over 100 miles per gallon of gasoline.

An even better option is to use vehicles that don't burn gasoline at all. A bicycle weighs about 20-30 pounds, making the passenger about 9/10 of the total vehicle weight. That weight ratio might change as the average American loses some weight however. Even if you factor in the extra food you eat when you cycle regularly, it's still terribly efficient. Best of all, bikes allow us to get exercise and feel the sun for a while.

The title for the most fuel-efficient and low-tech vehicle around goes to feet. When using a pair of these, the passenger is 100% of the weight of the vehicle. You can walk until you wear them out and you still won't have burned a single molecule of gasoline. Now that's efficient.

Thanks to lairdscott for the CC photo.
More aboutTwo Tons of Steel

MARSHMALLOW FLUFF-FILLED BITTERSWEET CHOCOLATE GANACHE-DIPPED CHOCOLATE MADELEINES

Diposting oleh good reading on Rabu, 12 Maret 2008

marshmallow fluff-filled bittersweet ganache-dipped chocolate madeleines

What a mouth-full! Will these madeleines trigger an involuntary memory in Proustian fashion?

These chocolate madeleines from Dorie Greenspan's cookbook Baking: From My Home to Yours, were quite easy to make. The hardest part was waiting for the batter to rest in the refrigerator for a minimum of 3 hours. After the requisite 3 hours, I took it out and proceeded to scoop it into the prepared madeleine pan.

Geez it was a stiff batter! It was the consistency of a cookie dough. I thought it was supposed to be more like a cake. My previous madeleine attempts with other recipes did not yield such a thick dough. I should have formed the batter into little oblong balls. I just plopped them raggedly from the spoon, thinking that the batter would just melt into the grooves of the pan.

No way. The batter didn't melt. Some of the baked madeleines were kind of lumpy and ragged-looking at the edges. These were the ones that I had not as neatly formed with a spoon. That being said, I guess it doesn't really matter in this case because I was going to stuff and dip them anyway.

It's always nice to have pretty-looking naked chocolate madeleines too though.

Bebe scarfed down her freshly-made madeleine. The marshmallow fluff was miniscule... I would have liked more filling in there. I was hoping for a ding-dong-sized portion of filling. Oh well. Next time I'll try to ram more filling in. The baked madeleines are pretty dense though and were not easy to fill so I suppose I'd have to dig out some of the interior to get more space for filling!

individually nestled in cupcake liners & ready to go to work tomorrow for sharing with staff!

Sorry for the overexposed pictures. It was late at night and I was too tired to take my madeleines down to my cardboard box food-porn "studio" for proper lighting! neah.

Here's the recipe if you're so inclined.

Fluff-filled Chocolate Madeleines

from Dorie Greenspan's Baking: From My Home to Yours


For the Madeleines
2/3 cup all-purpose flour
1/4 cup unsweetened cocoa powder
1/2 t baking powder
pinch of salt
2 large eggs, at room temperature
1/2 cup sugar
1/2 t pure vanilla
3/4 stick (6 T) unsalted butter, melted and cooled

Marshmallow fluff, for filling and frosting

For the Dip
4 oz bittersweet chocolate, finely chopped
1/2 cup heavy cream
1 1/2 T unsalted butter, at room temperature

To Make the Madeleines:
  • Sift the flour, cocoa, baking powder and salt together
  • Working with a stand mixer fitted with the whisk attachment or with a hand mixer in a large bowl, beat the eggs and sugar together until pale and slightly thickened, about 3 minutes.
  • Beat in the vanilla extract, then switch to a rubber spatula and gently fold in the sifted dry ingredients, followed by the melted butter.
  • Put a piece of plastic wrap directly against the surface of the batter and refrigerate for at least 3 hours or for up to 2 days. Chilling the batter gives you a better chance of getting the characteristic hump on the back of the cookies.
  • Centre a rack in the oven and preheat the oven to 400 degrees F. Generously butter 12 full-size madeleine molds, dust the insides wiht flour and tap out the excess. Butter and flour or spray the pan even if it is nonstick; skip this step if you are using a silicone pan. Place the pan on a baking sheet.
  • Spoon the batter into the molds.
  • Place the pan in the oven and immediately lower the oven temperature to 350 degrees F. Bake the cookies for 13 to 15 minutes, or until they feel springy to the touch. Remove the pan from the oven and rap one side of the madeleine pan against the counter--the plump little cakes should come tumbling out. Gently pry any reluctant cookies out with your fingers or a butter knife. Cool to room temperature on a rack.

To Fill the Madeleines:

  • Fit a small pastry bag with a small plain tip and spoon the fluff into the bag. Use the point of the tip to poke a hole in the rounded (plain) side of each madeleine, and pipe enough fluff into each cookie to fill it--stop when the fluff reaches the top of the cake. (You'll use only a bit of fluff).

To make the Dip:

  • Put the chocolate in a small deep heatproof bowl. Bring the heavy cream to a full boil, then pour it over the chocolate. Wait for 1 minute, then gently whisk the cream into the chocolate: start at the centre and slowly work your way out in concentric circles until you have a smooth, shiny mixture. Gently whisk in the butter.
  • Line a small baking sheet with wax paper. One by one, hold a madeleine at its narrow end and dip it into the chocolate, then lift it up, let the excess chocolate drip back into the bowl and place smooth side down on the wax paper. Slide the baking sheet into the refrigerator to set the glaze, about 15 minutes (You'll have more ganache than you need, but making a larger quantity produces a better ganache. The leftover dip can be covered and refrigerated for 1 week or frozen for up to 1 month.)
  • If you'd like, pipe a little squiggle of fluff on the top of each madeleine once the chocolate is set.
More aboutMARSHMALLOW FLUFF-FILLED BITTERSWEET CHOCOLATE GANACHE-DIPPED CHOCOLATE MADELEINES