But how could a test drive design??

Diposting oleh good reading on Kamis, 31 Mei 2007

Good question, I'm glad you asked...

Actually, I asked myself during my long a** commute, which gave me a lot of time to reflect.

The weird thing about TDD is that there is no design.

You don't design tests. You write them, one at a time.

This is something that makes TDD difficult. Even after I understood the basics, it was still a challenge to stay with it. I had to stop thinking about how to solve the problem and focus only on how to test the solution.

It's not that I don't think about designs at all, but I'll only design up until the point I know I'll be able to start my first test. This design is focused on high level interactions and the goals of my solution.

When the TDD light bulb went off above my head, my thinking changed to this:
What can I do to make this test as easy as possible to write?

Thats it. Kinda lame looking at it now, but really, thats it. When I focused on testing and that alone, that's all that remained.

If you have difficulty dispelling design noise, pretend you are Harry Potter and have your very own pensieve (that would be pretty cool, no?). Put the thoughts in the pensive. They will be there when you have the focus they deserve (In real life this works well with index cards)

Unless it is a new user story, I throw it out. I don't worry about it, because if I need it, it will happen.

But what if I forget? Are my user stories satisfied? Are my acceptance tests passing? I guess I don't need it.

But I need to refactor my code! Well, I should be doing this all the time! If I didn't have a chance for whatever reason, next time I am in the test, it will be so painful, I'll refactor. I trust myself and my team. When this happens a lot, I need to think about what done means (this is another topic)

How do I make tests easier to write?

When I can't make a test without getting frustrated or overwhelmed with what-ifs or setups, I introduce a mock and encapsulate the behavior. Using that mock just made my life a whole lot easier.

Did I just drive the creation of a new interface? Is there a new interaction that didn't exist because it was the easiest thing? Will my class be more simple because its not doing something too complicated? Will the new class be cohesive because it was created for a specific purpose?

Wow, not only am I creating a new design as I go, but all other things happen because I'm trying to make my life easier.

Anyone else see the beauty here?

Or the power?

When I have a very complicated problem, I break it up organically by test driving. Each part not only makes sense, but is easier to implement because I am able to focus on small pieces. I have instant gratification that each worked on its own, as it was created, without any integration.

Sweet bonus, the solution doesn't do anything extra and I didn't go on any tangents because I didn't want to write extra tests.

Extra sweet -- I spoke to coworkers, took a lunch break, wrote a blog post and had NO fear my momentum or focus would be lost.

Writing tests is more difficult than writing code, but when I focus on making my tests as easy as possible to write, it keeps me in the test, drives my design and simplifies my thinking.
More aboutBut how could a test drive design??

Xna Feature Request

Diposting oleh good reading on Selasa, 29 Mei 2007

Kris is soliciting votes for an xna feature -- GameServiceContainer.GetService<T>
(i.e. Make GetService support Generics!)

Follow the link and click "vote now".

Use your MSDN/Live credentials to log in.

If you get a page not found error, you need to complete registration for Microsoft Connect -- go to the "My Participation" link in the left menu.
More aboutXna Feature Request

No-Bake Chocolate Cheesecake

Diposting oleh good reading on Senin, 28 Mei 2007


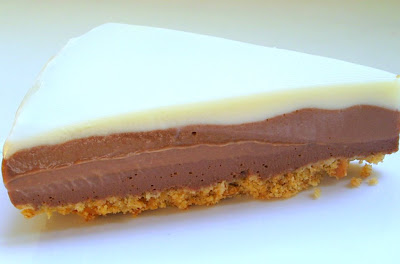
Made this no-bake cheesecake with a pack of Kraft's Philadelphia light cream cheese. It is supposed to be a Triple layer chocolate cheesecake. But you can see from the photo, it didn't turn out as expected. The three layers were not clearly distinctive :(

I guess the proportion of the dark and white chocolate was not right for the middle layer...as I sort of mix and match recipes to come up with this version. The original recipe uses 40g dark chocolate and 40g white chocolate for the middle layer. If I were to make this again, I will change it to 20g dark chocolate and 60g white chocolate. Nevertheless the cheesecake tasted very refreshing and light as I used yogurt instead of whipping cream.

Ingredients:
(makes one 18cm cheesecake)

for the base:
110g digestive biscuits, crushed into fine crumbs
60g butter, melted

for filling:
250g cream cheese, soften at room temperature
60g caster sugar
200g non-fat plain yogurt
2 teaspoons gelatin powder
3 tablespoon water
100g dark chocolate, melted
140g white chocolate, melted

Method:
  1. Mix biscuit crumbs; melted butter together and press firmly with the help of a spoon onto the base of a 18cm round pan. Chill for 30 minutes.

  2. Place gelatin powder and water in a bowl. Heat a pot filled with some water until just simmering and place the bowl inside the pot. Dissolve gelatin and water in the bowl. Keep warm.

  3. With a whisk, beat cream cheese till soft. Add in sugar and whisk until smooth and creamy.

  4. Add in yogurt and continue to beat till smooth. Blend in gelatin solution and mix well.

  5. Divide cheese mixture into 3 equal portions.

  6. For the 1st portion, stir in 80g of melted dark chocolate and spread evenly on the biscuit base. Chill in the fridge for a while. (I pop it in the freezer while preparing the 2nd layer).

  7. For the 2nd portion, stir in mixture of 20g melted dark chocolate and 60g melted white chocolate. Spread over the 1st layer. Chill in the fridge for a while.

  8. For the 3rd portion, stir in 80g of melted white chocolate. Spread over the 2nd layer. Chill for 3 to 4 hours before serving.

Tip: You can melt the chocolate in 3 separate bowls, ie 80g of dark chocolate in a bowl, 20g dark chocolate plus 60g white chocolate in another and 80g of white chocolate in a 3rd bowl.
More aboutNo-Bake Chocolate Cheesecake

Pair programming, team ownership and collaboration -- Oh crap!

Diposting oleh good reading

For me, like many others in our field, talking to people and collaborating wasn't as natural as coding and designing.

I never needed to talk out a design, it would just happen. I loved creating software and I was quite good at it. In a few short years I went from code monkey to architect and project engineer.

In all this time, I never developed a sense of team, community or sharing. I had a hard time communicating my designs; I never thought about them, I just did them. I had difficulty listening.

When I first got to Oxygen, with only pair programming, I was completely frustrated. I was use to excelling and being the hero of the team.

At pairing and communicating I, well, let's just say it didn't come so naturally.

For me, the most difficult part of pairing and code ownership is giving up what's best for you and substituting it with what is best for the team. This is a concept that is very important for the entire team's productivity and happiness.

In our world we have a lot of brilliant developers, with a lot of brilliant ideas. Our designs are more of an art than a science and with any art, it is a personal expression. This is why collaboration, sharing and pairing is so difficult -- in our minds our design is always really good.

And for each individual that is true.

But for someone else, a solution that brings you great success may bring them great frustration and pain.

What is the solution? How can we all agree? In what ways can we share our knowledge?

I'm not sure... but I think about it a lot.

While differing opinions can bring the best ideas, spending an entire pairing session (or worse days, weeks, forever) bickering about differing opinions is much worse than not bringing your ideas to the next level.

In pairing, when you have two opinions, the best option is to choose an opinion and run with it. If its not the right solution, it will be obvious right away.

However, sometimes its not a wrong decision, its just not the better solution and the pain of the decision may not be felt at that moment.

Will the frustration of the person be felt in the group? Probably not if they are sometimes heard. If your environment has a few people who are more stubborn than others, you may have some frustrated developers who need to get their way more often.

On any team, with each pair, you will eventually find a groove. How long it takes and the style of your solutions with depend on the individuals of the team. And the style you find may be completely different than what you do on your own.

Whatever gives your team the ability to keep their velocity, happiness and quality high is the best practice.
More aboutPair programming, team ownership and collaboration -- Oh crap!

TDD, What a bitch

Diposting oleh good reading on Minggu, 27 Mei 2007

Whenever I talk to someone who is interested in learning TDD I let them know that it is a very difficult concept to put into practice. It takes a lot of discipline and significant changes in the way you think and code.

Nobody mentioned this to me before I started. Everyone spoke of TDD like magic -- it changes your design, its the best thing ever, its so simple, all you need to do is write your tests before your class, you'll love it... (Ignore the man behind the curtain!)

After a few days of trying, I began to think something was very wrong. I wasn't quite the developing genius I thought...

That couldn't be true!

Like any reasonable person in my situation -- overstressed, too many responsibilities, tight deadlines, stakeholders bothering you, etc... I continued to pound my head against what seemed to be a steel wall of TDD that just wouldn't fit.

My head (now bleeding and bruised) was focused on how to solve the problem instead of how to test the solution. I didn't know it at the time, but until I changed this behavior, I would always be fighting my instincts and not gaining the benefits.

Fast forward two months and I was still, well, sucking, but not as bad. I had some test coverage, I wrote some classes test first, but I did not test drive every class, it seemed like too much work. I also didn't understand mocks, at all, and gave up on writing my own mock classes after about a day, so no interaction testing and lots of coupling.

It was very frustrating to have 1/3 of my tests fail if I was working on a common entity or if a bug showed up. Also, because I was coupling all my classes together I wasn't seeing the full benefits of test driving.

My focus was just as bad as coding before. If I needed a new behavior, I'd have to code. This meant testing the other class, which may cascade into other tests. Thinking about it, I think my focus was worse. Sometimes I could write a stub for the new behavior, but say I was creating a method that returned a boolean that had different responses that I needed to test... And there is the setup to get it into each state. And thats just a boolean assuming there's no interactions...

My thinking was in the same place it was a few months earlier. The only difference was I could write a unit test before I wrote code. But I wasn't test driving design. I had the design in my head. I was writing the unit tests for the classes and interactions I already decided I needed.

Fast forward two months: New job, new project, fresh start, woo hoo!

With this project, I was determined to understand TDD. A lot of bright people that I respected were saying great stuff and I was going to get it.

My first step was to understand nMock.

I knew using real classes in my tests was killing my focus, but I didn't yet know how much it affected my design. I read the nMock web page, explaining the api, about 500 times... "Okay," I said to myself. "You can use an interface before its implemented and verify its been called."

It sounded so simple, it read so simple, yet it made NO sense to me.

My delight in using mocks (once I figured out how to use them) was focused on several things -- I could focus on the test I was writing, my tests weren't failing because of another class and my tests were a lot simpler because I didn't need to put in knowledge about other classes to verify or assert behavior in the CUT. Implementations of interfaces used in tests didn't affect the tests anymore.

After a few weeks of nMock, what I began to notice was that my design, code, thinking, and mind was changing.

A lot.

I only made a class after it was being used as an interface in another class. That class' only public methods were in that interface. I never debugged my application. I almost never debugged my tests. My test coverage was over 90%. My design evolved through the tests.

I was test driving. Finally!

Making tests was so focused and had immediate results I was addicted. At some point, something happened in my brain and this great thing called TDD finally came in. I didn't want to write in the CUT first, because it wasn't how I was thinking. It seemed like more work.
I was in the test.
More aboutTDD, What a bitch

Chocolate Marble Bread

Diposting oleh good reading on Senin, 21 Mei 2007

I finally made it! This is my second attempt on a chocolate swirl bread...it is definitely much better than my previous attempt.

I realised that in order to prevent the chocolate from oozing out from the dough, the texture has to be right. The first time when I did the chocolate paste, it was too soft. The trick is to cook the chocolate paste till very thick and almost dried out...forming a big lump. The texture is almost like a soft cookie dough.

As I needed to use up my whipping cream before it expires, I used the Hokkaido Milky loaf dough instead of the dough recipe from the chocolate swirl bread. I made the chocolate paste while the bread maker was doing the manual work of mixing and kneading.

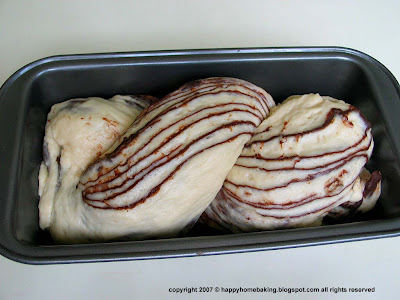
Here's how the dough looked like when it was plaited, ready for the second proofing.


The dough rose beautifully during the second proofing, but my shaping skills need further improvement. I wasn't able to achieve an even loaf...one of the sides was smaller than the other!


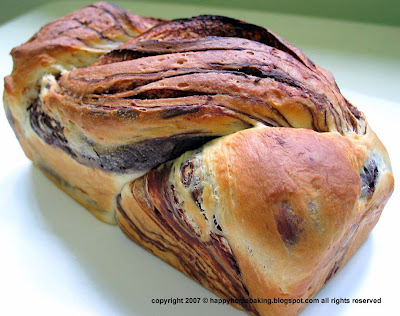
The finished loaf....all swirly and twirly...I was so glad that this time round, the top was not burnt. I've learnt that as the heating element of my oven is located on the top, I'll have to bake the bread on a lower rack position to prevent the top from burning. I positioned this loaf such that the top of the bread was at the centre of the oven. I was so pleased that the bread was browned evenly all over :)


I didn't really follow exactly how the dough was supposed to be rolled and shaped as given in the chocolate swirl bread recipe. Instead I adopted the rolling and shaping method of a basic danish bread. I was also too lazy to chill the dough in between the shaping, rolling and folding...I simply did it in one shot and let it proof. Luckily, the marble effect turned out great.


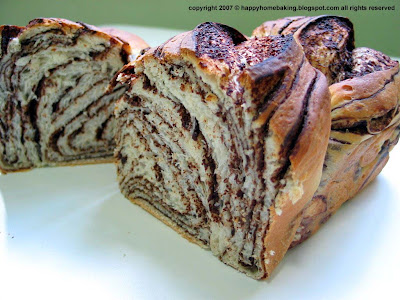
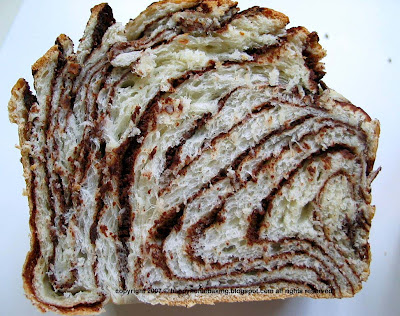
This is indeed a very interesting bread...each slice has got slightly different swirls...and the exciting thing is, you won't know how the marbling effect will be until you slice the loaf =)

and here's how I did my quick and easier version of the chocolate swirl bread.

Ingredients:
(makes one small loaf)

chocolate sheet
20g cake flour
50g sugar
1 egg white
80ml milk (warmed)
18g cocoa powder
10g butter

bread dough
270g bread flour
30g cake flour
5g active dry yeast
15g milk powder
40g caster sugar
4.5g (3/4 teaspoon) salt
125g fresh milk
Half an egg
75g whipping cream (heavy cream)

Method:

chocolate sheet
  1. Mix sugar and cake flour into the egg white until smooth.
  2. Place milk in a saucepan and heat till just simmering.
  3. Add coca powder into the milk and stir till cocoa powder is incorporated into milk.
  4. Add egg white mixture into the cocoa mixture and stir over low fire till mixture thickens and form a thick lump.
  5. Add in butter and stir till incorporated.
  6. Leave to cool. Place in a plastic bag and roll into a square (about 14cm x 14cm). Keep refrigerated before use.

bread dough
  1. Place all ingredients in the bread pan of the bread machine, according to the sequence stated in the instructions of your bread machine. Select the Dough function to knead and proof the dough (about 1hr 30mins).
  2. Take out the dough and punch out the gas produced. Roll out the dough into a rectangle (about 45cm x 20cm) on a lightly floured work surface. Place the chocolate sheet on the middle of the dough. Wrap both ends of the dough over to cover the chocolate sheet completely. Take note that the dough should be rolled long enough for both sides to fold over the chocolate sheet, leaving a border edge of about one inch. Seal the edges tightly. The dough should now be about 15cm x 20cm.
  3. Roll dough from centre to the edges to form a rectangle (about 45cm x 20cm). Do this gently to prevent the chocolate paste from oozing out. Fold the dough into 3 folds.
  4. Repeat step 3 above. (If you want to create more swirls, repeat this step twice.)
  5. Finally, roll dough to 30cm x 15cm. Make a cut in the middle (length wise) leaving an inch uncut. Twist and plait. Place plaited dough in loaf pan and let proof for another 30mins or until the dough rise to about 80% of the loaf pan.
  6. Preheat oven to 200 degC but bake at 180 degC for about 35 - 40 minutes. Remove from oven and unmould immediately. Let the loaf cool off before slicing.
More aboutChocolate Marble Bread

Sweet Potato Bread

Diposting oleh good reading on Minggu, 20 Mei 2007

These Japanese sweet potatoes have beautiful purple/pinkish skins, although the insides are orange. They are sweet and moist. I would usually boil them and will eat them plain. They taste really good when piping hot!

I used these sweet potatoes to make a loaf of bread. I omitted the roll oats called for in the original recipe and substituted muscovado sugar with plain sugar. The loaf was easily made with my bread machine using the basic function.

The texture of the bread was a little dense and rather moist. The taste wasn't really fantastic, but neither was it too bad. I couldn't really taste any flavour from the sweet potatoes though.

I will not post the recipe here as I wasn't quite sure whether I got it right?!

More aboutSweet Potato Bread

Storage

Diposting oleh good reading on Sabtu, 19 Mei 2007

I have amassed many, many articles for doing hair. An addiction if you will. A brilliant friend devised this clever way to store her hair articles. I just modified it for my own needs. I purchase an over-the-door shoe holder from Wally's (the cheap one, it is the only one that is see through) and then I separated my accessories by color. I then used two baggies, one for the clips and one for the ribbons. Depending on what I am doing with their hair that day, I just pull out the proper baggies and it makes putting them away easier as well.


Elastics posed another problem. I hated rummaging through a huge tote of elastics. So one night when I had nothing better to do, I sorted elastics. Now I buy them pre-sorted, but putting them into a sectioned tackle box did the trick.

More aboutStorage

High ponytails for the hair impaired

Diposting oleh good reading


My baby has short hair and I keep it short until all of her layers grow together (I have issues with scraggly baby hair). I wanted to have two ponytails on the top of her head one day so this is what I came up with. Make sure her hair is VERY wet and use lots and lots of hairspray. But the result is so fun.


More aboutHigh ponytails for the hair impaired

French braid across the front

Diposting oleh good reading


I make my daughter lie on her side for this one. I part the hair and pull the bottom half into a ponytail to keep it out of the way. I start above one ear and go across the front of her head. This one takes a little patience. I do an under French braid because of all of her baby hairs in the front, but it looks really cute with a regular French braid.


More aboutFrench braid across the front

Twist to a ribbon

Diposting oleh good reading


I don't know how to explain twists. I am not very good at them myself. So just look and see if you can figure them out.


More aboutTwist to a ribbon

Cascading knots

Diposting oleh good reading


Divide the hair in half. Pull into two ponytails and knot them. Then add that ponytail to the next section and knot again. Do the same thing one more time.

More aboutCascading knots

Dual French Braids to Crown

Diposting oleh good reading


I think this one is so feminine. Part the hair into two and French braid to the crown. Secure with elastics and add a pretty ribbon. I love curling the ends with this one.


More aboutDual French Braids to Crown

Smocking

Diposting oleh good reading


This is the cutest using bright-colored elastics. Divide hair into ponytails at the front of the head. Separate the ponytails into two. Divide hair again. Slowly go down in number. I like to stop their hair at one or three ponytails. It is all personal preferance.
More aboutSmocking

Soft and Sweet

Diposting oleh good reading


For Easter I like their hair soft. Reminds me of fluffy chicks. So for this one I pulled her hair up into a ponytail from her ear opposite her part to her part. I put it in a ponytail in the center of the two points. I curled her hair with the flat-iron and fluffed the curl.
More aboutSoft and Sweet

Ribbon Braids

Diposting oleh good reading


Pull the hair 1/2 way up into two ponytails. At the base, tie a double long length of ribbon. Braid to the ends using the ribbon as one of your three sections. Secure at the ends with elastics. Tie the ribbons up and add more as you desire. Curl the ends and you have a beautiful princess.

More aboutRibbon Braids

Messy buns

Diposting oleh good reading


I love a slanted part. Part the hair from the side where their hair parts naturally and part it to the center of the crown. Pull into two ponytails. Twist until the ends just poke out. Secure with bobby pins. I love putting ribbons at the base. Spike out the ends.


More aboutMessy buns

Dance Hair

Diposting oleh good reading


I LOVE curls on my kids. LOVE them. Unfortunately we were blessed with stick-straight hair. Our perfect solution is a flat-iron and a small barrelled curling iron. I pulled her hair 1/2 way up and sprayed the heck out of her hair until it was rather stiff. I combed it out and then went to work. Alternating sections, I curled her hair with the curling iron and the flat iron. To curl with a flat iron, you clamp the hair at the base with the iron and wrap the hair around it like you are going to curl ribbon on a gift. Slowly pull all of the hair through the iron and you end up with beautiful curls that hold better than they do if you use a curling iron. Top with a fluffy ribbon and you have hair worthy of a dance recital.


More aboutDance Hair

Knots

Diposting oleh good reading


Some call these topsy-turvy ponytails, we call them knots. Whatever you call them, they are great for vacations and swimming because they keep hair out of sweaty faces. Pull the hair into a ponytail. Use a rat-tail comb to divide under the ponytail in half. Take the elastic and pull it through the part you made. Clear as mud? Good.
More aboutKnots

Lots of ponytailsl with cute clippies

Diposting oleh good reading


I think this one is cuter on thicker hair, but I tried it on my little girl when hers was thinner. I have done it many times since then, but this is the only picture I have.
More aboutLots of ponytailsl with cute clippies

Ponytails with zig-zag part

Diposting oleh good reading


Using a rat-tail comb, part the hair in a zig-zag down the center. Pull into two ponytails. Add ribbons for a cute finishing touch.
More aboutPonytails with zig-zag part

Double twisted bun

Diposting oleh good reading


Pull the hair into a low ponytail. Section into two pieces. Twist one piece and secure with bobby pins. Twist the second section and wrap the opposite way. Leave the ends out for flipping.
More aboutDouble twisted bun

Two braid buns inter-twined with ribbon

Diposting oleh good reading

Make two ponytails at the crown. Tie a long length of ribbon and section the ponys into two. Using the ribbon as the third piece, braid. Fasten at the ends with an elastic. Wrap the braid into buns securing with bobby pins. Tie a ribbon at the base.

More aboutTwo braid buns inter-twined with ribbon

Two-braids pulled together at the crown

Diposting oleh good reading


More aboutTwo-braids pulled together at the crown

Two ponytails tied in knots

Diposting oleh good reading


This one was much cuter before she came home from school. I took the ponytails and twisted them and tied them in knots at the base. I secured the knots with bobby pins.


More aboutTwo ponytails tied in knots

Lattice Ponytails

Diposting oleh good reading


More aboutLattice Ponytails

Hot Agilista Update

Diposting oleh good reading on Jumat, 18 Mei 2007

Hot Agilista #2 (that's me) is in her hotel room writing a blog entry. Meanwhile Hot Agilista #1 (thats Oksana) packs her things for the journey home.

Things I learned at devteach:
  • Oksana and I are Boffers, not Speakers
  • Ayende's mind never stops. Its not surprising, but its been great to spend so much time with him here. He could probably fill a book
  • Scott Bellware likes to torture people by taking them to questionable restaurants.
  • JP Boodhoo is very disciplined and plays Gears of War!
  • ActiveNick and I are going to have fun playing Gears of War with JP!
  • Oksana rocks (I already knew that, but its still true)
  • Carl Franklin is quite the musician
  • Udi Dahan is surprisingly easy to talk to
  • Beth Massi is very cool
  • Roy Osherove is very funny.

PS although not documented by our paparazzi, our BoF was everyone's devteach highlight!
More aboutHot Agilista Update

Xbox back online

Diposting oleh good reading on Rabu, 16 Mei 2007

Someone mentioned today that my xbox was broken and I realized I needed to post about my gaming activity.

An update:

As of two weeks ago it was fixed and until I left for DevTeach I was spending most of my time playing Guitar Hero. What a great game!!

I was so proud of myself for getting through medium with mostly 5 stars (still have a few to go), I decided to try hard... and well, it was freakin' hard!

Much to my surprise I was able to beat several songs. My energy was high and my pride was higher.

Then it happened... Woman on Hard... WTF.

I tried to practice, but those pull offs totally kill me... and even when I get past the initial crazy part, that solo??? Really, they did that to knock you down a bit, let you know hard is hard...

When I get home, I'll return to medium until I have all 5 stars, then I'll try hard again.
More aboutXbox back online

Wholemeal Bread

Diposting oleh good reading


I've been missing from blogging for the past few days...was busy...hmmm...with doing Nothing ;) Yes, I have let my oven and bread machine a good rest while I was busy with nothing in particular...unless you count watching Korean drama on VCDs as doing something :P

I tried making kaya with the bread machine...but it was a complete flop :'( couldn't really pin point what went wrong...except I could have used coconut cream instead of coconut milk, the kaya was not smooth at all, it looked like a bowl of scramble eggs, haha! I still didn't want to throw it away though...will keep it in the fridge until there's a need to clear space for other stuff!

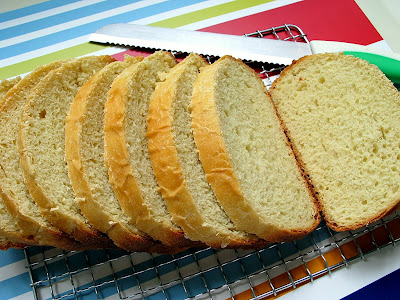
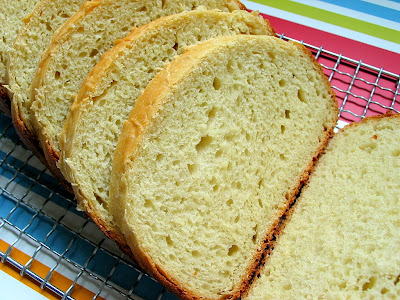
Was deciding whether to give the chocolate swirl bread a second attempt, but was too lazy to do anything too complicated other than a simple loaf. I made this country-style wholemeal round instead.


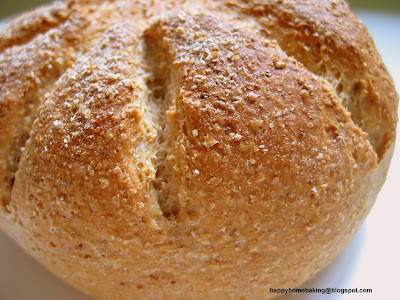
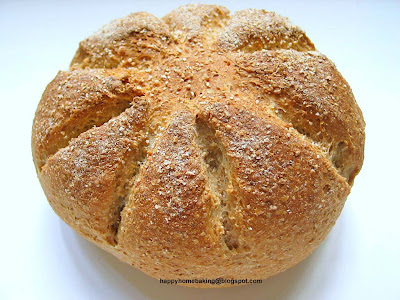
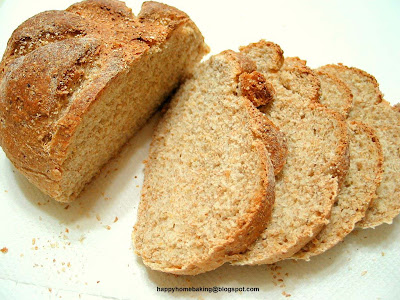
Presenting my first rustic loaf!

I would usually make soft sweet bread as my kids don't really like rustic kind...they find them too hard, coarse and chewy. Nevertheless, I went ahead with this as I really wanted to give rustic bread a go. It was a rather straight forward bread with very basic ingredients, there's no eggs or milk added. It is also not written anywhere in the recipe that there is a need to spray water in the oven, to create steam for the bread...something I am still a little afraid to try, as I wasn't sure whether it is necessary...since my oven comes with a function that will diffuse vapour?

I used the bread machine to knead the dough for 20mins and left it to rise in room temperature. I must say, our weather here in Singapore, with a typical room temperature of 28~30 degC plus the high humidity all year round...is really good for rising bread. The dough would usually double the size within an hour. It was very easy to shape the dough as it was not sticky at all. After punching down the dough to knock out the gas, simply give it a few knead and then lightly flatten it before shaping it into a smooth round ball. The trick here is to shape the dough as if you were filling it with some fillings, and gather all the loose ends and seal them together. Let it proof for another 30mins before dusting it with some wholemeal four and making 2 long slits (I made 4 instead! wanted to make 3 but due to my wrong judgement, got to make 4 cuts to make the dough look balance), and it is ready to send into the oven.


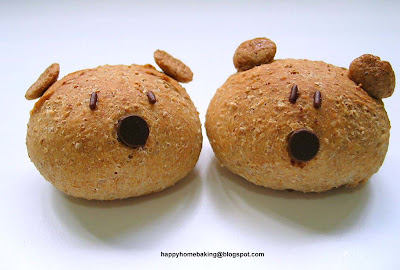
I pinched out 2 small dough and had a little fun decorating them. With some cookie crisps, chocolate rice and chocolate chips, my kids and I made these two cute bears or do they look more like the horlicks doggies? I actually wanted to make them into piggies, but my younger son strongly disagree with the idea! It wasn't easy to stick the cookie crisps onto the dough as it was not sticky at all, and the chocolate chips fell off the noses while the rolls were baking in the oven. The rolls expanded in the heat and pushed the chips off. I managed to "patch" them up after the rolls were cooled ;)


The crust of the bread was crisp and I really like the "look and feel" of the rustic loaf, not forgetting the smell of the bread when it was fresh out of the oven. I was pleasantly surprised to find that the crumbs were rather soft and tender, the texture was very much like a slice of wholemeal sandwich bread.

Here's the recipe for the bread which I have taken from a Japanese-Chinese translated cookbook, 面粉点心大会串.

Ingredients(makes a 20cm round bread)

150g bread flour
150g wholemeal flour
1 teaspoon instant yeast
2 tablespoon sugar
1 teaspoon salt
10g butter
170ml water

Method:

  1. Place bread flour and wholemeal flour in a mixing bowl and stir with a whisk to combine. I did this by measuring both types of flour in a plastic bag and then give a few shakes to mix the flours.
  2. Place all ingredients (according to the sequence as stated in your bread machine manual) in the bread pan and set the machine to the Dough setting. You can either leave the dough to proof in the machine, or let it proof in room temperature. If you are proofing the dough in room temperature, place it in a big mixing bowl, and cover it with cling wrap. Let is rise till double in bulk, takes about 1 hour.
  3. Remove dough from bread machine/mixing bowl. Knock out the dough and give a few light kneading. Gently flatten the dough and shape into a smooth ball. Place dough on a baking sheet lined with parchment paper. Cover with a damp towel or plastic bag and let it proof for another 30mins. Note that this time round, instead of cling wrap, you should cover the dough with plastic bag, as the cling wrap may stick onto the dough and prevent it from rising properly.
  4. Preheat oven to 180 degC. Dust with some wholemeal flour and make 2 long slits on the dough with a sharp knife. Bake for 30mins until the crust turns golden brown. Remove from oven and let cool on a rack.
More aboutWholemeal Bread

The Gentle Art of Pair Programming -- the Short, Short Version

Diposting oleh good reading

Oksana and I held a birds of a feather session on Pair Programming this afternoon and after a late start, we had big turn out.

The audience was excellent and enthusiastic. Thank you for your questions and interest!

For those of you who didn't get enough of us, we'll be presenting a full tutorial at Agile 2007 in August -- more details to follow.
More aboutThe Gentle Art of Pair Programming -- the Short, Short Version

Hello from DevTeach

Diposting oleh good reading

DevTeach is well underway in Montreal and the agile track, has been getting a great turn out. I'm really glad to see an interest in agile; I hope people take something back with them.

While the presentations are good, the best part of any conference is the conversations. DevTeach is no exception.

Session Highlights:
1. JP Boodhoo's sessions on refactoring and enterprise patterns -- JP is an enthusiastic speaker and I like his style. Longer sessions would have been great for both these classes. JP even tolerated all my questions, which takes great patience.
2. Jerry Miller's session on Rules of Agile Design -- I agree with everything he had to say (except calling them laws :P)
3. Scott Bellware's session on Behavioral Driven Development -- do we need to rethink our naming conventions again? I really enjoyed how Scott took us through the evolution of an interesting, but understandable example.

There are a few sessions I would have liked:
1. Analysis Services in Sql Server or something about MDX
2. Introduction to Inversion of Control
3. Commands and Bindings in Xaml
4. The Gentle Art of Pair Programming (the full thing!)

Oksana and I are buying Ayende, the creator of Rhino Mocks, for a beer later, so that should be fun!
More aboutHello from DevTeach

My First Korean Dish

Diposting oleh good reading on Kamis, 10 Mei 2007


I have finally cooked my first Korean dish...Kimchi Bokkumbap (stir fried Kimchi with rice).

I managed to squeeze some time to run down to Wisma Atrium to get kimchi from this eatery located within Food Republic. I find the kimchi very fresh and crunchy...so unlike those side dishes you get when you order Korean food from stalls at food courts. It doesn't have a sour taste to it, and it is very spicy! One box costs S$4.50...not really too expensive.

I followed the recipe from My Korean Kitchen, except that I didn't have bacon, and so I replaced it with chopped french beans. Since my boys can't really take spicy food, I dished out their portion just before adding in the kimchi. Besides kimchi, this is the first time I have used enoki mushrooms in a fried rice dish. This simple meal is really easy and very appetizing. My elder boy has requested that I should also cook his portion with kimchi the next time...he's slowly able to take spicy food...he could even take a few bites of the kimchi :)

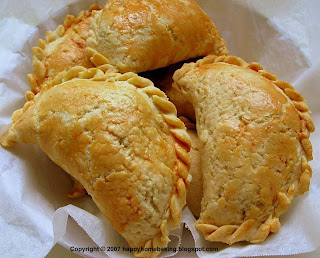
I made some baked curry puff this morning...***sigh***...I didn't like the dough at all...it was so crumbly and I had a hard time trying to roll and fill it without breaking the dough into pieces! I like making curry puffs...more specifically, the crimping part...but I didn't like the idea of having to deep fry the puffs. So, I was very eager to try this recipe where the puffs can be baked instead. Too bad the dough was too crumbly, the curry puffs didn't look pleasing at all. My boy couldn't wait to taste it though (I wasn't even keen to try!)...and the verdict...he told me the crust tasted like the Pooh cookies, very buttery, and you would only know that you were eating a curry puff after you taste the potato filling. It will be unlikely that I will make these again :(


More aboutMy First Korean Dish

Swirls and Twirls

Diposting oleh good reading on Selasa, 08 Mei 2007

Yes, I am back to bread making...only after a few days break! I made a plain loaf on Sunday and a batch of chocolate sweet buns this morning. I am really mad over bread making lately...thanks to my bread machine...I have been thinking nothing but making bread, bread, bread!

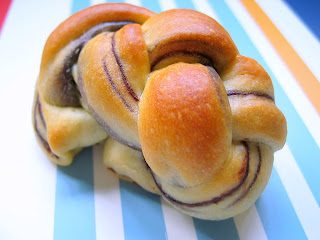
I used to wonder how bakers made those slits in between the buns. Thanks to a Chinese Cookbook "Bread Magic" which I bought many months ago, I am able to make this roll myself! There are many useful step-by-step photos in this cookbook, great for understanding how different bun shapes are formed. I used the bread machine to knead the sweet bun dough and made the chocolate paste from the Chocolate Swirl Bread recipe. This time round, I made sure the chocolate paste was really thick before removing it from the heat. As a result, the chocolate paste didn't ooze out when I tried to roll the dough.


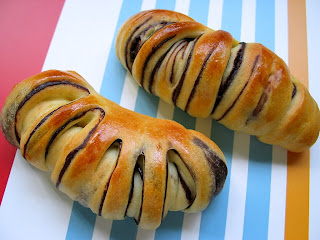
This roll was made by filling a dough with chocolate paste, shape it into a ball, then flatten & roll into a long rectangular shape. Make several slits length-wise on the dough and roll up. I was rather happy with the effect...not too bad considering it was my first attempt :D


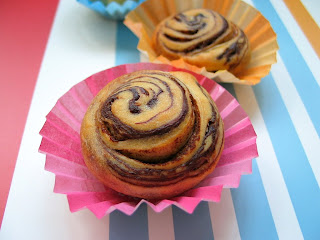
I like how a danish bread looks when it is plaited into a big loaf. Since I have yet to venture into danish breads, I tried my hand in plaiting a small bun instead. After filling a piece of dough with the chocolate, I rolled it into a rectangular shape and cut into 3 strips. After plaiting the 3 strips, tuck in the two ends underneath. Now, I could imagine how my "future" danish loaf would look like.


I made these mini-buns by following this method. The effect is quite nice and I think it will look good on a big loaf.


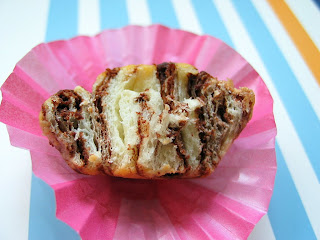
I borrowed this half eaten bun from my little one to get a photo of the inside;D

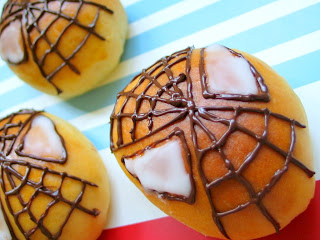
We have promised the boys we will catch the Spiderman 3 movie once the school exams is over...and here's my prelude to the movie...spidy buns!


Ingredients:
(makes around ten 50g portions)

chocolate paste
20g cake flour
50g sugar
1 egg white (reserve egg yolk to be used as egg wash)
80ml milk (warmed)
18g cocoa powder
10g butter

bread dough
150g bread flour
150g cake flour
5g active dry yeast
3g salt
125ml milk
1 egg
60g caster sugar
50g butter

Method:

chocolate paste
  1. Mix sugar and cake flour into the egg white until smooth.
  2. Place milk in a saucepan and heat till just simmering.
  3. Add coca powder into the milk and sitr till cocoa powder is incorporated into milk.
  4. Add egg white mixture into the cocoa mixture and stir over low fire till mixture thickens.
  5. Add in butter and stir till incorporated.
  6. Leave chocolate paste to cool. Keep refrigerated before use.

bread dough
  1. Mix all dry ingredients in a mixing bowl. Add in milk and egg. Mix into a dough. Place the dough on a lightly floured work surface. Knead the dough until the gluten is fully developed and the dough is elastic, smooth and non-sticky. It will take about 25 mins to knead the dough by hand. Initially the dough will stick on to the work surface. This step can be done by bread machine by selecting the Dough function and stop the machine after the kneading cycle is completed (20 mins).
  2. Place the dough in the mixing bowl and cover with a damp towel or cling wrap to seal in the moisture. Allow the dough to proof until double in bulk.
  3. Take out the dough and punch out the gas produced. Divide the dough into 50g portions. Shape into rounds and let rest for about 10 mins.
  4. Flatten rounds and add fillings as desired. Shape as desired. Arrange dough in a greased or lined pan. Let rest for about another 30 mins. Brush the top with egg wash (mixture of egg yolk with 1 tablespoon water). Bake for about 15 minutes in a preheated oven at 180 degC.

More aboutSwirls and Twirls

Mango and Peach Charlotte Cake

Diposting oleh good reading on Sabtu, 05 Mei 2007

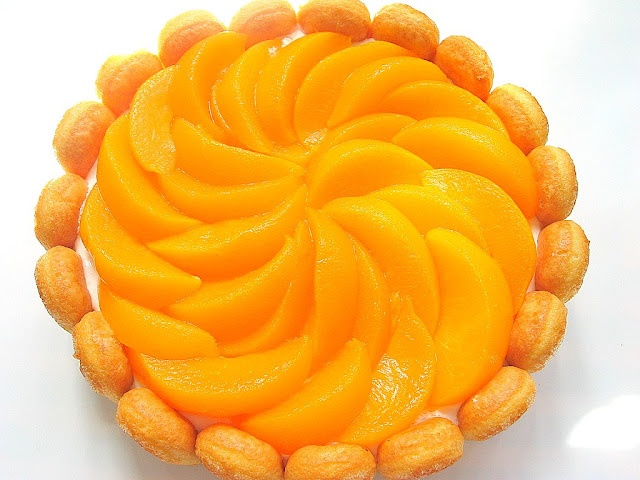
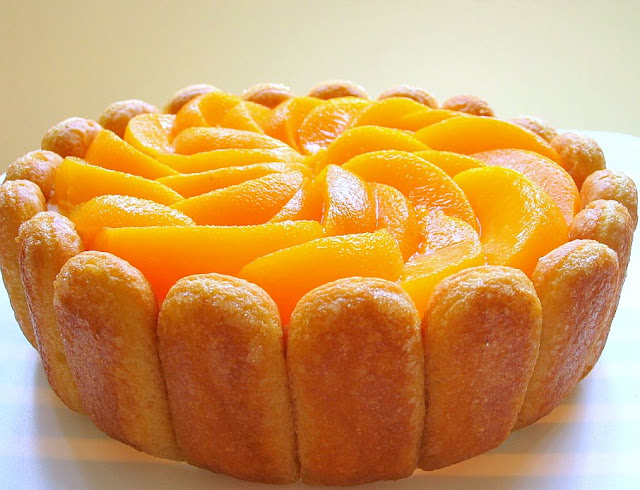
I first got to know about a charlotte cake in one of the recipe pages found in a local magazine. I was attracted to the pretty cake as it looks very elegant with the ring of ladyfingers (sponge fingers), strawberries and chocolate toppings. I have been wanting to try it, but it took me a while before I could manage to get ready-made sponge fingers. I knew I have to rely on store-bought ones as I would never be able to achieve the standard and even shapes of the biscuits if I were to make them from scratch. Thanks to fellow blogger, Elyn, for telling me where to get them. Even then, it took me three separate trips to different branches before I spot them on the shelves!


I decided to make this as dessert for my "peng yu" (a.k.a friends in Hokkien) when we planned to meet up at my place. Since they are my peng yus, I was sure they wouldn't mind if the cake was not up to standard ;)

I was planning to make a strawberries version, but was not able to get any strawberries from the nearby fruit stalls. Since there were several types of mangoes available at the stalls, I came up with this mango and peach version. The recipe that I have on hand is for a mousse filling, which is made with eggs, milk and thicken cream. I didn't like the idea and went on to use the same yogurt cake recipe instead. I replaced the plain yogurt with a low-fat peach & mango flavoured one and added in chunks of fresh mangoes in between the filling to enhance the taste.


As I am not very good at cake decorating, I topped the cake with canned peach slices. This also saved me a step to prepare the sugar syrup meant for dipping the sponge fingers. I merely used the syrup from the can :)


I manage to assemble the cake without using a cake ring or a springform pan. This was done by lining a normal cake pan with a layer of foil, then place a cake cardboard on the foil inside the pan. Once the cake was chilled, I simply lift up the cake from the pan and removed the foil.

By the way, my family and friends liked this supposedly "healthy" dessert, and I quite like the filling, which is light and refreshing :)


I also made a batch of cut-out cookies for my friend's kids...there is a layer of Poohs and Piglets hiding underneath the Mickeys and Minnies. Hope they'll like them!


Mango and Peach Charlotte Cake

Ingredients:
(makes a 7” cake)

1 packet sponge finger biscuits, halved crossways
1 can peach slices
100g peach and mango flavoured yogurt
150ml Vitagen (peach flavour)
150ml non-dairy whipping cream
1 tbsp gelatin
2 tbsp sugar (original recipe calls for 3 tablespoon)
150ml water
1 cup fresh mango chunks

Method:
  1. Dip sponge fingers in syrup from canned peach syrup. Arrange flat side around inside and base of prepared tin. (If you prefer the sponge fingers to be crisp and crunchy, you may choose not to dip them in the syrup).
  2. Sprinkle gelatin over water in a bowl. Add in sugar and stand the bowl in a pan of simmering water, stir until dissolved. Set aside to cool.
  3. Mix yogurt and vitagen and add in cooled gelatin solution. Mix well.
  4. Whip non-diary whipping cream till mousse-like. Add in the yogurt mixture to the whipped cream and mix well.
  5. Pour one-third of filling over the biscuit base. Top with mango chunks, then remaining filling. Refridge till set. Decorate top with peach slices.


More aboutMango and Peach Charlotte Cake

from Anne's home to mine

Diposting oleh good reading on Rabu, 02 Mei 2007


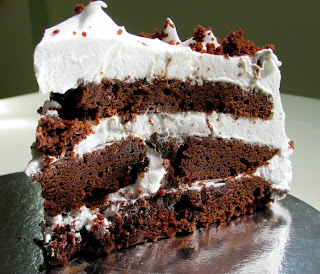
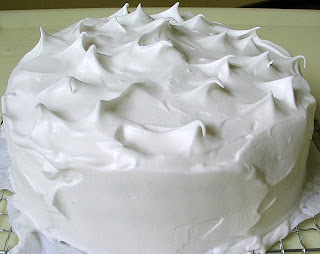
This is my version of Dorie Greenspan's Devil's Food White-Out Cake. Sorry, it didn't do any justice to an otherwise gorgeous cake.

After having seen the recent post by fellow flogger pal, Anne, I couldn't resist the temptation to try it out. I am very impressed with Anne's version of the cake. She has done such a great job in the layering, filling, frosting and decoration! In fact, I am always very inspired by her great cakes, most of the time, I would love to try out her recipes...however, they all look too challenging for me! When I take a closer look at the recipe of this white-out cake, I was quite confident that I could give it a try. The cake looks pretty easy to make, except for the marshmallow frosting. A candy thermometer is needed to ensure you get the right temperature of the syrup. Since I have yet to try whipping egg whites, I thought I should adopt Anne's easier method, that is, to use whipping cream for the frosting instead.

The cake has to be baked in two separate pans. Since my oven is only big enough to accommodate one pan at time, I thought of baking them one after another. However, knowing that baking soda is included in the recipe, I knew that it will not be a good idea to do so. The batter has to be baked immediately, as baking soda will react as soon as it is added to the the batter. To overcome this problem, I decided to bake 3/4 of the batter in one pan and the remaining quarter later. The last quarter is meant to make into crumbs to decorate the cake, as such, I thought it wouldn't matter if it didn't turn out well.

With the necessary ingredients on hand, I went ahead to bake the cake. All went well, until the cake went into the oven. I wasn't quite sure what went wrong, but the cake started to crack all over when it was almost done :( May be the batter was too much for the pan, but it was only about 70% filled. Only after inverting the cake, I realised that most the chocolate chips sank to the bottom of the cake. Hence, after slicing the cake, I flipped the slice over so that the cut side is facing down, and placed the cracked top layer in the middle. I patched up the broken pieces with whipped cream and managed to assemble a decent looking cake :)

I bought a pack of Phoon Huat's house brand non-dairy whipping cream to try. I must say it tastes better than the other brand that I have tried. The whipping cream is much easier to work with and I like the smooth, silky texture and it looks almost pure white. On top of that it is also much cheaper, only S$4 for one litre.

My younger boy offered to help frost the cake for me, too bad his brother was doing his last min. revision for his exam and missed the fun. My boy was very fascinated when the thin cream eventually turned foamy and mousse-like. He tasted the whipped cream and liked the slightly sweet taste. When he finally got the chance to taste the cake, he complained that the whipped cream didn't taste as sweet when eaten with the cake. While the elder boy commented that it was like eating 3 layers of brownies in a go. I was pleasantly surprised with their comments...it showed that they are starting to differentiate the slight differences in tastes and texture of food...something which I won't expect from young kids. :)


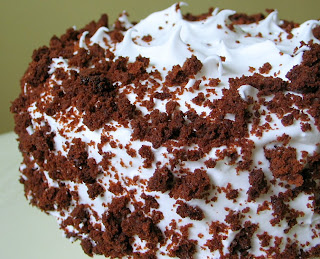
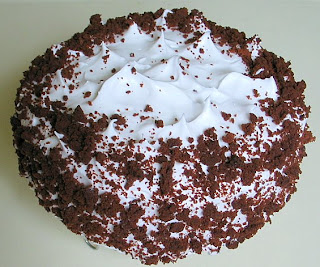
After having taken pictures of the cake, I compared it to the original photo on the bookcover of Dorie Greenspan's cookbook "from my home to yours"...I then realised that I should have filled up the sides of the cake with as much cake crumbs as possible. So, my cake has got lots of white patches here and there :(


I think my cake looked much better before I filled it with the cake crumbs ;)

More aboutfrom Anne's home to mine