More Liver

Diposting oleh good reading on Senin, 28 April 2008

It's time to celebrate your liver. It's a hard-working organ and it deserves some credit.

One of the liver's most important overall functions is maintaining nutrient homeostasis. It controls the blood level of a number of macro- and micronutrients, and attempts to keep them all at optimal levels.

Here's a list of some of the liver's functions I'm aware of:
  • Buffers blood glucose by taking it up or releasing it when needed
  • A major storage site for glycogen (a glucose polymer)
  • Clears insulin from the blood
  • Synthesizes triglycerides
  • Secretes and absorbs lipoprotein particles ("cholesterol")
  • Stores important vitamins: B12, folate, A, D, E, K (that's why it's so nutritious to eat!)
  • Stores minerals: copper and iron
  • Detoxifies the blood
  • Produces ketone bodies when glucose is running low
  • Secretes blood proteins
  • Secretes bile
  • Converts thyroid hormones
  • Converts vitamin D (D3 --> 25(OH)D3)
The liver is an all-purpose metabolic powerhouse and storage depot. In the next post, I'll give you a recipe for it...

More aboutMore Liver

The Liver: Your Metabolic Gatekeeper

Diposting oleh good reading

As I've been learning more about the different blood markers of metabolic dysfunction, something suddenly occurred to me. Most of them reflect liver function! Elevated fasting glucose, low HDL cholesterol, high LDL cholesterol, high triglycerides and high fasting insulin all reflect (at least in part) liver function. The liver is the "Grand Central Station" of cholesterol and fatty acid metabolism, to quote Philip A. Wood from How Fat Works. It's also critical for insulin and glucose control, as I'll explain shortly. When we look at our blood lipid profile, fasting glucose, or insulin, what we're seeing is largely a snapshot of our liver function. Does no one talk about this or am I just late to the party here?!

I read a paper today from the lab of C. Ronald Kahn that really drove home the point. They created a liver-specific insulin receptor knockout (LIRKO) mouse, which is a model of severe insulin resistance in the liver. The mouse ends up developing severe whole-body insulin resistance, dramatically elevated post-meal insulin levels (20-fold!), impaired glucose tolerance, and elevated post-meal and fasting glucose. Keep in mind that this all resulted from nothing more than an insulin resistant liver.

LIRKO mice had elevated post-meal blood glucose due to the liver's unresponsiveness to insulin's command to take up sugar. Apparently the liver can dispose of one third of the glucose from a meal, turning it into glycogen and triglycerides. The elevated fasting glucose was caused by insulin not suppressing gluconeogenesis (glucose synthesis) by the liver. In other words, the liver has no way to know that there's already enough glucose in the blood so it keeps on pumping it out. This is highly relevant to diabetics because fasting hyperglycemia comes mostly from increased glucose output by the liver. This can be due to liver insulin resistance or insufficient insulin production by the pancreas.

One of the interesting things about LIRKO mice is their dramatically elevated insulin level. Their pancreases are enlarged and swollen with insulin. It's as if the pancreas is screaming at the body to pick up the slack and take up the post-meal glucose the liver isn't disposing of. The elevated insulin isn't just due to increased output by the pancreas, however. It's also due to decreased disposal by the liver. According to the paper, the liver is responsible for 75% of insulin clearance from the blood in mice. The hyperinsulinemia they observed was both due to increased secretion and decreased clearance. Interestingly, they noted no decline in beta cell (the cells that secrete insulin) function even under such a high load.

Something that's interesting to note about these mice is they have very low blood triglyceride. It makes sense since insulin is what tells the liver to produce it. Could this have something to do with their lack of beta cell dysfunction?

The really strange thing about LIRKO mice is that their blood glucose becomes more normal with age. Strange until you see the reason: their livers are degenerating so they can't keep up glucose production!

LIRKO mice reproduce many of the characteristics of type II diabetes, without degenerating completely into beta cell death. So insulin resistance in the liver appears to reproduce some elements of diabetes and the metabolic syndrome, but the full-blown disorders require other tissues as well. As a side note, this group also has a skeletal muscle-specific insulin receptor knockout which is basically normal. Interesting considering muscle tissue seems to be one of the first tissues to become insulin resistant during diabetes onset.

So if you want to end up like your good pal LIRKO, remember to drink high-fructose corn syrup with every meal! You'll have fatty liver and insulin resistance in no time!

I have a lot more to say about the liver, but I'll continue it in another post.

More aboutThe Liver: Your Metabolic Gatekeeper

A big old thanks...and a giveaway *****It's Over*****

Diposting oleh good reading

I have noticed a slew of new visitors to my blog. I want to tell everyone who has mentioned my attempt at beautifying the world one hair style at a time to their friends and family a big ol' THANKS!

To show you how much I appreciate your loyalty and cyber-friendship, I am doing my first give-away.

Here is a preview. In addition to these bows, I will also have two other sets and some flowers as well. I will post pictures as I complete them. Don't look too close, I'm not a professional, I am just having fun making them.


The catch, you need to leave a comment on this blog post. I will randomly pull your comment number and this contest will end on Friday, May 2 at 3:30pm Mountain Standard Time.
More aboutA big old thanks...and a giveaway *****It's Over*****

Book Review: Blood Sugar 101

Diposting oleh good reading on Minggu, 27 April 2008

I just finished reading "Blood Sugar 101" by Jenny Ruhl. It's a quick read, and very informative. Ruhl is a diabetic who has taken treatment into her own hands, using the scientific literature and her blood glucose monitor to understand blood sugar control and its relationship to health. The book challenges some commonly held ideas about diabetes, such as the notion that diabetics always deteriorate.

She begins by explaining in detail how blood glucose is controlled by the body. The pancreas releases basal amounts of insulin to make glucose available to tissues between meals. It also releases insulin in response to carbohydrate intake (primarily) in two bursts, phase I and phase II. Phase I is a rapid response that causes tissues to absorb most of the glucose from a meal, and is released in proportion to the amount of carbohydrate in preceding meals. Phase II cleans up what's left.

In a person with a healthy pancreas, insulin secretion will keep blood glucose under about 130 mg/dL even under a heavy carbohydrate load. The implications of this are really interesting. Namely, that blood glucose levels will not be very different between a person who eats little carbohydrate, and one who eats a lot, as long as the latter has a burly pancreas and insulin-sensitive tissues.

Most Americans don't have such good control however, hence the usefulness of low-carbohydrate diets. This begs the question of why we lose blood sugar control. Insulin resistance seems like a good candidate, maybe preceded by
leptin resistance. As you may have noticed, I'm starting to think the carbohydrate per se is not the primary insult. It's probably something else about the diet or lifestyle that causes carbohydrate insensitivity. Grain lectins are a good candidate in my opinion, as well as inactivity.

Diabetics can have blood glucose up to 500 mg/dL, that remains elevated long after it would have returned to baseline in a healthy person. Ruhl asserts that elevated blood sugar is toxic, and causes not only diabetic complications but perhaps also cancer and heart disease.


Heart attack incidence is strongly associated with A1C level, which is a rough measure of average blood sugar over the past couple of months. It makes sense, although most of the data she cites is correlative. They might have seen the same relationship if they had compared heart attack risk to fasting insulin level or insulin resistance. It's difficult to nail down blood sugar as the causative agent. More information from animal studies would have been helpful.


Probably the most important thing I took from the book is that the first thing to deteriorate is glucose tolerance, or the ability to pack post-meal glucose into the tissues. It's often a result of insulin resistance, although autoimmune processes seem to be a factor for some people.
Doctors often use fasting glucose to diagnose diabetes and pre-diabetes, but typically you are far gone by the time your fasting glucose is elevated!

I like that she advocates a low-carbohydrate diet for diabetics, and lambasts the ADA for its continued support of high-carbohydrate diets.

Overall, a good book. I recommend it!

More aboutBook Review: Blood Sugar 101

CAMBIE STREET PLUG: KREATION BAKERY & CAFE GLOUCESTER REVISITED & GINSENG SEAFOOD NOODLE RESTAURANT (REVIEW)

Diposting oleh good reading


cakes from kreation bakery on cambie street

bebe's favourite: a mini vanilla cupcake with pink raspberry buttercream

The Cambie Street corridor that underwent Canada Line construction is open again and we've revisited a few establishments. A couple of new Asian restaurants have popped back to life.

vanilla sponge, ricotta mousse infused with citrus flavour, blueberry cream filling; topped with orange and orange zest.
We parked in the street in front of Kreation Bakery and walked across the street to eat at Cafe Gloucester today. Later, after lunch we stopped by Kreation bakery to pick up a few items. Bebe wanted her usual: a mini cupcake. I purchased the Earl Grey Chocolate Mousse and an Orange Ricotta Mousse with Blueberry filling. The cakes were pretty and looked yummy.

the sponge wrapped around the mousse was light and airy.

the blueberry filling looked rich, but it wasn't. in fact, the whole cake was quite light tasting

earl grey chocolate mousse ($5.00) from kreation bakery

CAFE GLOUCESTER
3338 Cambie Street, Vancouver, BC
The other restaurant we have long been waiting to reopen was Cafe Gloucester. It closed down a couple of years ago and didn't reopen until just recently. It is now run by new owners. It has a completely new staff. On our first visit a couple of weeks ago, we weren't extremely impressed with the flavours of the dishes. However, we gave them another try today at lunch and we were pretty happy with the way they've tweaked the dishes to taste better. They were more generous with the "fillings": the Shanghai Noodles had more meat and veggies, the sauce was much improved and the noodles were more tender. I had the Laksa free-range Hainan chicken (jow day gai) noodle soup, and Stomach had a Chiu Chow Seafood Rice Soup. Stomach was pleasantly surprised with the quality of the broth. I was happy with my Laksa flavours. The girls were happy with their noodles and scarfed it all down. A good sign. I hope they maintain consistency.
manjari tea mousse, tea brulee, tea almond spongecake and meringue with almond slices.


KREATION ARTISAN CAKE
3357 Cambie Street (on the west side of Cambie, between 17th and 18th Avenues).
Kreation's cakes were all light tasting. The meringue disk on the chocolate mousse was crunchy, light and delicious. The bottom of the disk was painted with some dark chocolate so as to ensure that it maintained its crispness atop the mousse. There were 2 distinct mousses. The outer mousse was darker and the inner a lighter colour, which enveloped the tea almond spongecake. My favourite part was actually the meringue disk! The whole cake was delicious and had a unique tea flavour. I'm not sure where the tea brulee part comes in. Unless it was what I thought was the painted on dark chocolate. Maybe. But it sure looked and tasted like dark chocolate. Anyhow, it was all good.
Most items range from about $3.75 to $5.00 each. The bakery seems to do a hopping business with wedding cakes and favours. As well, they sell those highly decorated sugar cookies that look too pretty to eat. The little flowerpot with the decorated flower sugar cookies on a stick caught my eye. Here's their site.

GINSENG SEAFOOD NOODLE RESTAURANT (update:  CLOSED!)
3466 Cambie Street, Vancouver, B.C.
Further down Cambie Street, near Starbucks and the Park Theatre, is a newly opened restaurant called Ginseng Seafood Noodle Restaurant (it replaces the belly-up Om Vegetarian) where we have gone to on a few occasions for dinner and were pleasantly surprised by the dishes. The name of the restaurant we were told, indicates the Chef's specialties and expertise. We ordered an Oyster HotPot, a Chicken with special sweet soy-based ginger, scallion sauce and Gai Laan with Beef. The Chicken dish (a version of Jaa Jee Gai) was my favourite and my mother liked the Oyster HotPot. As with most new restaurants, they were still working out some kinks (primarily consistency) when we visited, but they seem now to be adequately busy.
This consistency thing is a problem in many restaurants I know (especially in new restaurants!) because the chef has to have his days off and his sub has to be able to pull off creating the same quality and flavours. I hate it when I recommend a restaurant to friends and they are disappointed because they happened to go on the chef's day off. They come back to me and complain. I feel bad about it, but you know how most Vancouverites are: we'll give you a try and if you don't make the grade, we won't come back. It's not often that we'll give restaurants a second try because we have so many other excellent restaurants from which to choose. That explains the high turnover rate of restaurants in Vancouver and Richmond.
Well, I hope the businesses on Cambie can rebound soon and bring Cambie Street back to life!

Kreation Artisan Cake on Urbanspoon
More aboutCAMBIE STREET PLUG: KREATION BAKERY & CAFE GLOUCESTER REVISITED & GINSENG SEAFOOD NOODLE RESTAURANT (REVIEW)

HOMEMADE BITTERSWEET CHOCOLATE MARSHMALLOWS

Diposting oleh good reading on Jumat, 25 April 2008

homemade bittersweet chocolate marshmallows

Bebe loves marshmallows. She can pop back a few in a blink of an eye.

Until just this year, I didn't even think to make marshmallows.
I found a marshmallow recipe in Dorie Greenspan's cookbook, Baking: From My Home to Yours, and chose a bittersweet chocolate variation. I used VanHouten cocoa powder and Lindt 70% dark chocolate and the chocolate flavour rang through very clearly.
the light dusting of cornstarch you see covering these marshmallows was largely gone after an overnight rest

Freshly made, these marshmallows, with their dusting of cornstarch, were okay. After waiting a day, they were so much better. The chocolate flavour was more intense and the texture of the marshmallows was soft and pillowy.
I dusted off the surplus cornstarch from some of the marshmallows with a pastry brush because patting them didn't seem to get enough of the cornstarch off of the marshmallows. Too much cornstarch kind of left you with an overwhelmingly powdery residue in your mouth. With the overnight marshmallows, the light film of cornstarch had been mostly absorbed. You definitely need the cornstarch there so you can cut the sticky marshmallows, so it's not as if you can do away with the dusting altogether.
I cut them in little squares and they were so light, airy and soft that you could easily eat the whole pile of them. The chocolate flavour was a winner and I'd make these again!
BITTERSWEET CHOCOLATE MARSHMALLOWS
(adapted from Dorie Greenspan's Baking: From My Home to Yours)
About 1 cup cornstarch
3/4 cup cold water
1 1/4 cup plus 1 T sugar
2 T light corn syrup
2 1/4-ounce packets unflavoured gelatin
3 large egg whites, at room temperature
1/4 t vanilla extract
3 ounces bittersweet chocolate [I used Lindt 70% dark]
2 1/2 T unsweetened cocoa powder [I used Van Houten brand cocoa powder]
  • Line a rimmed baking sheet--choose one with a rim that is 1 inch high-- with parchment paper and dust the paper generously with cornstarch. Have a candy thermometer at hand.
  • Put 1/3 cup of the water, 1 1/4 cups of the sugar and the corn syrup in a medium saucepan over medium heat. Bring the mixture to a boil, stirring until the sugar dissolves. Once the sugar is dissolved, continue to cook the syrup--without stirring--until it reaches 265degrees F on the candy thermometer, about 10 minutes [note: it took only 6 minutes when I made it]
  • While the syrup is cooking, work on the gelatin and egg whites. In a microwave-safe bowl, sprinkle the gelatin over the remaining cold water (a scant 7 tablespoons) and let it sit for about 5 minutes, until it is spongy, then heat the gelatin in a microwave oven for 20 to 30 seconds to liquefy it. (Alternatively, you can dissolve the gelatin in a saucepan over low heat.)
  • Working in the clean, dry bowl of a stand mixer fitted with the whisk attachment or in another large bowl with a hand mixer, beat the egg whites on medium-high speed until firm but still glossy--don't overbeat them and have them go dull.
  • As soon as the syrup reaches 265 degrees F, remove the pan from the heat and, with the mixer on medium, speed, add the syrup, pouring it between the spinning beaters and the sides of the bowl. Add the gelatin and continue to beat for another 3 minutes, so that the syrup and the gelatin are fully incorporated. Beat in the vanilla.
  • Melt the 3 oz chocolate with the cocoa powder, stirring until glossy and smooth.
  • Using a large rubber spatula, scrape the melted chocolate mixture into the the batter and fold in until mixed.
  • Using a large rubber spatula, scrape the meringue mixture onto the baking sheet, laying it down close to a short end of the sheet. Then spread it into the corners and continue to spread it out, taking care to keep the height of the batter at 1 inch; you won't fill the pan. Lift the excess parchment paper up to meet the edge of the batter then rest something against the paper so that it stays in place. Greenspan uses custard cups.
  • Dust the top of the marshmallows with cornstarch and let the marshmallows set in a cool, dry place. They'll need about 3 hours, but they can rest for 12 hours or more.
  • Once they are cool and set, cut the marshmallows with a long thing knife or pair of scissors. Whatever you use, you'll have to rinse and dry it frequently. Have a big bowl with the remaining cornstarch at hand and cut the marshmallows as you'd like--into squares, rectangles or even strips. As each piece is cut, drop it into the bowl. When you've got 4 or 5 marshmallows in the bowl, reach in with your fingers and turn the marshmallows to coat them with starch, then, one by one, toss the marshmallows from one hand to the other to shake off the excess starch; transfer them to a serving bowl. Cut and coat the rest of the batch. [I found using a pastry brush to dust off the excess cornstarch was more effective]
More aboutHOMEMADE BITTERSWEET CHOCOLATE MARSHMALLOWS

PlayDough

Diposting oleh good reading

I have always thought that I will have to make two separate doughs in order to produce a dual coloured marble bread. Which also means that I will have to use the bread machine to knead one dough, while I work on the other manually. It will be impossible to get the bread machine to knead both doughs as there will be at least a half hour lapse between the two doughs, no?


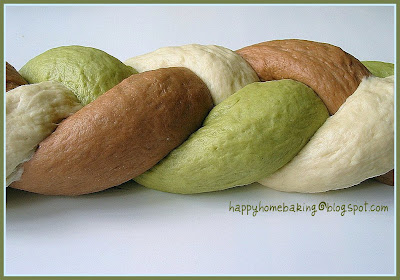
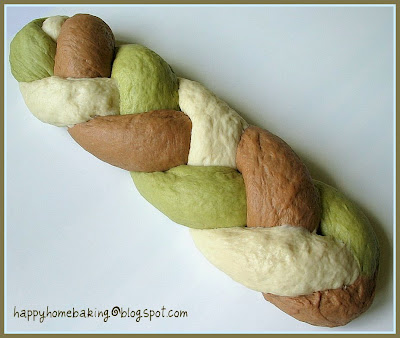
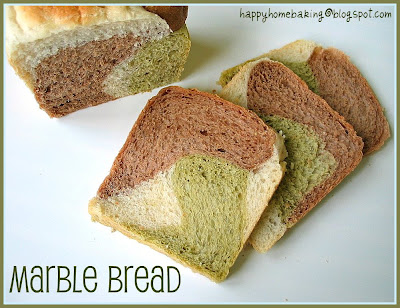
Thanks to this Chinese cookbook on bread making that I found the way to get around with the problem. All I have to do is to knead the dough just like any other bread recipe. After the bread machine completed the kneading cycle, I divided the dough into 3 equal portions. Don't be lazy, use a scale to weigh the dough so that you get three equal portions. For one of the doughs, I kneaded in half a teaspoon of green tea powder...the 2nd portion I added in one teaspoon of cocoa powder (it was supposed to be half teaspoon, but I used the wrong measuring spoon!!). The 3rd portion I left it plain. It was not too difficult to knead in the powdered green tea/cocoa...just a few gentle kneading should get the powder fully integrated into the dough. I didn't follow the recipe on the flavourings as it uses green tea, curry powder, and a red ingredient which I am not sure what it is.


The three dough were then left to rise in separate bowls. After they doubled in size, I shaped them into rounds and left them to 'rest & relax' for about 10mins before they were shaped into long ropes. The doughs were quite easy to handle...except for the plain dough which was still a bit sticky after the first proofing. The three long ropes were then plaited.


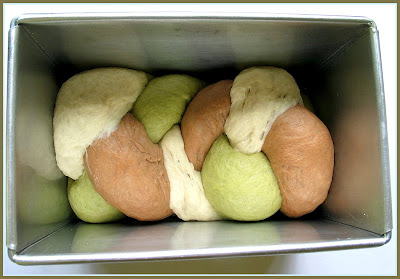
After the braided dough was left in the tin to proof...I noticed something wasn't right. The plain dough started to tear away as the dough expanded. Since I couldn't do anything at this stage, I sent it to the oven to bake after the second proofing.


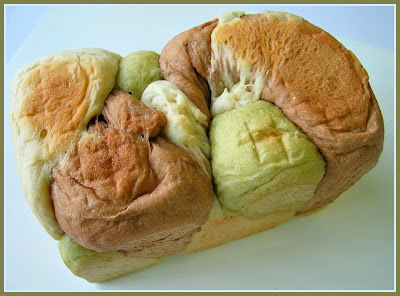
This was how the bread looked like when it was unmold! I though it should be added straight to my list of kitchen disasters ;,(

It was so disappointing!


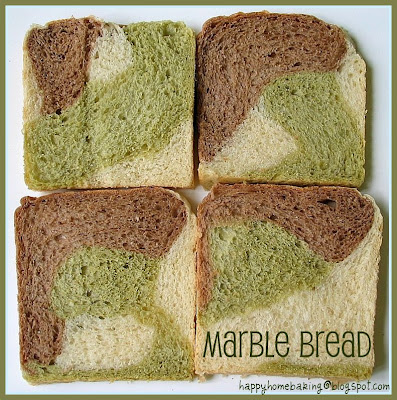
I only felt sightly better after I sliced the bread...at least the swirls and marbling effects were quite interesting.


and each slice of bread has got it's own unique pattern! The texture of the bread was excellent...soft and light. Even though I could taste the cocoa powder in it, the bread tasted really plain on it's own. The taste was not very different from any of those plain store-bought sandwich bread. The flavour from the green tea powder was so subtle that you won't know its existence if not for the colour.

So, have you been wanting to try out a colourful bread all this while? If the answer is positive, why wait?!


Marble Bread

Ingredient:

300g bread flour
30g caster sugar
1/4 teaspoon salt
1 & 1/4 teaspoons (5g) instant yeast
180g water

20g unsalted butter

1/2 teaspoon green tea powder
1/2 teaspoon cocoa powder

Method:
  1. Place water, sugar, salt, bread flour in the pan of the bread machine (according to the sequence as stated in the instruction manual of your bread machine). Make an indentation on the flour and add in the instant yeast.
  2. Select the Dough function of the bread machine and press start.
  3. After about 8mins of kneading, add in the 20g of butter. Let the machine continue to knead the dough. After the kneading cycle has stopped (20mins), Stop and Restart the machine. Continue to let the machine knead for another 10mins.
  4. Remove dough from the bread pan. Divide dough into 3 portions (about 170-180g per portion).
  5. On a lightly floured surface, take one dough and knead in the cocoa powder. Repeat the same with the second dough with the green tea powder. Place the doughs in 3 separate bowls, cover with cling wrap and let them rise till double in volume, about 60mins.
  6. Remove doughs and give a few light kneading for each dough. Press out the trapped air as your knead. Shape into balls and cover with cling wrap, let the dough rest for 10mins.
  7. For each dough, flatten and roll out into a oval shape about the size of 30cm by 15cm. Roll up, lengthwise, swiss roll style to form a long rope.
  8. Plait the three long doughs. (It is not necessary to plait very tightly). Pinch and seal the ends tightly. Place the plaited dough into a pullman tin* (well greased). Tuck the ends down. Cover the lid and let dough proof for 60mins or until the dough rise up to 90% of the height of the tin.
  9. Bake at preheated oven at 180-190 degC for about 30mins.
  10. Remove from oven and unmold immediately.
Recipe adapted from 孟老师的100道面包
*size of my pullman tin, about 7.5" x 4" x 4"
More aboutPlayDough

Fond Memories

Diposting oleh good reading on Rabu, 23 April 2008

Warning: This post has got nothing to do with food. Skip this if u are looking for something edible :)


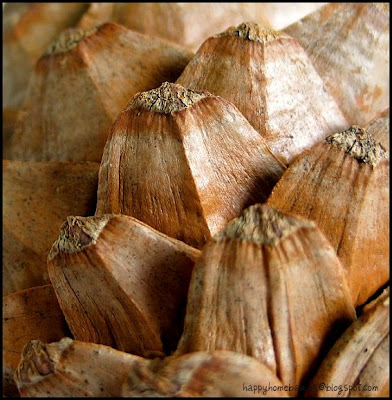
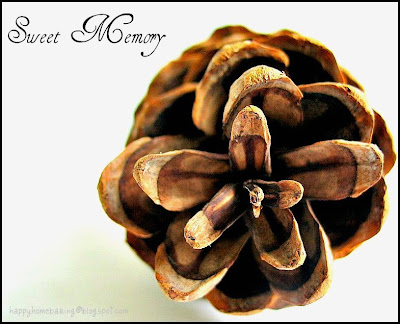
Guess what is this? No, this is definitely not edible...


and it is not some exotic fruits either...


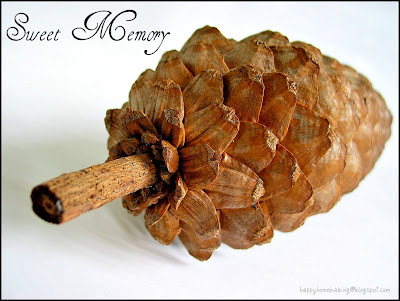
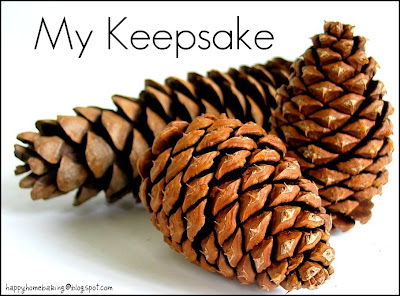
yes, it's a pine cone!! It's the huge, long one at the background of this photo, which is actually more than 30cm in length!


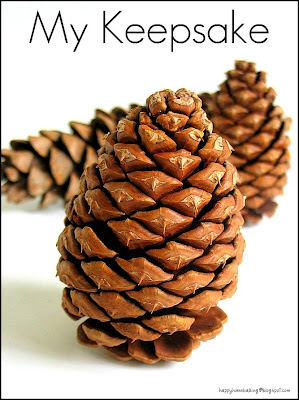
I didn't do any baking today...and took the time to do some 'area' cleaning instead. I gave these three pine cones a good 'shower' and left them to dry under the morning sun. This is the first time I have given them a proper shower...not sure whether I will do any damage to them??

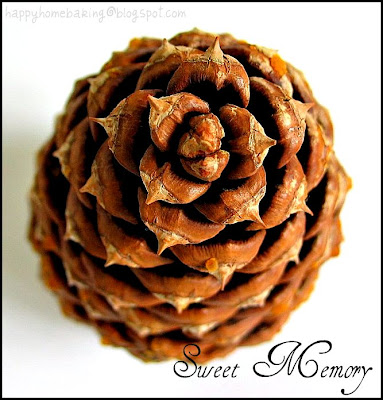
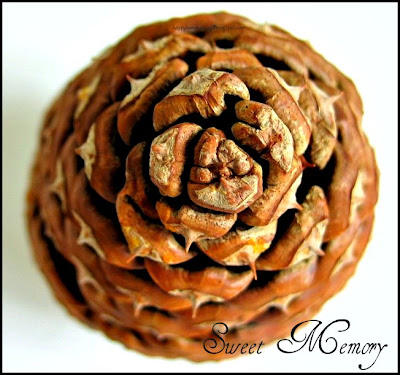
Since I wasn't doing much(I seems to have plenty of time if I am not baking!)...I decided to take some photos of these cones and played around with the editing tool which I recently discovered in the flickr site. I love how the photos turned out after adding in the border and the text. It certainly brings some 'life' to an otherwise boring photo. It helps to cover up the not too good lighting conditions too! You will probably notice that the right side of all my photos tend to be brighter than the left...as I could only rely on the natural lights coming from the windows on my right :'(


I remember collecting these pine cones with my elder boy, many years ago...he was only 2 years old then. That was a xmas eve morning in the year 2000.


After doing up the images, I can't help but to blog about these cones as they have brought back such fond memories. Those were the happiest moments of our lives...we were able to make long road trips on every weekend during our short stay in the States...to visit the national parks and be really close to nature.


I think I like this image best...I hope you have enjoyed reading this post :)

More aboutFond Memories

BEARD PAPA'S CREAM PUFFS

Diposting oleh good reading on Minggu, 20 April 2008

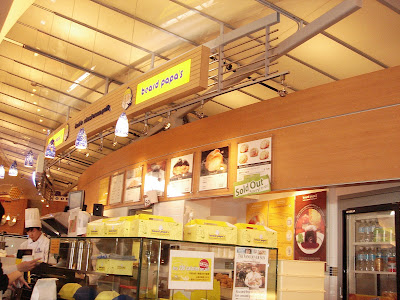
beard papa's at aberdeen centre mall food court, richmond, b.c.

While shopping at our local Asian mall, Aberdeen Centre, Bebe and Bib required a big snack.

Fortunately, the line at Beard Papa's wasn't so long this day. I thought it a perfect time to try out the cream puffs I've heard everyone raving about in our local papers. Apparently these cream puffs have a loyal following in Asia and around the world.
the legendary beard papa cream puff has a crispy exterior with a heavy dusting of confectioners' sugar

I had never heard of them until this year.

When I want a cream puff, I just bake my own. It's not exactly rocket science. They were the very first things I made when I started baking on my own in elementary school. They turned out perfectly the first time I made them too!

though other flavours were sold out at the time, at least i was able to buy a chocolate "eclair"

So here I was in line, waiting to see if these cream puffs lived up to their legendary status. Some people wait in the long lineups for hours just to get a box of these puffs. This reminds me of the Krispy Kreme phenomenon. I wasn't that impressed with the donuts when I tried them. They were good, but I didn't think they were worth waiting in line for when I could get really fresh donuts anywhere. The cream puffs were made on site I think. There were little signs everywhere telling of how "healthy" they were--for a junk food. One sign proclaimed each puff was only 230 calories each! wow. makes you want to eat a dozen, right?

cream puff innards: the cool custard is creamy and not cloying at all

From my place in the lineup, I could watch the cream puff assembly line: the baked puffs cooled in a pile in the back, one beard papa's employee worked the huge pump from the vat of pastry cream, filling each puff by hand and they sat waiting for the powdered sugar dusting. It looked just as efficient as McDonald's. There was obviously a system and it seemed to be working smoothly.

When I bit into the cream puff, confectioners' sugar flew everywhere--onto the front of my shirt, on the table below and up my nose. I almost choked with the sudden and unexpected inhalation of powdered sugar. The exterior was crispy and dry. Very nice. The flavour of the puff itself was eh. I've had tastier puffs from elsewhere and even made at home. The filling for the puff was very good though and was very generous. It exploded and oozed out of the puff shell. The pastry cream was still cool and the textural contrast was delightful. These puffs were quite large compared to other puffs I've had in local bakeries. I suppose they should be large because of the price you're paying.

Each original vanilla cream puff costs $1.75Cdn

A box of 6 puffs will put you back $9.50

A box of 12 puffs costs $19.50

The chocolate eclair puffs cost $1.95 each; 6 = $10.50; 12 = $21.00

I would have liked to try the green tea cream puff but they were all sold out. All the specialty flavours were unavailable when I was there. Too bad.

The chocolate eclair puff was just as good as the original puff but simply had a coating of chocolate instead of the powdered sugar.

I've since been back to the mall and have not had the inclination to buy any more puffs. I was curious what the hubbub was all about and now my curiosity is satiated. I definitely won't be in any long queue to buy these puffs in the future. Give me a short lineup and I might be tempted to have another. As many Asian families don't know how to work their ovens (yes, I've seen some families use their ovens as storage for pots, pans, plastic bags and other kitchen detritus!); instead mainly using the stovetops for stir-frying and steaming, I can see why there would be the huge lineups of Asian people for these pastries.

Fellow foodies, we could do just as well or better by baking cream puffs at home.

More aboutBEARD PAPA'S CREAM PUFFS

Short Hair Part Puffy-Braid

Diposting oleh good reading


Section the top of the hair into a square.
Make your first part going across the head.
Pull into a ponytail.
Secure with an elastic.
Part the next section going across the head.
Comb down smooth.
Pull the first ponytail into this and make a second ponytail.
Secure with an elastic.
Pull the last part of the square smooth and add the hair that is already in the ponytails to this section.
Secure with an elastic.
***I have included two pictures of this. One with a bow and one without. It is harder to see the elastics with the bow. A ribbon would allow you to see more detail.
More aboutShort Hair Part Puffy-Braid

Looped Upside-Down French Braid

Diposting oleh good reading


Today she wanted her hair to look like Kierstie from "American Girls". So I tried. However, that hairstyle doesn't work with upside down French Braids. Only the normal style. Whoops! So here is our creation from my mistake.
Wet the hair, part down the middle.
Pull one side of the hair into a temporary ponytail.
Upside down French braid the opposite side.
Secure the bottom with an elastic.
Take the bottom and fold it up towards you to where the hair meets the neck.
Secure the "loop" with another elastic.
Tie your ribbon on the elastic.
Piece out the ends.
Repeat on the other side.
More aboutLooped Upside-Down French Braid

Scarf and Flippy Ponytails

Diposting oleh good reading on Sabtu, 19 April 2008

AYSO stands for 'All Your Saturdays Occupied".

Which is exactly how we spend every Saturday morning.

And spring is in full, windy force here.

Hence the scarfs.

Plus, I think they are cute.


I just pulled her hair into two flippy ponytails low on her head.
I sprayed well and added the scarf.
She looked adorable running...or so I hear. I stayed home with a baby who would not have done well in the wind.
But at least we don't live in tornado row.
More aboutScarf and Flippy Ponytails

If You Give An Oreo Cookie Monster...

Diposting oleh good reading

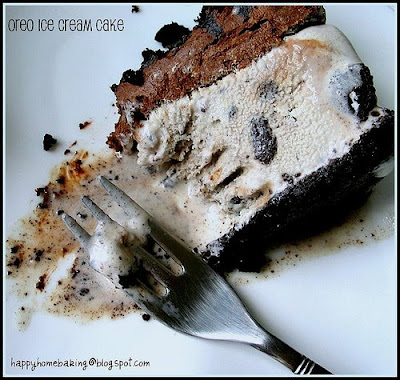
an oreo cookie sandwich, he will probably ask for another two more...then he will probably ask for some ice cream to go with the oreos...and perhaps some chocolates too....


It was only a few days ago that I discovered the joy of taking images of a slice of ice cream cake. As the camera clicks away, the icy frosting on the outer layer started to disappear...and very soon, the ice cream began to give in to our hot and humid weather...as if urging me to dig in right away...telling me I should just dump that camera aside. and I did just that. I helped myself to one huge mouthful before I continued to give it another couple of clicks before I wiped up the entire slice...


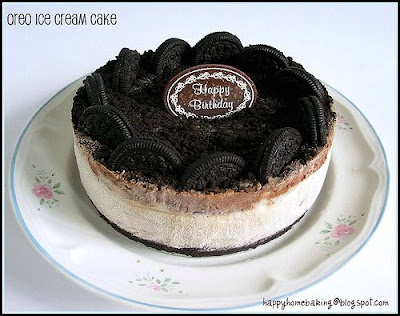
that happened to be a slice from this birthday cake I made for my husband. Two weeks before his birthday, I asked him what kind of cake would he like this year. As usual, he asked for something that has got oreos in it. So the two of us sat in front of the computer and I typed in the key words "oreo cake" and clicked on the 'Search Everyone's Photos' on Flickr. I was pleasantly surprised to see the photo of a cake I made appeared on the screen. He took a hard look and it was apparent that he couldn't remember that was his birthday cake last year. Anyway, inspired by the beautiful images which started to appear on the screen one by one, he requested for an ice cream cake..and we left things as it is. I didn't think there would be anything more difficult than to head down to the store to get a pack of oreos and a tub of ice cream for his birthday ;)


Well, since he has walked with me for more than half of his lifetime, and to thank him for always being there by my side, I thought I really should put in some effort to grant his wish. After reading up on how to make an ice cream cake, I made up this Oreo Ice Cream Cake...which was choked to the brim with layers of oreo cookies.

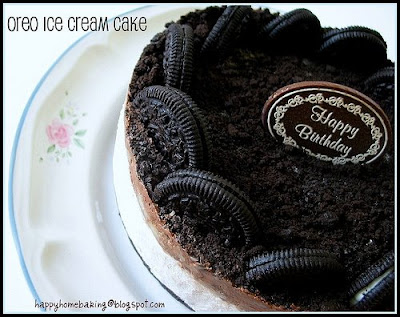
The base was a layer of oreo crumbs, which I covered with a tub of Cookies & Cream ice cream. I even added some oreo chunks into the ice cream layer. Next came the chocolate ganache layer...and it was generously dusted with oreo crumbs before topping off with more oreo cookies! The only thing that had got nothing to do with oreos was the chocolate birthday 'card'. It was among one of the many goodies given to me generously by VB. Thank you VB!


It was a very good experience coming up with this cake since this is the first time I have ever made an ice cream cake. It was actually much simpler than I thought. I used a loose bottom pan for the cake...and since I do not have any appropriate plastic sheets to line the sides of the pan...I improvised by using long strips cut from a cookie bag. You need lots of patience when making this cake. It has to be well chilled before unmolding. I tried to unmold it when it was only in the freezer for 2hrs...as I thought the surface looked well set...but the ice cream started dripping from the sides when I tried to release the pan. I quickly returned it to the freezer and tried it again 4hrs later...and it came off nicely!

The only downside of this cake: the oreo cookies that were used to decorate the top loose their crisp after they were in the freezer for so many hours. I read that one way to overcome this problem is to decorate the cake just 30mins before serving. Warm a palette knife by running it under hot water, dry it and swipe it over the chocolate layer a few times. Once the chocolate is soft enough...'stick' whatever cookies or fruits on top, and send it back to the freezer to set before serving. I'll try this method on my next ice cream cake :)


Oreo Ice Cream Cake
(makes one 18cm cake)

Ingredients
110g oreo cookies (finely crumbled)
40g butter, melted and cool
about 1 tub of ice cream (1.5 ltr)
1 cup Nestle pouring cream (or heavy cream)
150g dark chocolate, finely chopped

Method:

  1. Line the sides of a loose bottom pan with plastic sheets. Set aside.
  2. Place oreo crumbs and melted butter in a bowl. Mix thoroughly with a spoon until the crumbs are moistened. Press the crumbs evenly into the base of the prepared pan. Use the back of the spoon, smooth out the crumbs and press firmly. Freeze the base for at least 1 hour.
  3. Soften the ice cream at room temperature. When the ice cream is soft enough, place it in a mixing bowl. With a spoon or spatula, stir the ice cream until it is spreadable. Spoon the ice cream over the oreo base, ensure all gaps are filled. Depending on the depth of the pan, fill it with enough ice cream till it reaches about half to one inche before the rim. Cover with a cling wrap and freeze for at least 2 hours.
  4. When the ice cream layer is set, prepare the chocolate ganache. Place cream and finely chopped dark chocolates in a bowl over a pot of simmering water. Stir till the chocolate melts complete. Leave to cool off.
  5. This step has to be done as quickly as possible. Spread the chocolate ganache over the ice cream layer. Decorate as desired.
  6. Cover with cling wrap and freeze for at least another 6 hours before unmolding. When ready to unmold, dampen a kitchen towel with hot water and wrap it around the pan and hold it there for about 10seconds. Remove the towel and unmold. After unmolding the cake, return it back into the freezer to firm up before serving.

More aboutIf You Give An Oreo Cookie Monster...

BANANA FLAX CHIFFON: A HEALTHY ALTERNATIVE

Diposting oleh good reading on Jumat, 18 April 2008

banana flax chiffon

Okay, you know I collect bananas.
freshly ground golden flaxseed adds health benefits to this cake without making it taste icky

I obviously have a hefty collection thus far and decided to whittle down my collection by baking my favourite chiffon cake.
the cake is very moist and can be kept for 3-5 days

I adapted the recipe by adding 4 tablespoons of freshly ground golden flaxseed. It's hardly noticeable and in fact gives it a bit of a subtle nutty flavour.
no frosting is necessary; but a dusting of confectioners' sugar is always pretty

With the addition of the flaxseed this Banana Chiffon Cake is not only moist and delicious; but it is also mildly healthy with the addition of this ingredient. At least I'm adding back some fibre in there along with the other heart-healthy benefits of flaxseed.

My favourite chiffon recipe comes from America's Test Kitchen because it uses 7 whole eggs. There's none of that craziness you get with using more egg whites than yolks; leaving you with a bunch of yolks that you have to utilize in yet another recipe.


Here's the recipe I used.

More aboutBANANA FLAX CHIFFON: A HEALTHY ALTERNATIVE

A STAPLE IN MY PANTRY

Diposting oleh good reading

a moist slice of freshly baked banana bread

I collect bananas.

I buy a bunch whenever I shop at the market and if we eat them, that's fine, but if there's a couple lying around too brown and spotty for anyone to want to eat, I just peel them and toss them into a ziploc bag in my freezer.


Eventually, I accumulate enough bananas to make my favourite banana bread recipe.
I actually don't enjoy eating bananas per se, but I do love banana bread. With the little ones around, there's reason to bake 2 loaves. The recipe yields 2 loaves, but can easily be cut in half to make just one. I leave one freshly baked loaf out to eat and the other one I slice and wrap individually in plastic wrap. I toss these into a ziploc bag and shove that in my freezer too. When Bebe or Bib need a

snack or I'm in stuck for an idea for breakfast, I just take out what I need and zap it in the microwave for 25 seconds. It's a great time-saver and the banana bread still tastes fresh.My favourite banana recipe is moist and full of banana flavour. Ensure the bananas you use are spotty brown for the best results. If I want to get fancy, I scrape out the seeds from a vanilla bean instead of using the vanilla extract. It is so good. The recipe is here.
More aboutA STAPLE IN MY PANTRY

Spring Scarf

Diposting oleh good reading


Pull hair into a lose, temporary ponytail.
Take a triangle of fabric, or a pre-made hair scarf.
Wrap it around the base of the hair and tie it where the hair meets her neck.
Pull the ponytail out.
Either curl the hair or smooth it out straight.
If you choose to leave parts of the hair down, do that before you put the scarf on.
Spray and be done!

More aboutSpring Scarf