Tampilkan postingan dengan label thanksgiving. Tampilkan semua postingan

Thanksgiving Dinner

Diposting oleh good reading on Kamis, 24 November 2011


1. Southern Cornbread Dressing

4 cups crumbled cornbread
2 cups dry bread
3 1/2 cups chicken stock
3 eggs
1 cup milk
2 tsp salt
1/2 black pepper
1 cup chopped celery
1 cup chopped onion
1 tsp sage

Mixx cornbread and dry bread with the stock. Beat eggs slightly, add milk, salt, and pepper. Add to bread mixture. Then add celery, onion, and sage. Mix well. Bake in well greased pan at 375 for 30 to 40 minutes.


3. Green Bean Casserole
1 10 3/4 oz can Cream of Mushroom Soup
3/4 cup milk
1/8 tsp black pepper
2 9 oz bags frozen green beans, thawed
1 1/3 cup French Fried onions

Mix soup, milk, and pepper in a baking dish. Stir in beans and 2/3 cup French Fried onions. Bake at 350 for 30 minutes or until hot.
Top with remaining 2/3 cup of onions. Bake for 5 minutes or until golden.

4. Sweet Potato Casserole
2 1/2 lbs sweet potatoes, cut into 1 inch cubes
3/4 cup packed brown sugar
1/4 cup butter, softened
1 1/2 tsp salt
1/2 tsp vanilla extract
2 cups mini marshmallows

Preheat oven to 375.
Place sweet potatoes in a pot and cover with cold water. Bring to a boil. Reduce heat, and simmer for 15 minutes or until very tender. Drain. Rinse under cold water and peelings will come right off.
Place potatoes in a large bowl. Add sugar and next 3 ingredients (through vanilla). Mash sweet potato mixture with a potato masher. Place mixture into an even layer in an 11 x 7 inch baking dish coated with cooking spray. Top with marshmallows. Bake for 25 minutes or until golden.


6. Chocolate Pecan Pie
1 9 inch deep dish unbaked pie shell
2 cups pecan halves
3 large eggs, beaten
3 tbs butter, melted
1/2 cup dark corn syrup
1 cup sugar
2 tbs Jack Daniels
3 oz semisweet chocolate
Preheat oven to 375. Cover bottom of pie crust with pecans. In a medium bowl, whisk together the eggs and melted butter. Add the corn syrup, sugar, Jack, and chocolate. Stir until all ingredients are combined. Pour mixture into pie shell over pecans and place on a heavy duty cookie sheet. Bake for 10 minutes. Lower temperature to 350 and bake for additional 25 minutes or until pie is set. Remove from oven. Let cool on rack.
More about → Thanksgiving Dinner

Thanksgiving Fun!

Diposting oleh good reading

Happy Thanksgiving, everyone! I hope you all had a great day!

Check out this picture....Syd was looking fabulous today. She's always thrilled to let her big hair come out to play.

We had a wonderful day with family. Now we're back home and somehow found ourselves playing with the webcam. I thought I'd share some of our fun pictures. Enjoy!


More about → Thanksgiving Fun!

Thanksgiving Dinner

Diposting oleh good reading on Selasa, 18 Oktober 2011

DSC_2397
Thanksgiving Mini Cheesecakes with Double-duty Cranberry Sauce


DSC_2408
Cute Polymer Clay Witch

This polymer clay witch magnet was made by my cousin.  This cute figure and many like her (dentists, princesses, snowmen etc.) can be found for sale at her Etsy site.  They are hugely adorable and I think they would make great cake-toppers for kids (and adults) to be reused as magnets.  They have been coated so frosting/grease won’t penetrate the baked clay figurines and I even washed the chef guy because he had cranberry sauce all over him.  The little circular magnets are attached to the back.  Check them out HERE at her Etsy site, and click HERE for her blog.

DSC_2404

DSC_2409
Here’s the Polymer Chef.  He had a hand in the cranberry sauce as you can see.

DSC_2371
For Thanksgiving dinner, I made cranberry sauce with a bag of cranberries, one cup sugar and one cup water (just like it says on the package!)  I love the jewel tones of the berries and the leftover sauce is perfect for topping the mini cheesecakes.  I always have tons of cranberry sauce leftover.

DSC_2373

DSC_2368
After brining my organic turkey, I dried it in the refrigerator overnight.  Then I roasted it back side up.  Here it is ready to be flipped around breast-side up to finish roasting.

DSC_2384
We like tradition around here.  I stuff my turkey with plain ol’ bread stuffing.

DSC_2385
Here’s the creamed spinach and mushroom.

DSC_2388
I roasted some veggies too:  brussel sprouts, carrots, parsnips, beets, turnips and onions.

For the mini cheesecakes, I used this recipe HERE.
More about → Thanksgiving Dinner

Thanksgiving Menu

Diposting oleh good reading on Minggu, 14 November 2010

Trey and I are staying here for Thanksgiving, so I'm cooking Thanksgiving dinner for us! I'm very excited! I got the majority of my ingredients today! Here's what's on the menu!

Turkey
Southern Style Cornbread Dressing
Sweet Potato Casserole with Marshmallows
Green Bean Casserole
Cranberry Sauce
Sister Schubert Rolls
Green Congealed Salad
Chocolate Pecan Pie

For the most part, it is a very traditional Thanksgiving meal! At least, traditional in the south! I know some might think green congealed salad? ew. Well, it is a tradition in Trey's family. And we LOVE it. Seriously, it is so yummy. This will be my first time to make it. Of course, I will be posting recipes for all the dishes!

More about → Thanksgiving Menu

PUMPKIN CAKEPOPS

Diposting oleh good reading on Senin, 11 Oktober 2010

I found using the cakepop sticks easier and cleaner than trying to make the more environmentally conscious pumpkin cakeballs.  For some reason, the balls didn’t want to form smooth surfaces and I ended up with this drizzly mess all over the place as you can see below.  Even though the cakeballs were cold, bits of  chocolate cake crumbs started falling off into the bowl of orange candy melts.  It was not a pretty sight.  DSC_0450

pumpkin cakepops

Pumpkin cakepops for Thanksgiving.  Happy Thanksgiving, Canada! 
DSC_0468

See that pumpkin shaped pop?  I made balls with my chocolate/frosting mixture.  Then I flattened both of the poles slightly.  I used a wooden skewer to make about 6 indentations longitudinally to the poles.  I put the formed balls into the freezer to set.
DSC_0454

So I have a rather messy looking patch of pumpkin cakeballs, but they’re tasty nonetheless.  I know cakepops (on the stick) look better and they’re fun and cute, but there’s something simple and not-so-fussy about cakeballs.   I melted some green candy melts and piped little stems on the pumpkins.  I wasn’t going to attempt pumpkin leaves as I was already covered in orange and green candy melts.  The melts aren’t so easy to pipe.
DSC_0453
More about → PUMPKIN CAKEPOPS

THANKSGIVING DINNER

Diposting oleh good reading on Senin, 12 Oktober 2009

DSC_3784

I promise I have a reasonable excuse for not having posted regularly in such a long time. Really I do.

First, since I’m an English teacher, you know that high school can be hectic in the first couple of months. It has been a tad more hectic this time--more than usual.

Also, last week, I just had two root canals redone. My ex-dentist didn’t really didn’t do a good job of it (about 10 years ago) and I think as a result I developed an infection recently. I went to a fantastic specialist—an endodontist this time and he was highly recommended by my current dentist. I am much more confident that this time it’ll work.

However, after 2 hours in the chair and listening to drilling and chiselling, I still currently have cheeks that only a chipmunk would love and I have slight bruising. This is all normal of course, and though I ate congee for the first few days, I was able to eat the gorgeous free range turkey I roasted today. I just cut everything in itty bitty pieces and chewed on my left side only. Hey, whatever works, right?

DSC_3779

Since I discovered the joys of brining turkeys, I’ll never go back. One year, I delayed too much at purchasing a turkey and as a result I couldn’t find a fresh one anywhere in the supermarkets. I happened to go to Capers/Whole Foods and lo and behold, they had quite a few fresh turkeys left in their fridge. I grabbed one and made the tastiest turkey ever. Since then, I haven’t gone back to the regular supermarket turkeys. I buy free range or organic. It costs way more money but the taste is remarkable. This turkey was a little over 15 pounds. It was $95. Yup. That is indeed pricey. But it is so flavourful!DSC_3787

I loathe dry breast meat and so I don’t waste my hard-earned money on a pricey bird by treating it poorly. I always brine my fresh turkeys the day before. I start in the morning and put the turkey in a large plastic bin. Then I mix hot water and kosher salt with a bit of sugar and stir to dissolve. I then toss in a tea bag filled with some cloves, black peppercorns, and juniper berries. I add plenty of cold water and then submerge the turkey in the brine and stick it all in the fridge until the evening. I drain and dry the turkey and place it uncovered on a rack atop a sheet pan and allow it to dry in the refrigerator overnight. This helps with a crackly skin.

DSC_3795

I start the bird out on a rack in the roasting pan lined with carrots, onions, celery, thyme sprigs from my backyard and some water to catch those yummy drippings. The turkey starts its journey to yummyville with its back up, at a high temperature – 400 degrees F. After an hour, I flip it over and have it breast up for most of the time at 250 degrees F. Then I blast it on high heat again for the final hour for a crisp and crackly skin. Because I have a Wolf oven, I have the luxury of the built-in meat probe and also a convection feature if I’m in a hurry. I never have problems with over or under-cooked meat.

DSC_3785

The best part is the stuffing, and though I’ve tried other types of stuffing, I like a traditional moist bread stuffing: cubed white bread, onions, celery, parsley, poultry seasoning and some eggs and chicken broth. It never disappoints.

DSC_3798

Sure, I’ve even heard of sticky rice stuffing and thought of making it, but since I only make turkey twice a year, I don’t want to take a chance on anything we may not like as much. I’ve tried sausage, bacon, fennel, pine nuts and all the fancy other additions to stuffing, but I like the star attraction to be the turkey. The plain bread stuffing is a wonderful accompaniment.

DSC_3792

One of my daughter’s favourite side dishes is creamed spinach. This time I added chopped white mushrooms. I sauteed them until dry and added them to the creamed spinach mixture and topped everything with parmesan cheese. After baking, it was bubbly, creamy and delicious!

DSC_3800

DSC_3802

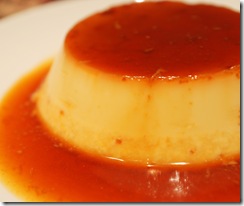
For dessert, I had planned to make a pumpkin créme brulée. Unfortunately, when I got to Superstore, the entire section of canned pumpkin was sold out. I looked high and low and thought it better to just forget the idea. So I made créme caramel. It was a perfect ending to a satisfying meal.

Now, I’ll be saying bye for now because I have a stack of things to mark and my seratonin levels are sky-high from all that turkey. I’ll be putting my feet up shortly.

Have a Happy Thanksgiving!

More about → THANKSGIVING DINNER

PUMPKIN PIE CHIFFON CAKE

Diposting oleh good reading on Jumat, 17 Oktober 2008

dulce de leche dripping down ethereally soft pumpkin chiffon: doesn't that look sexy?
lookie...here's that adorable mini chocolate pumpkin i made! it's especially cute on cupcakes too!

Here's a recipe I promised to post utilizing some of the leftover pumpkin puree from my Mini Pumpkin Cheesecake Brulees. BTW, I'm thinking of making those again because they were so good!


This Pumpkin Chiffon cake was so delicious! It was moist and had a tender crumb. The pumpkin puree, pie spices and cinnamon gave it a pumpkin pie flavour but the texture was so light and airy. You know how eating a pumpkin pie at the end of a meal can put you over the top? It tends to be very rich and dense in texture. Well, you could eat many more slices of this cake after your turkey meal and not feel the seratonin repercussions!

CAKEBRAIN'S PUMPKIN PIE CHIFFON CAKE
1 cup sugar
½ cup golden brown sugar
1 1/3 cups cake flour (measure unsifted)
1 ¼ tsp baking powder
¼ tsp baking soda
½ tsp salt
7 large eggs, 2 left whole, 5 separated (at room temperature)
1/3 cup vegetable oil
1 tsp vanilla extract
½ tsp cream of tartar
2/3 cup water
1 cup canned pureed pumpkin
1/2 t. cinnamon
1/2 t. pie spices


1. Adjust oven rack to lower-middle position and heat oven to 325°F. Whisk sugars, flour, baking powder and salt together in large bowl (at least 4-quart size). Whisk in two whole eggs, five egg yolks (reserve whites), water, oil and extract until batter is smooth. Stir in pumpkin puree, cinnamon and spices.
2. Pour reserved egg whites into large bowl; beat at low speed with electric mixer until foamy, about 1 minute. Add cream of tartar, gradually increase speed to medium-high, then beat whites until very thick and stiff, just short of dry, 9 to 10 minutes with handheld mixer or 5 to 7 minutes in standing mixer. With large whisk, fold whites into batter, smearing any blobs of white that resist blending.
3. Pour batter into ungreased large tube pan ( 9 inch diameter, 16-cup capacity).
4. Bake cake on lower middle rack in oven until wire cake tester inserted in center comes out clean, 60-70 minutes. Immediately turn cake upside down to cool. If pan does not have prongs around rim for elevating cake, invert pan over bottle or funnel, inserted through tube. Let cake hang until completely cook, about 2 hours.
5. To unmold, turn pan upright. Run frosting spatula or thin knife around pan’s circumference between cake and pan wall, always pressing against the pan. Use cake tester to loosen cake from tube. For one-piece pan, bang it on counter several times, then invert over serving plate. For two-piece pan, grasp tube and lift cake out of pan. If glazing the cake, use a fork or a paring knife to gently scrap all the crust off the cake. Loosen cake from pan bottom with spatula or knife, then invert cake onto plate. (Can be wrapped in plastic and stored at room temperature 2 days or refrigerated 4 days.)
Serving: Drizzle a slice of the pumpkin chiffon with dulce de leche or caramel sauce. Top with a cute hand-made chocolate mini-pumpkin!


I have entered this dessert in the World Food Day Event hosted by Ivy at Kopiaste. Thanks to Giz, at Equal Opportunity Kitchen for informing me about this worthy event!
I have much to be thankful for: A healthy family, great friends and a food blogging community that is both inspirational and supportive!
More about → PUMPKIN PIE CHIFFON CAKE

PLAYING WITH CHOCOLATE: MINI CHOCOLATE PUMPKIN TUTORIAL

Diposting oleh good reading on Minggu, 12 Oktober 2008

Here, by popular demand, is my tutorial on making Mini Chocolate Pumpkins.

Since it's a long-weekend here in Canada, I have an itty bitty amount of time between stacks of marking to give you a quick run-down on how to work "Chocolate Plastic" into cute Mini Pumpkins.

Remember those Chocolate Roses I made? (Check back later because I have to post that tutorial next!) I still have plenty of leftover chocolate plastic from making the roses. I kept it tightly wrapped in plastic wrap and then put all of that in an airtight plastic container. All you have to do is take a small piece of the chocolate plastic and warm it up in your hands or beat it with a rolling pin! What fun! Yes, the beating part.

The recipe is simple: Melt 6 oz bittersweet chocolate and combine it with 1/3 cup
corn syrup. Mix thoroughly until combined. Spread the mixture thinly and evenly on a plastic wrap-lined sheet pan for a few hours (covered with more plastic wrap). Knead the chocolate plastic to soften and keep it wrapped in plastic wrap when you're not using it.

Pinch a small ball of chocolate plastic in your fingers and create a ball by rolling it between your palms. You remember...kind of like when you were a kid playing with Playdough!

I like a squat shape for my mini pumpkins, so I kind of squash the ball between my palms. Then I use a toothpick (or a skewer, or my favourite tool--my metal "cake tester") and trace lines up and down...and all around the pumpkin to--well, make it look like a pumpkin!

Take a tiny ball of chocolate plastic and roll it into a tiny log to make the stem. Cut off a stem-sized piece and use a toothpick to position it into the pumpkin.
I like to make a hole down the top of my pumpkin with a toothpick first. I drill down to about the centre of the pumpkin.It's a delicate matter. You can use tweezers I suppose, but I find a toothpick works fine because the little point helps guide the stem end into the hole.

I use the toothpick tip to squish and press down the stem to attach it firmly to the pumpkin top and then proceed to make a leaf.

Create a tiny ball of chocolate plastic into a leaf shape. I know that pumpkin leaves don't look like this, but I'm working in such a tiny scale that I don't really care. This simple leaf design is so much easier to handle. If you're so inclined, go ahead and make the pumpkin leaves look botanically correct. I find that trying to make little curly tendrils doesn't work well as the plastic chocolate doesn't hold its shape so well when it's rolled so thinly.
You can use the Mini Chocolate Pumpkins to adorn Mini Pumpkin Cheesecake Brulees or this Pumpkin-Pie Chiffon Cake oozing with Dulce de Leche. They're great on cupcakes too. If you want, you can use white chocolate and tint the finished shapes with food colouring but I'm not as crazy about the white chocolate flavour as real dark chocolate :)

Yes, I'll post my original Pumpin-Pie Chiffon Cake Recipe next (I was a busy little baking-bee this weekend). It's yummerific. I'm on a roll because I winged the recipe with all the extra pumpkin puree I had on hand from making those Mini Pumpkin Cheesecakes. I still have some puree left and am thinking of adding it to a certain creamy dessert I've made in the past...

Enjoy!


More about → PLAYING WITH CHOCOLATE: MINI CHOCOLATE PUMPKIN TUTORIAL

MINI PUMPKIN CHEESECAKE BRULÉE

Diposting oleh good reading on Kamis, 09 Oktober 2008

there's no squash quite so adorable as the pumpkin!

Canadians will be celebrating Thanksgiving this upcoming Monday. I am gearing up by buying little decorative pumpkins for the kids and I'm looking around for things to do with pumpkin puree as I just opened this massive can and have so much left over!

mini pumpkin cheesecake brulées: smooth, creamy and not over-spiced!

I used my mini cheesecake pan from Williams Sonoma to make some Mini Pumpkin Cheesecakes. I bruléed the tops after they finished their overnight cooldown in the refrigerator and topped them with these adorable little chocolate "plastic" pumpkins. No, it's not plastic! It's made out of quality bittersweet chocolate and corn syrup! These are more yummy than the fondant pumpkins I made last year for my cupcakes. "You can't go wrong with chocolate" is my motto. I have plenty of this chocolate playdough left over from making those chocolate roses from the other day. I'll be doing a chocolate rose tutorial soon. Come back and check it out later!The recipe I created makes only 8 mini cheesecakes. I just wanted to use one brick of cream cheese, and I kind of just made the recipe up along the way.

MINI PUMPKIN CHEESECAKE BRULEE

Crust:

  • 1/2 cup crushed graham cracker crumbs
  • 1 T sugar
  • 1 T melted butter

  1. Preheat oven to 350°F.
  2. Combine all the ingredients together, mixing well. Press an equal amount into 8 mini cheesecake molds.
  3. Bake for 10 minutes. Let cool while making the filling.

Pumpkin Cheesecake filling:

  • 8 oz (250g) Philadelphia cream cheese, at room temperature
  • 1/4 cup sugar
  • 1 egg, room temp.
  • 1/4 cup canned pureed pumpkin
  • 1/2 t. cinnamon
  • 1/2 t. pie spices
  • 1 T. milk
  1. Lower heat to 300°F.
  2. Beat cream cheese in a standing mixer until creamy and smooth.
  3. Add the sugar, pureed pumpkin and spices and beat on medium speed until well combined.
  4. Add the egg and continue to mix for about 1 minute. Finally, add the milk and mix thoroughly.
  5. Spoon equal amounts of the cheesecake filling into all 8 prepared molds.
  6. Bake the cheesecakes for 20 minutes at 300°F
  7. Allow to cool for 10 minutes in the molds.
  8. Refrigerate for at least 2 hours or overnight. Remove the cheesecakes and brulee just before serving.

Serving:

  • Sprinkle granulated sugar over each cheesecake and use a brulee torch to caramelize the sugar until golden brown.
  • Top with a mini chocolate pumpkin. Form small balls of chocolate plastic with your hands and use a toothpick to form grooves on the pumpkin and veins on the leaf. see tutorial

More about → MINI PUMPKIN CHEESECAKE BRULÉE