Tampilkan postingan dengan label puddings and custards. Tampilkan semua postingan

COCONUT-VANILLA RICE PUDDING BRULEE

Diposting oleh good reading on Kamis, 09 Februari 2012

Coconut-Vanilla Rice Pudding...Brûlée


Any rice will do for your pudding.  I used Jasmine because that's what I had on hand.

This recipe for rice pudding just happens to be Gluten Free and Dairy Free.  I used canned coconut milk (Aroy-D Brand).  Make sure you stir up the coconut milk in the can before measuring out.  The recipe has so few ingredients and is super easy!  You can make these ahead, you can leave off the sugaring process entirely and just eat it plain.  You can also eat it cold or warm.  Just nuke individual servings in the microwave (make sure you cover the pudding in the microwave or it may explode like it did in my oven! eep! rice pudding explosion! don't say I didn't warn you!)


Sprinkle a layer of organic evaporated cane sugar over your rice pudding.  Make sure your container is oven-proof!

Ready your blow torch (you can do several at a time on the top rack of your oven and use the broiler)

Brûlée your sugar.

Check. Did you miss any spots? you can add some more sugar and torch those areas again...


 COCONUT-VANILLA RICE PUDDING BRULEE 
  • 1/2 cup rice [I used Jasmine, but a short or medium grain will be creamier]
  • 1/4 cup sugar [I used organic evaporated cane sugar.  If you like it sweet, use up to 1/2 cup sugar]
  • 2 cups coconut milk 
  • 1 teaspoon vanilla extract [I used vanilla bean paste]
  1. In a large heavy saucepan, cover rice with water and bring to a boil [I used 1 1/2 cups of water]
  2. Reduce and simmer on low heat, covered for 15 minutes.
  3. Add sugar, coconut milk and vanilla extract.  Simmer over low heat for 15 minutes.
  4. Stir until excess liquid has evaporated.  
  5. Distribute the rice pudding in ovenproof individual ramekins.  [You can make these ahead up to this point and store covered in the refrigerator]
  6. Sprinkle extra cane sugar [granulated will do] until you cover the entire surface of the pudding.
  7. Either brûlée your pudding tops with a torch or broil in the oven until golden brown.
  8. Serve immediately.


More aboutCOCONUT-VANILLA RICE PUDDING BRULEE

FEED A COLD: ANCIENT CHINESE CURE FOR A SORE THROAT

Diposting oleh good reading on Jumat, 23 April 2010

DSC_4558-2
Ancient Chinese Secret Clay Steaming  Cups…
DSC_4561-2
haha! actually, they’re only a few years old.  I purchased them in Chinatown in Vancouver and they merely look rustic.

My maternal grandmother had a set of these and my mother has her own set.  They are a distinctly southern tradition and can be found in Asian bakeries around town in Metro Vancouver. BTW, check out my paternal grandfather’s heritage village area (our particular village in Kaiping (Hoiping) is called Xicun( “Shrimp Village”)…it made the UNESCO list of heritage sites!  cool eh? 
DSC_4564-2
These clay molds, or “buut jai” are similar to muffin tins and are specifically designed for a Chinese sweet made of rice flour and sugar.   When I was young and living with my maternal grandmother, Poh Poh,  during the summers after my grandfather passed away,  I ate many a confection made entirely of sugar and rice flour.  This particular sweet is close to my heart as it is comforting.
DSC_4566-2
As with all homey desserts, this one lacks in pizzazz and beauty.  However, it is a favourite among children.  The rice pudding cakes are slightly chewy if made properly and a little sweet but not cloyingly so.  The little cakes must have a belly button in my opinion—signifying that is has been made properly.  Otherwise, it’s a fake.  A farce.   haha.  Some people put red beans in theirs (uck!) or use brown sugar (meh!) but in our household, the clean lines, the empty belly button and the pure white Buut Jai Goh is da BOMB!
DSC_4567-2
My daughters have a sore throat and dry cough right now and there’s not much I can give them other than Manuka honey for the throat, green tea and some cough drops with even more manuka honey.   I recall when I was young, how eating Baak Tong Goh ("White Sugar Cake", a fermented kind of super sweet rice pudding cake) or a Buut Jai Goh would alleviate my sore throat.  The sticky rice pudding would coat the throat temporarily and it would make me feel all better for a little while.
DSC_4568-2
My maternal grandmother is no longer with us, and my mother was never one to make something from scratch if it could be purchased easily at a local bakery; but I sure have a passion for reliving the good ol’ days!   In a matter of an hour, I had these on a plate ready for my daughter to eat.  Bebe loved it and ate 2 right away.  Bib didn’t think much of it and declined them.  Her loss. 
click on for the recipe...

BUUT JAI GOH (Clay Bowl Steamed Sweet Rice Cakes)
  • 1 1/4 cup rice flour
  • 2 cups water
  • 2/3 cup sugar (or lightly packed brown sugar)
  • 1/2 cup cold water
  1. Prepare steamer:  preheat empty clay bowls (or small rice bowls) on high heat.  This recipe makes 15 cakes.  You may have to adjust for the size of your bowls.   [tip: I like to spray my bowls with Pam to allow for easier removal if the cakes later]
  2. In a large saucepan, combine the 2 cups water with the 2/3 cups sugar and heat until sugar is dissolved.  Allow to cool.
  3. In a large mixing bowl whisk the rice flour while slowly incorporating the 1/2 cup cold water.  The batter will be thick.
  4. Slowly pour the sugar mixture into the rice mixture, whisking to thoroughly combine.
  5. Carefully pour the mixture into the preheated clay bowls.
  6. Cover and steam for 20 minutes.  If you’ve done this right, you’ll get an indent in the centre; what I like to call a “belly-button” in the middle of your little cake.
  7. Important:  remove the clay bowls from the steamer and allow to cool on the counter for at least an hour or until set.  Use a wooden skewer to remove the cakes from the clay molds.   When cooled, store covered with plastic wrap at room temperature.  You can briefly resteam the cakes if you like to eat them a little warm.  I like mine at room temperature.
More aboutFEED A COLD: ANCIENT CHINESE CURE FOR A SORE THROAT

RICE PUDDING

Diposting oleh good reading on Rabu, 27 Januari 2010

RICE PUDDING
The Vancouver 2010 Olympics is fast approaching, and the weather is not exactly cooperating.  It’s so mild you can walk outside in a t–shirt!

However, during the evening, it’s still quite nippy…enough to warrant a warming comfort food my daughters simply love.  They get all excited over puddings.  Warm rice pudding is their absolute favourite. 

I rummaged around my “rice bin”, which is simply a drawer filled with close to 100 pounds of practically 20 different varieties of rice.  I’ve got black rice, red rice, wild rice, Jasmine, Basmati, Brown, Semi-brown, glutinous, sushi rice and the list goes on. 

I thought how pretty it would be to make red rice pudding.  Or black rice pudding.  Then I reminded myself that for my 6 year old and 3 year old, refined white rice would probably be much more appreciated.  I know, I know.  Bad mommy.  I should be thinking of their fibre intake and all the extra nutrients in the other rices.  Perhaps another day. 

This Rice Pudding is pretty traditional and straight forward.  No egg yolks, no separate custard or pastry cream to mix into the concoction.  All the ingredients will be in your pantry.

We prefer to eat our Rice Pudding slightly warm because cold rice is just yucky in texture. It’s kind of crunchy if it’s too cold.  So we just nuke it in the microwave for a few seconds before serving and if it’s too thick, we thin it with some milk. 
DSC_4111

For my serving of pudding, I added cardamom pods.  They would inevitably say “Mommy, what’s that green stuff in the pudding? is it a vegetable?” 

Horrors. 

So I always split my desserts before serving and add the neat-o flavour enhancers to my portions.  Everybody’s happy.
DSC_4110
RICE PUDDING
  • 1/2 cup short-grain or medium-grain white rice ( I used Kokuho brand sushi rice)
  • 2 cups whole milk
  • 1 3/4 cups heavy whipping cream
  • 3 tsp pure vanilla extract
  • 1/4 cup organic evaporated cane sugar
  • 5 cardamom pods, split (optional)
  1. Rinse the rice under water 3 times until clear.  Place rice in a large heavy saucepan. Cover with cold water and bring to a boil.  Remove from the heat and drain with a sieve.
  2. Return the rice to the pan.  Add milk, cream and cardamom pods, if using.
  3. Bring to a boil over medium heat.  Reduce heat to low and simmer for 45-50 minutes, stirring occasionally with a heat-proof rubber spatula to prevent rice from sticking to the bottom of the pan.
  4. Stir in vanilla extract.  Stir in sugar and simmer for 10 more minutes.  Pour the rice pudding into a small serving container, discarding cardamom pods (if used).
  5. Serve warm or refrigerate for later.   If you need to warm up the pudding,  spoon out individual portions and microwave for a few seconds to warm through.  Stir in a little milk if it’s too thick.
More aboutRICE PUDDING

THANKSGIVING DINNER

Diposting oleh good reading on Senin, 12 Oktober 2009

DSC_3784

I promise I have a reasonable excuse for not having posted regularly in such a long time. Really I do.

First, since I’m an English teacher, you know that high school can be hectic in the first couple of months. It has been a tad more hectic this time--more than usual.

Also, last week, I just had two root canals redone. My ex-dentist didn’t really didn’t do a good job of it (about 10 years ago) and I think as a result I developed an infection recently. I went to a fantastic specialist—an endodontist this time and he was highly recommended by my current dentist. I am much more confident that this time it’ll work.

However, after 2 hours in the chair and listening to drilling and chiselling, I still currently have cheeks that only a chipmunk would love and I have slight bruising. This is all normal of course, and though I ate congee for the first few days, I was able to eat the gorgeous free range turkey I roasted today. I just cut everything in itty bitty pieces and chewed on my left side only. Hey, whatever works, right?

DSC_3779

Since I discovered the joys of brining turkeys, I’ll never go back. One year, I delayed too much at purchasing a turkey and as a result I couldn’t find a fresh one anywhere in the supermarkets. I happened to go to Capers/Whole Foods and lo and behold, they had quite a few fresh turkeys left in their fridge. I grabbed one and made the tastiest turkey ever. Since then, I haven’t gone back to the regular supermarket turkeys. I buy free range or organic. It costs way more money but the taste is remarkable. This turkey was a little over 15 pounds. It was $95. Yup. That is indeed pricey. But it is so flavourful!DSC_3787

I loathe dry breast meat and so I don’t waste my hard-earned money on a pricey bird by treating it poorly. I always brine my fresh turkeys the day before. I start in the morning and put the turkey in a large plastic bin. Then I mix hot water and kosher salt with a bit of sugar and stir to dissolve. I then toss in a tea bag filled with some cloves, black peppercorns, and juniper berries. I add plenty of cold water and then submerge the turkey in the brine and stick it all in the fridge until the evening. I drain and dry the turkey and place it uncovered on a rack atop a sheet pan and allow it to dry in the refrigerator overnight. This helps with a crackly skin.

DSC_3795

I start the bird out on a rack in the roasting pan lined with carrots, onions, celery, thyme sprigs from my backyard and some water to catch those yummy drippings. The turkey starts its journey to yummyville with its back up, at a high temperature – 400 degrees F. After an hour, I flip it over and have it breast up for most of the time at 250 degrees F. Then I blast it on high heat again for the final hour for a crisp and crackly skin. Because I have a Wolf oven, I have the luxury of the built-in meat probe and also a convection feature if I’m in a hurry. I never have problems with over or under-cooked meat.

DSC_3785

The best part is the stuffing, and though I’ve tried other types of stuffing, I like a traditional moist bread stuffing: cubed white bread, onions, celery, parsley, poultry seasoning and some eggs and chicken broth. It never disappoints.

DSC_3798

Sure, I’ve even heard of sticky rice stuffing and thought of making it, but since I only make turkey twice a year, I don’t want to take a chance on anything we may not like as much. I’ve tried sausage, bacon, fennel, pine nuts and all the fancy other additions to stuffing, but I like the star attraction to be the turkey. The plain bread stuffing is a wonderful accompaniment.

DSC_3792

One of my daughter’s favourite side dishes is creamed spinach. This time I added chopped white mushrooms. I sauteed them until dry and added them to the creamed spinach mixture and topped everything with parmesan cheese. After baking, it was bubbly, creamy and delicious!

DSC_3800

DSC_3802

For dessert, I had planned to make a pumpkin créme brulée. Unfortunately, when I got to Superstore, the entire section of canned pumpkin was sold out. I looked high and low and thought it better to just forget the idea. So I made créme caramel. It was a perfect ending to a satisfying meal.

Now, I’ll be saying bye for now because I have a stack of things to mark and my seratonin levels are sky-high from all that turkey. I’ll be putting my feet up shortly.

Have a Happy Thanksgiving!

More aboutTHANKSGIVING DINNER

A TRIO OF MINI CREAM PUFFS

Diposting oleh good reading on Selasa, 03 Juni 2008

i haven't decided yet if the matcha pastry cream looks appetizing or like green slime...

but

who doesn't like a cream puff?

With my renewed affection for pastry cream, I decided to see what variations I could try that would work well with Sherry Yard's basic recipe.
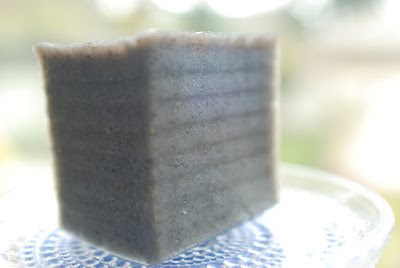
black sesame pastry cream looks like...geez, what does it look like? food ought not to be grey in colour

I baked up a batch of mini cream puffs using Yard's recipe and made a batch of her vanilla pastry cream. I divided the batch into 3 bowls and added various flavourings to each bowl; crossing my fingers that they would turn out. I left one bowl plain vanilla...because it's still so tasty this way.
a sure-fire winner: a vanilla pastry cream & strawberry stuffed cream puff

In one bowl, I mixed in 1 tablespoon of toasted black sesame seeds, ground finely to a powder. Yes, the result looks like ash had fallen into my pastry cream, but the flavour was quite nice.


the new variations provide quite a nice contrast in flavours sitting together on a plate

The other bowl I made into a matcha pastry cream. I used 1 teaspoon matcha mixed with 1 teaspoon hot water. I created a paste and then added that to the pastry cream. I think therein was my problem. The additional 1 teaspoon of water created a watery pastry cream whose texture I found too soft. Also, the flavour was too intense for most people, I think. I didn't think the flavour was too bad, but for 1/3 of a recipe, perhaps it was too strong. I think 1 teaspoon of matcha would be fine for the whole batch of pastry cream. Next time, I'll use 1 teaspoon of the pastry cream to make the matcha slurry instead of using hot water. Perhaps the texture would be better.
doesn't that look so edible?

For this particular pastry cream, I still think either vanilla bean or the coconut pastry variation is best suited for most applications. For cream puffs, the black sesame wasn't disappointing, but I don't think I could eat a whole batch of them. It's nice as a filling for a mini puff, sitting on a plate with the other flavours. Next time, I'll have to make a chocolate variation for the trio of mini puffs. Perhaps chocolate, coconut and banana?

Check out my previous post on Fresh Berry Tarts for Yard's Pastry Cream recipe. For the basic vanilla recipe, use one cup milk instead of the one cup unsweetened coconut milk.

PATE A CHOUX (CREAM PUFFS)

from Sherry Yard's The Secrets of Baking
1 cup bread flour
1 t sugar
1/4 t salt
1/2 cup water
1/2 cup whole milk
6 T unsalted butter
4-5 large eggs [I used 5]

for egg wash: 1 large egg, plus 1 egg yolk
  • Sift together the flour, sugar, and salt in a large bowl. Set aside
  • Bring the water, milk, and butter to a boil in a large saucepan over medium heat. At the boil, remoe the pan from the heat and add the flour mixture all at once. Using a sturdy spoon, stir vigorously to combine.
  • Return the mixture to medium heat and stir constantly in figure eights. Cook for at least 4 minutes, or until the mixture has a smooth, mashed-potato-like appearance. This helps to break down the starch and develop the gluten. Remove it from the heat.
  • Transfer the hot mixture to the bowl of a standing mixer fitted with a paddle attachment. Mix on low speed for 1 to 2 minutes, or until the dough cools to 185 degrees F. Add 4 of the eggs, one at a time. Be sure to let the batter absorb each egg and scrape down the sides of the bowl with a rubber spatula before adding the next. Before adding the last egg, test for consistency. Pinch off about 1 teaspoon of dough with your thumb and index finger, then pull your fingers apart. The dough should stretch rather than break. If it breaks, add the last egg. Mix on low speed until thoroughly incorporated, about 2 minutes. Do the finger test for consistency again. The dough should be shiny and smooth. It is now ready to be piped. To store for later use, cover the surface with plastic wrap and refrigerate for up to 2 days.

Shaping:

  • Fit a large plain tip into a large plastic piping bag. Make a big cuff at the top of the bag and fill the bag halfway with choux paste. Uncuff and twist the top of the bag to push the contents toward the tip. For large cream puffs, pipe mounds of pate a choux 2 inches in diameter and 1 inch high onto the first baking sheet, 2 inches apart. For medium puffs, the mounds should be 1.5 inches in diameter and 1 inch high. Small puffs should be 1/2 inch in diameter and 1/2 inch high. At this stage, the unbaked cream puffs can be frozen. Cover with plastic film and freeze for up to 2 weeks. Defrost at room temperature for about 30 minutes before baking.

Egg wash and Baking:

  • Preheat the oven to 425 degrees F. Adjust the rack to the center of the oven and place a heatproof baking dish or pan on the floor of the oven. Prepare a baking sheet by lining it with parchment paper. Glue each corner of the parchment to the sheet with a dab of choux paste. This keeps the paper in place during piping and baking. Line a second baking sheet with parchment paper and place a rack on it.
  • Make the egg wash by whisking the egg and yolk in a small bowl. Brush lightly but evenly over the puffs.
  • Place the puffs in the oven and pour the hot water into the pan on the oven floor. Quickly close the door to keep all the steam in the oven . Bake for 10 minutes, or until the puffs begin to rise, then turn the oven down to 350degrees F and rotate the baking sheet. Prop the oven door open slightly with a wooden spoon and bake for 18-20 minutes more for large puffs, or until the puffs turn nutty brown. (For medium puffs, bake for 15-18 min. more). Remove from the oven and cool completely on a rack, about 15 minutes, before filling and serving. At this stage, the cream puffs can be frozen for later use. Place the cooled puffs in an airtight plastic bag and freeze for up to 2 weeks. They will also keep for 24 hours at room temperature before being filled.


More aboutA TRIO OF MINI CREAM PUFFS

FRESH BERRY TARTS WITH COCONUT PASTRY CREAM

Diposting oleh good reading on Jumat, 30 Mei 2008

fresh berry tarts with coconut pastry cream

Long time no see, everyone!

I have been on hiatus.

During my "cleansing/detoxification" of sugar for the last few weeks, I had tons of marking as this is the end of the school year.

As I type this, my last huge pile of projects awaiting marking is sitting on my dining room table: board games, poetry anthologies, art work, dioramas, video-taped skits and other such creative takes on "To Kill a Mockingbird Pride Projects" (so-named for the pride each student is supposed to have, for having created projects that showcase their individual talents). The last few make-up exams are being scheduled, a handful of anxious individuals have yet to recite their memorized "Tomorrow and tomorrow" Macbeth soliloquies, and a stack of textbook receipts for lost books are awaiting my attention. I recently powered through 2 class sets of essays and I'm feeling euphoric. The marking burden is starting to lift slightly from my achey shoulders.

I figured it was time to celebrate with a batch of pastry cream! However, you know me...I had to tinker with the classic flavour of vanilla and add something to it. I decided upon Coconut flavoured pastry cream. From the market I had purchased a fresh little box of blueberries and a huge box of strawberries. In my freezer I had on hand a 24/pack sleeve of frozen tart shells and a half a can's worth of leftover Coconut milk.

I decided that Sherry Yard's Pastry Cream recipe with the Coconut Variation would best suit the bill today. I opted to use 3 large eggs in the recipe instead of the 5 large egg yolks. I thought it would be lighter and less yellow, lending to a more coconutty flavour and appearance.


Yard's recipe is so easy. I was happy with the results of using the whole eggs. The cornstarch I used to thicken the pastry cream enabled me to make the pastry cream in practically a couple of minutes! I was whisking away and it was pretty instantaneous how it thickened to a pudding consistency. It was smooth and though I strained it as directed, only a few bits were left in the strainer. It wasn't grainy at all. Yum. The flavour was very nice. I'll be using this one again.

COCONUT PASTRY CREAM
from Sherry Yard's The Secrets of Baking
yield: 2 to 2 1/4 cups, enough for two 9-inch tarts or 24 mini tarts

1 cup milk
1 cup unsweetened coconut milk
1/2 cup sugar
1 1/2 t finely chopped orange zest [I left this out entirely]
2 t vanilla extract
3 T all-purpose flour or cornstarch
pinch of salt
5 large egg yolks or 3 large eggs, chilled
1 T unsalted butter, softened
  • If you will need to cool this quickly, line a baking sheet with plastic film and set aside.
  • Bring the milk, coconut milk, 1/4 cup sugar, and vanilla to a simmer in a medium nonreactive saucepan over medium heat
  • Meanwhile, sift together the remaining 1/4 cup sugar, the flour or cornstarch, and salt onto a piece orf parchment paper. Whisk the egg yolks or eggs in a large bowl. Add the sfited dry ingredients and whisk until fluffy.
  • When the milk comes to a simmer, remoe from the heat and ladle out 1/2 cup of the hot milk mixture. Drizzle it slowly into the eggs while whisking. Once the 1/2 cup nilk is incorporated into the eggs, pour the mixture back into the hot milk, whisking constantly. Be sure to scrape all the eggs into the pan with a rubber spatula.
  • Immediately begin to rapidly whisk the pastry cream. In less than 1 minute, it will boil and begin to thicken. Continue to whisk for about 3 minutes, or until it has the consistency of pudding. To test the cream for doneness, tilt the saucepan to one side. The cream should pull away from the pan completely. Rinse and dry the large bowl.
  • Strain the pastry cream through a fine-mesh strainer back into the bowl. Add the butter and stir until it is metled and incorporated. If the cream seems grainy, pulse it in a food processor until smooth. The cream is now ready to use, or it can be cooled to room temperature and refrigerated for up to 3 days. To cool the pastry cream quickly, spread it out on a baking sheet lined with plastic film. To prevent a skin from forming as it cools, place a sheet of plastic film directly on the surface.

FRESH BERRY TARTS

I used fresh strawberries and blueberries, but I imagine raspberries and blackberries would be equally good. I can envision sliced mangos, kiwi and other soft-fleshed fruit being equally delicious resting on the pastry cream.

1 "sleeve" of frozen tart shells (24 count)

1 cup fresh blueberries

4 cups strawberries, sliced

  • Bake the frozen tarts as directed on the package. Mine called for 12 minutes at 375degrees F.
  • Wash and prepare the fruit. I tasted the strawberries and didn't find them sweet enough. Unfortunately, it isn't strawberry season in Vancouver yet. When it is, I'm definitely going to make this recipe again. Local is the way to go with fruit. Today, I used those honking huge California strawberries that look kind of malformed...and they were slightly white inside. I know that's not a good sign. But that's all that I could find this time of the year. sigh. The way I fixed this washed out strawberry flavour problem was I sprinkled a couple of tablespoons of granulated sugar on the sliced strawberries. I allowed the berries to macerate a bit in the sugar and eventually it produced this syrup at the bottom of the bowl. I was short on time and didn't save the juices to reduce on the stovetop to a thick syrup--but if you had the time, you should. Then you'd incorporated the cooled syrup back into the berries.
  • I leave the baked tart shells unfilled, stored in a tupperware container until ready to serve.
  • When ready to serve, fill each tart shell with a tablespoon or so of cold pastry cream. Arrange your berries on top.
  • Refrigerate any leftover prepared tarts. The tart shells will begin to get soft from the moisture in the pastry cream and fruit so I try to consume them quickly after assembly.

******

What else can you do with pastry cream? Take a look at my Cream Puff Trio post!

I'm entering this berry tart in the Nutriferia Berrilicious Roundup. Go check it out!

Nutriferia badge
More aboutFRESH BERRY TARTS WITH COCONUT PASTRY CREAM

BLACK SESAME PUDDING CUBES

Diposting oleh good reading on Jumat, 28 Maret 2008

nine-layered black sesame pudding cubes

Have you ever had "Nien Goh"? It's the Chinese New Year's rice pudding cake that's steamed. This Black Sesame Pudding recipe is similar to the New Year's rice pudding cake in many ways. The base is rice flour and sugar and it's steamed. In fact, it's steamed in layers...9 layers in all. In the picture, you can see at least 8 layers. My ninth layer is kind of thin and doesn't show up very well. But it's there!

This recipe yielded a pudding that was not as chewy or tender as I would have liked. I wanted to replicate the Black Sesame puddings you get at Dim Sum. This one was more dense and very filling. After one cube, I was done and wanted to go to take a nap.


The black sesame flavour was pretty good, but perhaps this pudding is best eaten warm and fresh. After refrigeration, the pudding became harder and wasn't as pleasant to eat cold. I hadn't tried resteaming the pudding after it was refrigerated, but it's worth a try to bring back the texture. I don't think I'd make this one again. I couldn't eat more than one cube because it was so filling.

BLACK SESAME PUDDING

(from Distinctive Snacks of Hong Kong)
1 1/2 oz (40 g) black sesame
8 oz (225 g) castor sugar
3 1/2 cups water
7 oz (200 g) rice flour
2 oz (50 g) waterchestnut flour
1/2 T oil

  • Rinse, drain and air-dry the black sesame. Stir-fry in dry clean wok until golden brown. Grind in 6 oz(200 ml) water. Put through a sieve to form a fine solution.

  • Dissolve castor sugar in 6 oz (200 ml) water

  • Mix rice flour and waterchestnut flour with 2 cups (500 ml) water. Add oil and mix.

  • Add the above 3 items together, mix well. Pour a thin layer of mixture to about 1/2 cm thick in a square tin. Steam over high heat for 3 minutes until set.

  • Remove wok lid, pour in a second layer of mixture, steam for another 3 minutes. Repeat this process for 9 layers and then steam the whole pudding for 20 minutes.

  • Remove from heat. Cool, unmould, slice and serve.

  • Tip: mix sesame solution well before steaming.
More aboutBLACK SESAME PUDDING CUBES

COCONUT VANILLA BEAN RICE PUDDING

Diposting oleh good reading on Rabu, 23 Januari 2008

coconut vanilla bean rice pudding brulee
Yes.  This picture is mine.  All mine!  See what the hubbub is about.
This recipe is creamy and deliciously rich. If you love the flavour of coconut, this rice pudding is for you. It incorporates a velvety custard into coconut milk-infused jasmine rice and becomes a decadent dessert suitable for entertaining. My friend N is a fan of coconut and has requested this recipe. I've adapted it from Kate Zuckerman's A Sweet Life. In my rendition, I use a vanilla pod whereas she uses cardamom. For entertaining, I have bruleed the tops in individual dishes and they were fantastic.
One note: if you notice your custard curdling and it looks grainy, you can rescue it by whisking it vigorously using a wire whisk while it is still hot. Or, you can use a blender food processor or stick blender to puree the curdled custard for a minute or two.

Enjoy!

COCONUT VANILLA BEAN RICE PUDDING
adapted from Kate Zuckerman's A Sweet Life(yields 6 cups, serves 8 to 12)

RICE
1/2 cup plus 2 T jasmine rice or basmati rice
1/4 cup sugar
1 (13 1/2-fluid ounce) can coconut milk
1 cup whole milk
1/4 t salt

CUSTARD
1 vanilla bean (or 1 T vanilla extract)
1/2 cup plus 2 T sugar
1 cup whole milk
2 cups heavy cream
5 egg yolks
1 egg

special tools: fine-mesh strainer

Cook the rice. coconut rice, prepared by baking in a covered pot in the oven
  • Preheat the oven to 325 degrees F. Place the rice in a strainer and rinse with cold water. Place the rice in a heavy-bottomed medium-sized saucepan with 2 cups cold water. Bring the rice to a boil and immediately remove the pan from the heat.

  • Strain the rice and discard the starchy water. Place the blanched rice back in the pan and add the sugar, coconut milk, milk, and salt.

  • Bring to a boil, remove from the heat, and cover the pan with aluminum foil or the lid. Place the pan in the oven and bake until the rice expands, and absorbs all the liquids, 30 minutes. (If the pan is not oven-proof, transfer the rice and liquid to a metal or glass baking dish and cover with aluminum foil). If there is still runny milk in the pan, continue to bake, covered, for another 5 to 10 minutes. When the rice is done, remove if from the oven, leave it covered, and set it aside.
Make the custard.
the cream and vanilla bean mixture, prior to cooking and thickening
  • While the rice is baking, make the custard. Split the vanilla bean, scrape out the seeds with a knife and combine the empty pod along with the seeds in a heavy saucepan with 1/2 cup sugar, milk and cream. Bring to a simmer over medium heat. Remove from the heat and allow the vanilla to steep for 10 minutes.
  • In a mixing bowl, combine the egg yolks, egg and remaining 2 tablespoons of sugar and briskly whisk for 1 minute. Using a ladle, slowly whisk some of the hot cream into the egg mixture to warm it. Gradually pour the warmed egg mixture into the hot cream, whisking the cream constantly as you pour.

  • Cook the custard over medium heat, stirring continuously and scraping the bottom with a rubber spatula or wooden spoon, until the custard thickens enough to coat the back of a spoon. Remove from the heat and remove the empty vanilla pod.
Combine the custard and the rice
    the rice pudding is coconut-custardy-creamy
  • Scoop the rice into a large mixing bowl. Pour the hot custard over the rice and, using a whisk, slowly whisk until all of the rice granules are dispersed evenly and the mixture is thoroughly combined. Allow the rice pudding to cool completely.
Serving suggestions
  • Portion into oven-proof individual serving gratin or creme brulee dishes.
  • Sprinkle with granulated sugar and brulee (under a broiler or with a torch).
Storage
Will keep refrigerated, for 3 days
More aboutCOCONUT VANILLA BEAN RICE PUDDING

COCONUT CLOUD CUBES (COCONUT PUDDING)

Diposting oleh good reading on Rabu, 02 Januari 2008

coconut cloud cubes are like foamy light clouds of coconut-flavoured jello

I don't know if you can tell, but I received a new camera for Christmas from Stomach. I had been bitching about not being able to play around with my pictures. I had a credit-card thin Sony digital camera that was great for taking everywhere with me but I couldn't do much with the camera other than point and shoot (not that I had any idea what to do otherwise, by the way.) coconut bubbles are captured by gelling the egg white/coconut mixture

Stomach had taken photography courses so he had all these lenses for his Nikon camera that were going to waste what with digital technology. Fortunately, the new Nikon D-80 he bought me can use those lenses now and they haven't gone to waste after all. Now he just has to sell the body of the old camera.

This camera is very heavy compared to the micro-thin camera I'm used to but it's fun playing around with the settings. I haven't figured out entirely how to focus properly and apparently my composition sucks because I've never taken a photography course in my life! so bear with me. I think I'm having fun and I don't really care anyway. I think I see some further accessory purchases for this camera on the horizon, namely those fancy schmancy flashes that go off simultaneously. Lighting is definitely an issue.

coconut cloud cubes are great if you like coconut flavour but not the texture of dessicated coconut

This dessert is more of a gelled pudding than anything. You can enjoy Coconut Pudding at your local Dim Sum restaurant and sometimes it's made with an egg white foam and other times it isn't. When egg whites are incorporated into the pudding, the texture becomes almost spongy. It's snow-white and a wonderful play of cold, foamy coconut; quite like biting into a cloud if it were made of coconut cream!

COCONUT CLOUD PUDDING (COCONUT PUDDING/ YEH JUP GOH)

1 cup (250 ml) water
5 oz (125 g) castor sugar
1 oz (25 g) gelatine
1 cup (250 ml) coconut milk
1 cup (250 ml) 2% milk
6 oz (150 ml) egg white
  • Boil water, add sugar and stir to dissolve. Cool slightly and add gelatine. Stir well to dissolve. Add coconut milk and 2% milk.
  • Chill the mixture in the refrigerator until half set (to the consistency of thick cream). Check every 10 minutes, stirring to ensure even setting. If the geletine mixture is over-set, melt over hot water and re-chill until you get a creamy consistency.
  • Whip egg whites in stand mixer until stiff peaks form. Gradually add the gelatine mixture until ingredients are well combined
  • Immediately pour mixture into plastic-lined pan or molds and chill until firm and set.
  • Cut into cubes; serve cold
More aboutCOCONUT CLOUD CUBES (COCONUT PUDDING)

MANGO PUDDING

Diposting oleh good reading on Jumat, 27 Juli 2007

750 ml mango pulp of puree (in East Indian section of stores)
1 1/2 cups sugar
6 cups water (3 of boiling water & 3 cups cold)
4 packages unflavoured gelatin
500 ml whipping cream (unwhipped)
  • Dissolve gelatin in 3 cups boiling water, then add the 3 cups of cold water
  • Add the rest of the ingredients. Mix together thoroughly and refrigerage overnight.
  • One recipe fills two tupperware jello containers (round ring) or you could use a 9" x 13" pan and make them into squares.
  • Serve with a little evaporated milk and canned fruit cocktail
More aboutMANGO PUDDING

MAH JONG JELLO (RAINBOW FINGER JELLO)

Diposting oleh good reading

If you make these layers properly, they'll look like little mah jong tiles. Make sure your refrigerator is level.

4 packages flavoured jello
6 packages unflavoured gelatin (Knox)
1 can sweetened condensed milk (Borden)
Boiling water

JELLO LAYERS

For each jello layer (repeat this 4 times)
1/4 cup cold water
1 package unflavoured gelatin
1 cup boiling water
1 package flavoured gelatin
  • soften gelatin for 5 minutes in cold water
  • add the boiling water
  • stir in flavoured gelatin until completely dissolved
  • important: let cool to room temperature

MILK LAYERS:
1/2 cup cold water
2 packages unflavoured gelatin
1 cup boiling water
1 package flavoured gelatin
1 can sweetened condensed milk

  • soften gelatin for 5 minutes in cold water
  • add boiling water and stir to dissolve
  • blend in condensed milk and cool to room temperature
  • use 2/3 cup mixture for each milk layer

ASSEMBLY:

  1. Pour flavoured gelatin into 9" x 13" glass pan. Place in refrigerator until set (15-20 minutes)
  2. Slowly and gently pour 2/3 cup milk mixture (cooled) over top; tilt pan around to spread smoothly. Place in refrigerator until set
  3. Repeat steps #1 and #2 ending with jello mixture
  4. Refrigerate assembled jello another 4 hours before cutting
More aboutMAH JONG JELLO (RAINBOW FINGER JELLO)

EGG TARTS THE EASY WAY

Diposting oleh good reading

5 eggs
4 oz evaporated milk
6 oz sugar
10 oz water
2 T custard powder
frozen tart shells
  • Mix sugar and 8 oz water
  • Use 2 oz or Hot water to dissolve custard powder
  • Mix all ingredients well
  • Pour into frozen tart shells
  • Bake at 180C for 15 to 20 minutes
More aboutEGG TARTS THE EASY WAY

BAAK TONG GOH (SWEET RICE CAKE)

Diposting oleh good reading

2 cup American long grain rice (Calrose/Texas Long Grain)
2 1/2 cup water
1 1/2 cup sugar
4-5 drops "Yuet Heung Yuen" Lye water (found in Asian supermarkets)
1/2 t. Fast Rising Instant Yeast
1 T vinegar

  • Dissolve yeast & 1 T of sugar in water
  • Blend rice & water for 18 minutes in a blender
  • Add yeast mixture to rice mixture with sugar
  • Add drops of lye to the mixture and stir
  • Add vinegar and stir
  • Let sit at room temperature, covered for 5 hours
  • Steam for 12 minutes in oiled, plastic-wrap lined pan on high heat
More aboutBAAK TONG GOH (SWEET RICE CAKE)