MALGIERI & ZUCKERMAN MACARONS VS. TARTELETTE MACARONS

Diposting oleh good reading on Minggu, 14 Oktober 2007

Sigh. Macarons.

I had the good fortune of having a trusty comrade fighting by my side in my macaron battle today. J brought along a macaron recipe from Nick Malgieri and another from Kate Zuckerman's The Sweet Life. She too had been testing out recipes in preparatory anticipation of our ensuing battle. At home, she noticed some inconsistencies from batch to batch: first batch, no feet; second batch nice feet! Knowing J, and her exacting ways, I trust that she followed the recipe exactly. I mean, she didn't even want to play around with the batter and add any flavourings! The Zuckerman recipe was promising and so we tried it in my kitchen today; trying to tweak it to work for us. The only problem was that it called for one to leave the piped macarons out from 1 to 2 hours to dry and allow a "skin" to form! She had abandoned the Malgieri recipe because they all turned out too cookie-like.

Here's how the Zuckerman recipe went:
J brought Kate Zuckerman's macaron recipe into the ring for battle...

zuckerman's sugar/ground almond mixture, after sifting
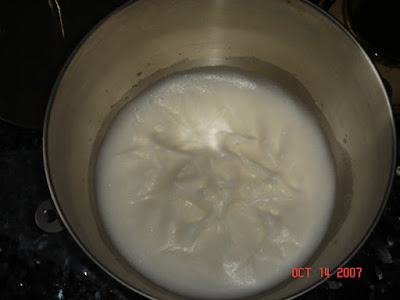

zuckerman indicates to whip eggwhites to the soft peak stage

here's J gently folding the whites into the ground almond mixture


our little zuckerman macaron soldiers lined up waiting for oven time

While we were waiting for the skin to form, I suggested we make another batch with an interesting Pistachio Macaron recipe I had noticed on Tartelette's blog. I turned on my computer, grabbed 3 eggs straight from the fridge and cheated time by warming them up in a bowl of hot water to bring them to room temperature.

Upon looking at the baking Zuckerman macarons (which by the way had already been sitting for 2 hours on the counter waiting for skins to form), J noticed they weren't producing feet and some of the cookies were cracking. They were looking like plain ol' ordinary cookies. After dickering with the temperature--an initial blast of heat and then lowering it; reducing the temperature to the same as the pistachio recipe's, etc., we still couldn't get them to behave properly. So disappointing! She whipped the trays out of the oven, exclaiming they were unworthy of further time in the oven and the ganache filling! She's pretty strict, eh? I'm glad she's on my side in this battle.

zuckerman macarons with no feet, no smooth tops and cracked surfaces. yummy though

Here's how Tartelette's Pistachio Macaron recipe fared:

After grinding whole almonds and pistachios with confectioner's sugar, I folded in the stiffly beaten egg whites. The mixture was way stiffer at this point than Zuckerman's recipe.

the pistachio macaron batter, ready for piping

tartelette's macaron soldiers, ready and waiting (for only 20 minutes! not 2 hours like kate's!)

1st batch of pistachio macarons rising to the occasion (creating feet) in my Wolf oven

and then collapsing after I brought them out! drat!

some of these collapsed macarons had hollow bottoms. odd.

At this point, I decided the oven must be too hot (it was set at 315degrees F throughout for 12-14 minutes) for the full amount of time that the macarons had to be in there to bake. For the next batch, I watched them "rise/create feet" first (at 315 degrees) and as soon as the feet were at their height, I then turned the oven down to 300degrees F to finish baking. The results were much better looking and they looked very promising indeed!

2nd tray of pistachio macarons using the reduction of heat method

we quickly whipped up a simple ganache to sandwich the macarons

So the Tartelette recipe looked good and smelled good. It had a smooth top, it had even, frilly feet and the exterior was thin and yielded to gentle pressure. It was very delicate and when you bit into it, it was mostly hollow; its texture was slightly chewy and the flavour was delicate pistachio with a hint of almond. The ganache filling, when piped too thickly, was too overpowering and you couldn't taste the pistachio...so I would say a buttercream would be a better match. We later opted to make the filling just a smear to hold the two cookies together, though the cookie looks prettier with a thicker amount sandwiched in between.

Having tasted professionally made macarons, I was still not wholly satisfied however. I'm a texture person. I hate nuts, raisins and anything seed-like or grainy in my baked goods. Yuck. Though these macarons didn't have chunks (we sifted well), I didn't really appreciate the fact that the ground nuts were not as fine as the failed batch I had made previously with almond paste or with the Matcha macaron batter using the sugar syrup based on Tartelette's recipe. I wanted the macaron to dissolve into nothingness, but instead I was left with a few grainy bits of the ground nuts rattling around in my mouth. Also, it did not have the slight crunch of the matcha macaron recipe; nor its stronger flavour profile. I felt the Matcha macarons were much closer in texture to the macarons I like.

With both these recipes, we started off with whole almonds and whole pistachios. I personally like the more consistent and finer texture achieved by starting with almond paste (ideally) and after that, commercially ground almonds. Whole almonds have so far to go before they're fine enough for me.

I declare the Tartelette Pistachio Macaron recipe the winner today and have to say that the foolproof method of using the sugar syrup is superior in texture.

My next batch will be CHOCOLATE MACARONS! I hear they're the toughest flavour to make...
More aboutMALGIERI & ZUCKERMAN MACARONS VS. TARTELETTE MACARONS

T ROOM BAKERY & KITCHENWARE

Diposting oleh good reading on Sabtu, 13 Oktober 2007

t-room: bakery & kitchenware store

Ahh. Fall in Vancouver is my favourite time of the year...


Today is Gymboree music class for Bib. She's in Music I and is lovin' it (sorta). Well, she only cries when another baby starts crying. I think it's sympathetic crying on her part. Stomach and Bib stayed for the class and Bebe and I went for a stroll along 10th Avenue since it was a great sunny day. On the way back I noticed a bakery that I had read about in the Georgia Straight. It's T Room: Bakery & Kitchenware, located in Point Grey Village.

the kitchenware side of t room


The word "kitchenware" on the sign beckoned me because I'm a sucker for kitchen gadgets.


I spotted a funky blue and brown apron (which I purchased) and salivated over all the goodies. Bebe wanted the Princess Cake (of course) and I wanted the Chocolate Mousse, although the Sacher looked enticing as did the Meringue Sandwiches.


are those matcha cookies i see in that cookie jar?

chocolate mousse

princess cake
yeah, i know it's green, but bebe wanted it!

The friendly staff gave me a tour of the store and allowed me to take some pictures. They do not yet have a website set up and just recently opened this past July.

t room's sweet offerings

T Room's great because it's got it all. They have one side of the store dedicated to really cool kitchenware. The other side is the "tea/dining" area and further to the back of the store you have a private room you can book for special functions. This room overlooks the backyard garden and you can overlook the kitchen area where all the delicious sweets are made.
a private room in the back of the store for special functions


The highlight of T Room on a beautiful sunny Vancouver day is the backyard garden. It is absolutely gorgeous. I was told that you could have little parties back here and they recently hosted a preschooler's birthday party. They also offer a selection of great teas and I was told they do High Tea as well.

garden courtyard at the back of t room

I had to leave but I'll have to visit again and try their teas.
It looks like the perfect place for me to hang out with a cup of tea, a dainty sweet and a huge stack of essays to mark!

T Room Bakery &Kitchenware
4445 10th Ave. W
Vancouver, B.C. V6R 2H8
Canada
(604) 677-BKRY (2579)
T Room Bakery and Kitchenware on Urbanspoon
More aboutT ROOM BAKERY & KITCHENWARE

A Birthday Cake

Diposting oleh good reading on Jumat, 12 Oktober 2007


Baked a small birthday cake for my niece a few days ago. Apparently, I didn't do a good job at decorating it :(

I find it so difficult to make the cake surface smooth. Although I do not have a cake decorating stand, I could still manage to get the sides quite smooth and even (by placing the cake on a cooling rack and turn it, while holding the palette knife at the side). However, I have no luck for the top surface...no matter how hard I tried, there was still the impression of the palette knife all over :'(


My niece loves this Cinnamoroll, one of the many Sanrio characters. I tried piping some melted chocolate over a Cinnamoroll picture with the intention of using it as a chocolate transfer. Well it didn't work, even though I have chilled the chocolate to let it set, it refused to stick onto the cake surface. As I didn't have the patience and time to make another one, I piped the character free-hand! Quite a daring act, hehe! As a result, Cinnamoroll appeared to have over eaten, hence, the puffy looking chins, and his ears were totally off!

I guess the girl wouldn't mind, and proceed to pipe the words. It was only after piping the word 'happy', I realised that there wasn't enough space for the word 'birthday'! No choice, I got to settle with a short-form! I was only a little cheered up after I managed to pipe on the little blue stars...I would love to make those weaving patterns, but as of now, I can only do the stars. The stars really helped dress up the cake a little.


This time, I used another sponge cake recipe as I only wanted to make a 18cm cake. The sponge layer tasted good...soft and fluffy.


The only thing I could console myself was that the middle layer was filled quite nicely this time.


The cake certainly tasted good, judging by the fact that 1 adult and 3 kids could finish half the cake in a set!


Ingredients:
(make a 18cm round cake)

3 eggs, bring to room temperature
90g caster sugar
100g cake flour
20g unsalted butter, melted
2 tablespoons fresh milk (I used low-fat fresh milk)
2 ~ 3 drops of vanilla extract

filling & frosting:
1 cup non-dairy whipping cream
1 can peach slices

Method:
  1. Sift cake flour, set aside. Melt butter, set aside. Grease and line a 18cm round pan. Position rack at the lower bottom of the oven. Pre-heat oven to 170degC.

  2. With an electric mixer, whisk eggs and sugar on HIGH speed for about 5 to 7mins, until the batter double in volume and is ribbon-like (the batter should leave a ribbon-like texture when the beater is lifted up). Turn to LOW speed and whisk for another 1 to 2 mins. Whisking at low speed helps to stabilise the air bubbles in the batter.

  3. Sieve over the sifted cake flour in 3 separate additions, into the batter. With a spatula, gently fold in the flour each time the flour is added. Take care not to deflate the batter.

  4. With a spatula, mix about 1/3 of the batter with the melted butter in a separate bowl. Fold in this mixture into the remaining batter. This method will help to ensure the butter will be fully blended and at the same time will not deflate the batter.

  5. Add in fresh milk and vanilla extract, and fold in gently with spatula, until well blended.

  6. Pour the batter into the prepared pan. Gently give the pan a few bangs on a work surface to release air bubbles that are trapped in the batter. Bake for 30 ~ 35 mins, or until a skewer inserted in the centre comes out clean. Unmold, invert the cake on cooling rack and cool completely.
Assemble the cake
  1. With an electric mixer, whip the non-dairy whipping cream still stiff.

  2. Slice the cake horizontally into 2 layers. Brush the surface of the sponge layers with the syrup from the canned peach slices. This helps to keep the sponge layers moist.

  3. Place one layer of the sponge cake on a cake plate/board. With a palette knife, spread some whipped cream evenly over the layer. Arrange 2 concentric rings of peach slices on the sponge layer. Fill with some more whipped cream and spread it evenly all over. Top with the second cake layer.

  4. Spread the whipped cream over the top and side of the cake. Decorate as desired.
Recipe source: adapted from 点心达人, 轻松学 /小川智美著
More aboutA Birthday Cake

MY HYDROPONIC HERB GARDEN

Diposting oleh good reading


the aerogarden

Being the gadget queen that I am, I couldn't pass up the chance to have a fresh pot of organic, hydroponic herbs on my kitchen counter. The AeroGarden is so easy to set up and it uses NASA technology apparently.

When friends come by and see my hydroponics setup, they joke that I have the ability to grow pot. Well, not exactly in fact, because you need to use the AeroGarden seed pods that are designed specifically to fit in these little holes. I doubt I'll be seeing pot pods soon.

I love that there's no dirt and no bugs. No sprays. No work. Everything is on a timer and you just add water and fertilizer tablets when it tells you to. Idiot proof. Since I have a brown thumb, it's perfect.

I bought my AeroGarden with a 20% off coupon at Linen 'n Things and it comes complete with the seed pod kit for herbs. Apparently you can grow tomatoes, flowers and other veggies too.

It's fall in Vancouver but I can still have fresh herbs throughout the winter months. The basils are growing like crazy and so is the mint. I don't know what to do with it all. It's definitely an excuse to use fresh herbs in my cooking.
More aboutMY HYDROPONIC HERB GARDEN

WHITE CHOCOLATE BROWNIE WITH MATCHA CHEESECAKE SWIRL

Diposting oleh good reading on Kamis, 11 Oktober 2007

I love matcha and this recipe from Nook and Pantry looked like it would fit the bill. I adapted the recipe and it was delicious.

This picture doesn't do the brownie justice as it was late at night and I didn't feel like composing.

The white chocolate brownie is delicious and complements the matcha cheesecake nicely. A nice combination.

WHITE CHOCOLATE BROWNIE WITH MATCHA CHEESECAKE SWIRL
Brownie base:
8 Tbsp butter (1 stick), cut into 1-in pieces
5 oz. white chocolate, chopped
2 eggs
5 Tbsp sugar
1 tsp vanilla
3/4 C flour
1/8 t. baking powder
Cheesecake swirl:
8 oz bar of cream cheese, room temp
2 eggs
3 Tbsp sugar
3 tsp matcha powder
About 2 tsp of water, hot but not boiling

Preheat the oven to 325ºF.
SWIRL: Mix the green tea powder with a bit of hot water to form a paste. Mix the cream cheese, egg, and green tea paste until smooth. Taste a bit and see if it's strong enough.

BROWNIE: Melt the butter with the white chocolate. Mix in the sugar, eggs, vanilla, and flour and baking powder. Whisk until smooth but do not overmix.

Line a 8 x 8 square baking dish with a sheet of foil (with overhang for easy lifting) or grease and flour it. Pour in half of the white chocolate batter. Then drop half of the cream cheese mixture on top in spoonfuls. Top the batter with the rest of the white chocolate brownie batter, then finally add the remaining half of the cream cheese mixture on top. Use a knife and swirl the brownie and cream cheese together to create a marbled pattern.

Bake the brownies at 325ºF for 40 - 45 minutes, or until a toothpick inserted in the center comes out with moist crumbs. The center should be almost set. You don't want the toothpick to come out clean because that would mean the brownies have overbaked. Cool in the pan for 5 then lift the brownies out and cool to room temperature. They're best served cold so chill them in the fridge for about 3 hours
More aboutWHITE CHOCOLATE BROWNIE WITH MATCHA CHEESECAKE SWIRL

Assorted Sweet Buns

Diposting oleh good reading on Rabu, 10 Oktober 2007


I made a batch of sweet buns using the same bread recipe as the milk loaf. According to the original source of this recipe, the bread tastes as good when made into small buns. I filled some of the buns with red bean paste and a few with kaya spread.


I made a few doughs into donut shapes and glazed them with melted chocolate. I don't do any deep frying at home, so, making any donuts is out of the question, even though my boys have also caught on the donut waves lately.


Actually the only thing they like about donuts are the sweet toppings...especially those that are glazed generously with chocolate. The chocolates that I used have got a very smooth texture, I didn't have to add any butter or whipping cream. The consistency was just right for glazing. As I didn't have any white chocolates on hand, I tried melting some white chocolate chips. To my surprise, it was rather difficult to melt the chips...and it was very hard and thick, as such I had to add a few teaspoons of milk in order to get the right consistency for decorating.


To create the effect of the heart shapes, after coating the buns with dark chocolate, simply add drops of white chocolates, equally spaced out, over the surface. With a toothpick, swap it across the white dots. I saw this in a cookbook long time ago, and only had the chance to try it today. Not very impressive, isn't it ;')


I didn't use a donut cutter or any cookie cutter to cut out the centre hole of the donut. What I did was quite 'primitive'! I simply shaped the dough into a round ball, and poke a finger right through the centre. Then I "spin" the dough around with a finger to enlarge the hole. It was only at this point that I realised that I had to use something to prevent the hole from closing up during the second proofing. I couldn't think of any tools to use on hand...and finally, I got out a couple of empty bottle caps and stuck it in the dough. I removed the caps just before baking, and it didn't seems to work. Once the buns were subject to the heat in the oven, they expanded and the hole almost disappeared!

The kids were happy when they saw these...


but I much prefer these plain ones!


More aboutAssorted Sweet Buns

Oh! my...

Diposting oleh good reading

Oxygen Media was acquired by NBC Universal yesterday.

What does that mean for me?

I have no idea. Daniel says it well:

These things always work out, and I’m looking forward to whatever will happen.
More aboutOh! my...